This article explains how to connect Google Sheets to your bot and read or write cell values.
Examples of using the Google Sheets integration:
Checking a user against Google Sheets and performing actions with them
Getting information from a Google spreadsheet by a given value
Creating user requests with approval or rejection in a resource
Connecting a Google account
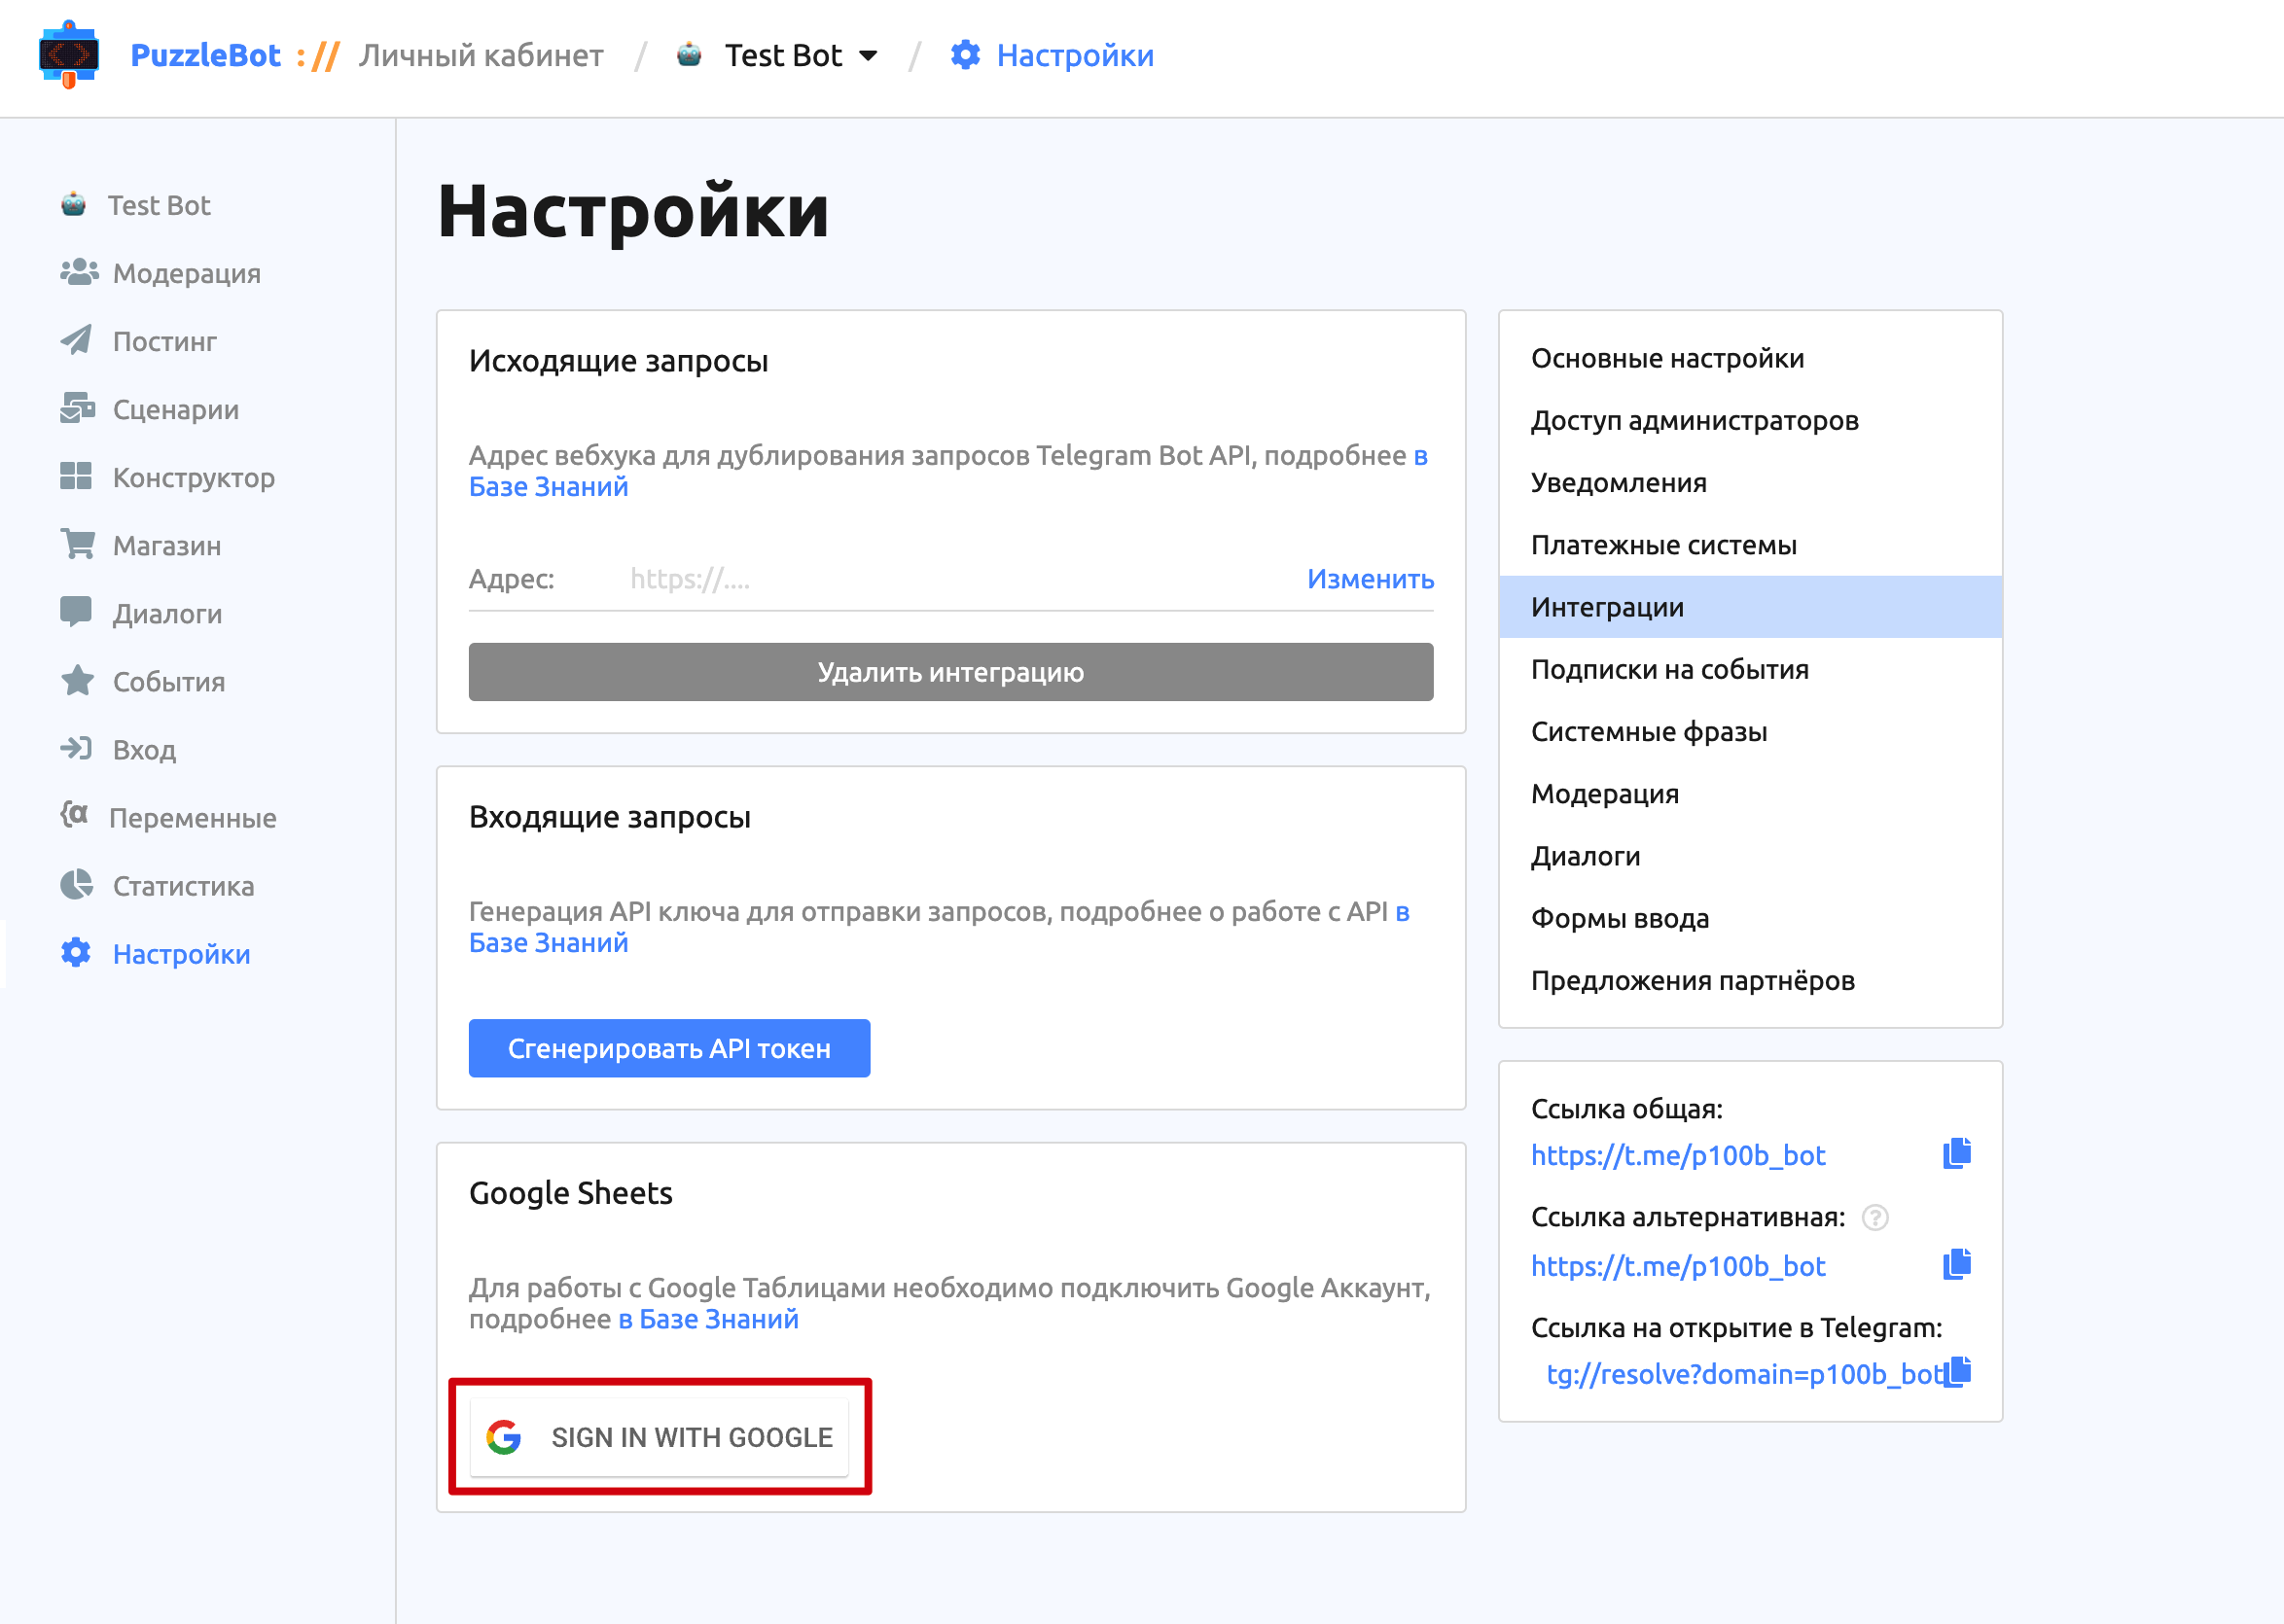
To connect a Google account, open the bot page in your puzzlebot account, go to the Settings tab, select the Integrations section and click the SIGN IN WITH GOOGLE button.

A separate page opens, where you need to grant all the requested permissions.
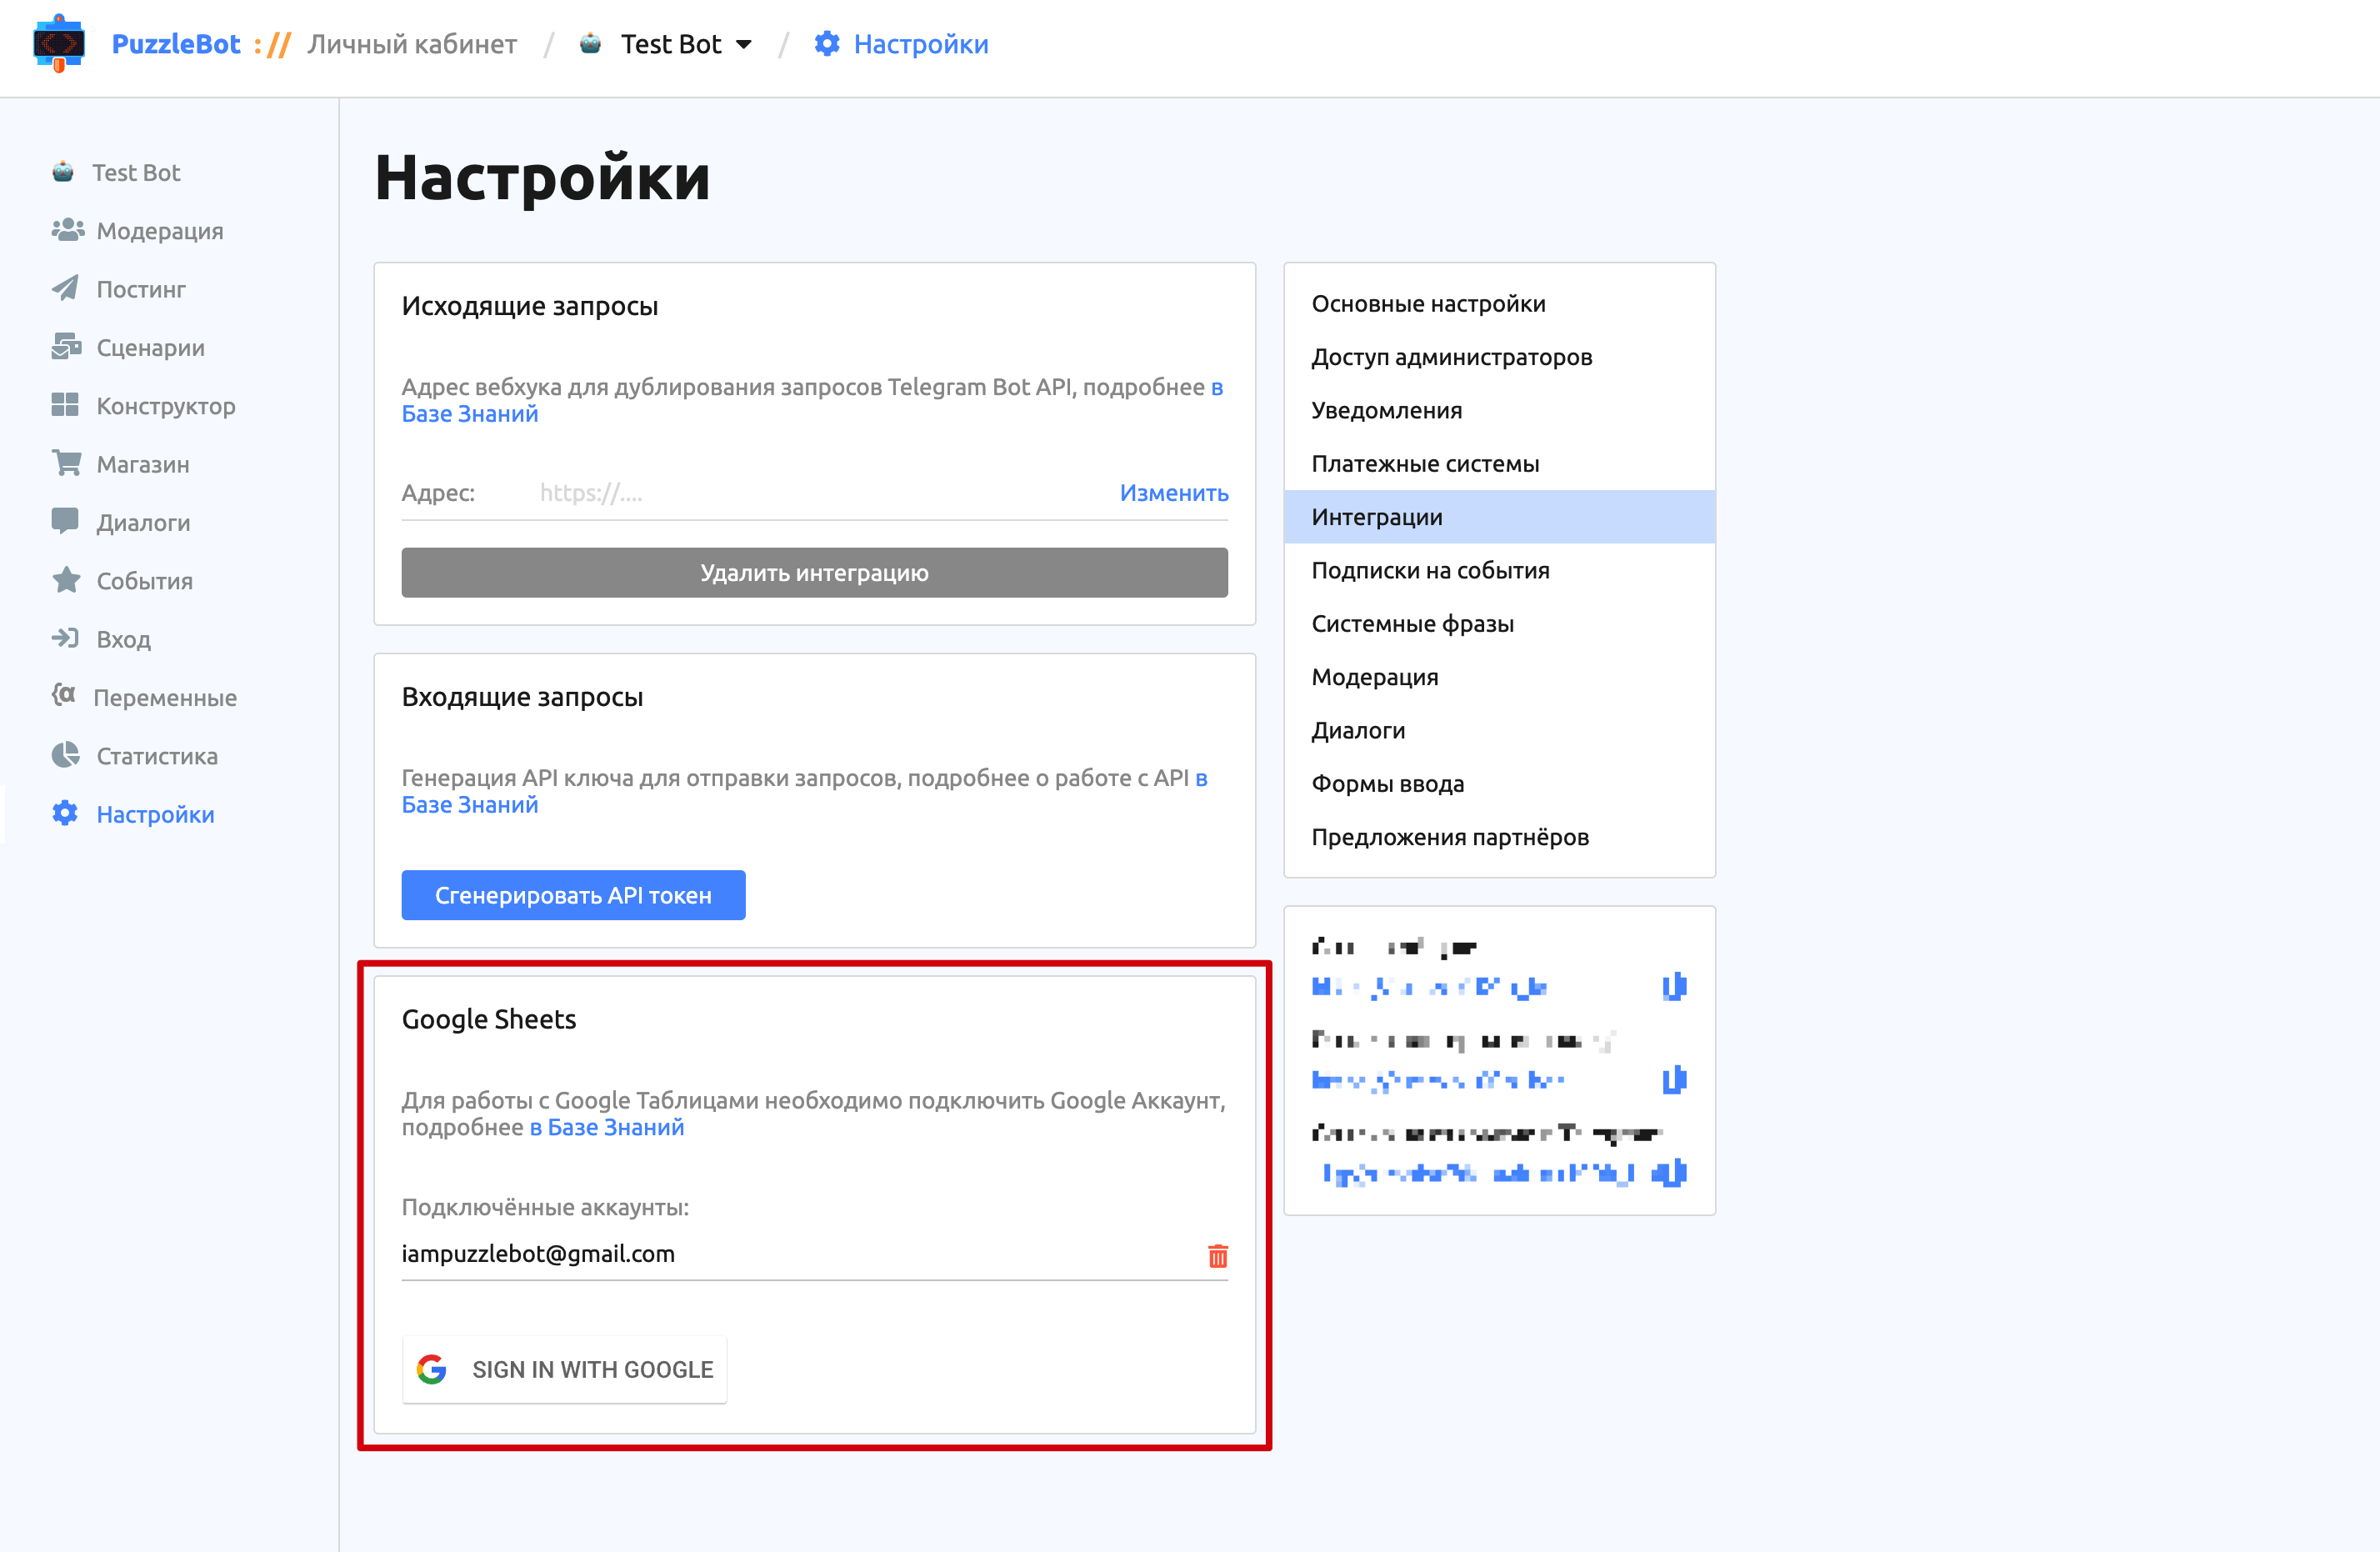
Once the Google account is connected, it appears in the list.
Important! You can connect several Google accounts.
If you need to revoke the permissions, use this page: Apps with access to your account.
Integration features
After you connect a Google account, you can use the integration in the following places:
Actions — a section in Commands, Conditions and Posts. Action types:
Create row
Update row
Clear row
Delete row
Create sheet
Delete sheet
Check — a section in Conditions. Check types:
Check row
Integrated variable — a new subtype of integrated variables that lets you access a specific cell or search through rows.
Important! Google Sheets limits the number of requests to spreadsheets: 60 requests per minute for reading and 60 requests per minute for writing.
Let's go through the settings common to all types.
Setting up the integration
Every integration block can be divided into three stages:
Selecting the account, spreadsheet and sheet
Filter for finding the rows you need, or entering an address
Writing values
Selecting the account, spreadsheet and sheet
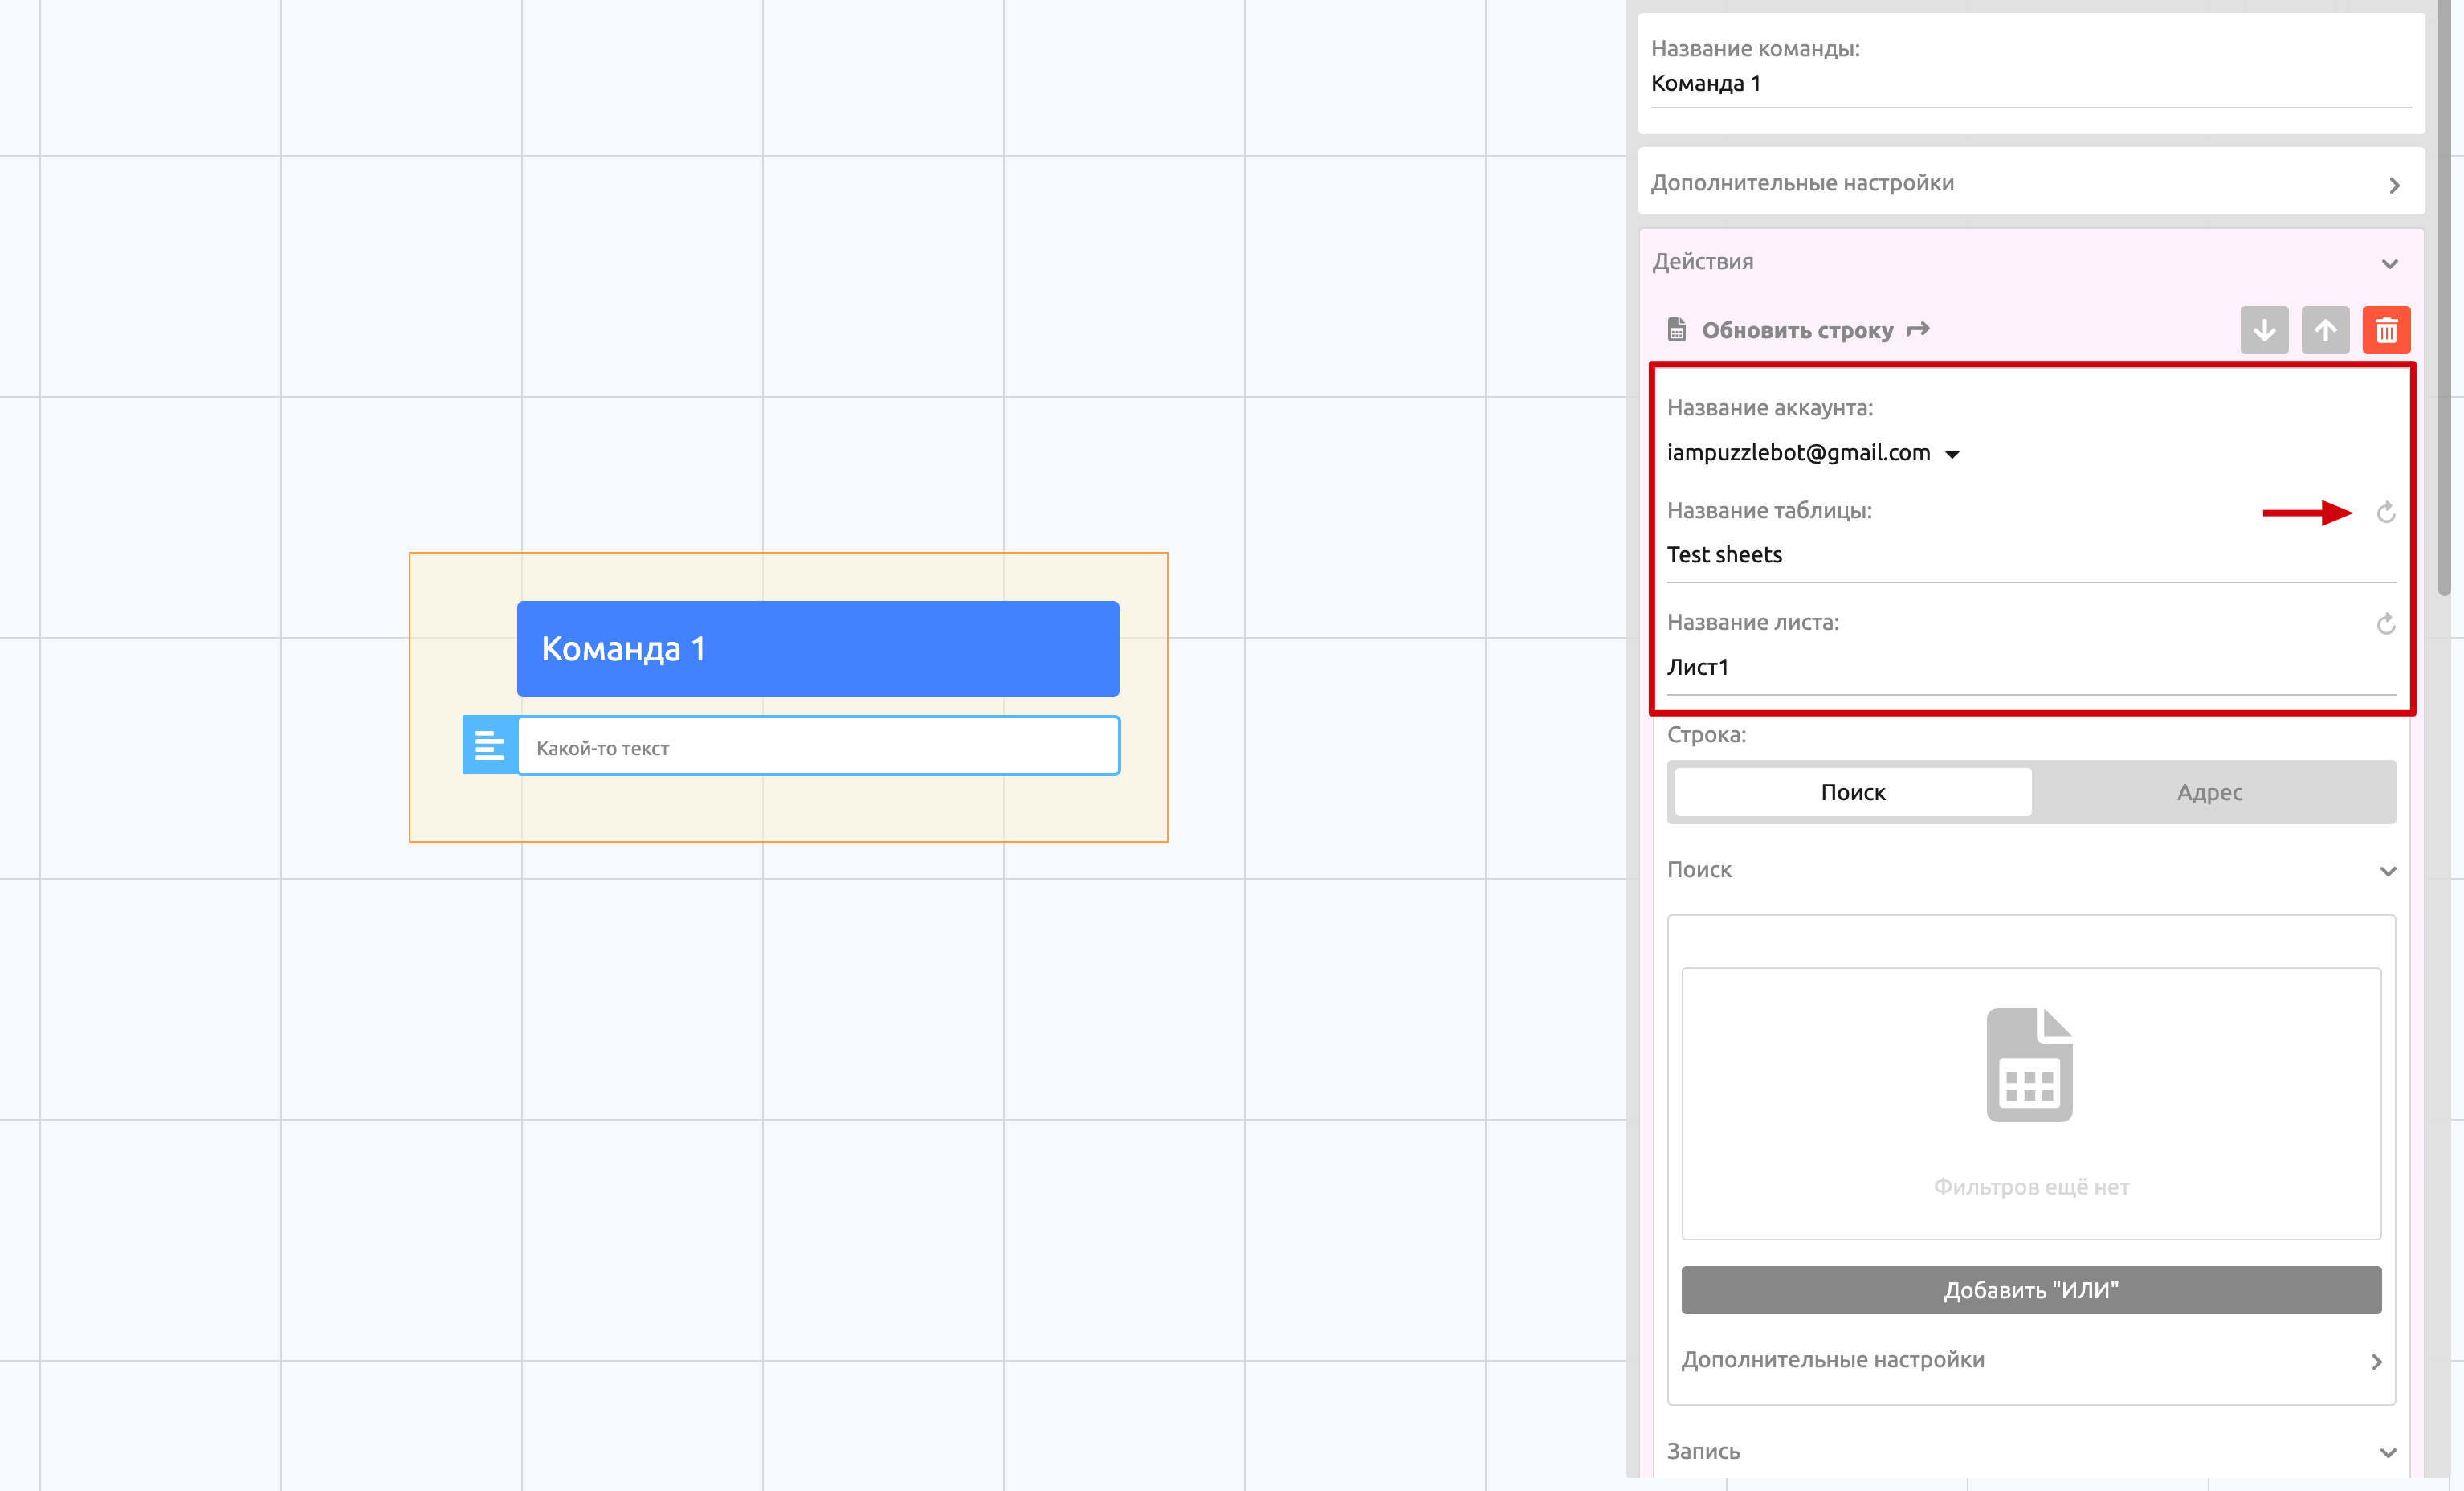
This stage consists of three fields: account selection, spreadsheet name and sheet name. As you type a name, the spreadsheets or sheets are searched. Next to each field there is a button that refreshes the list.
Filter for finding the rows you need, or entering an address
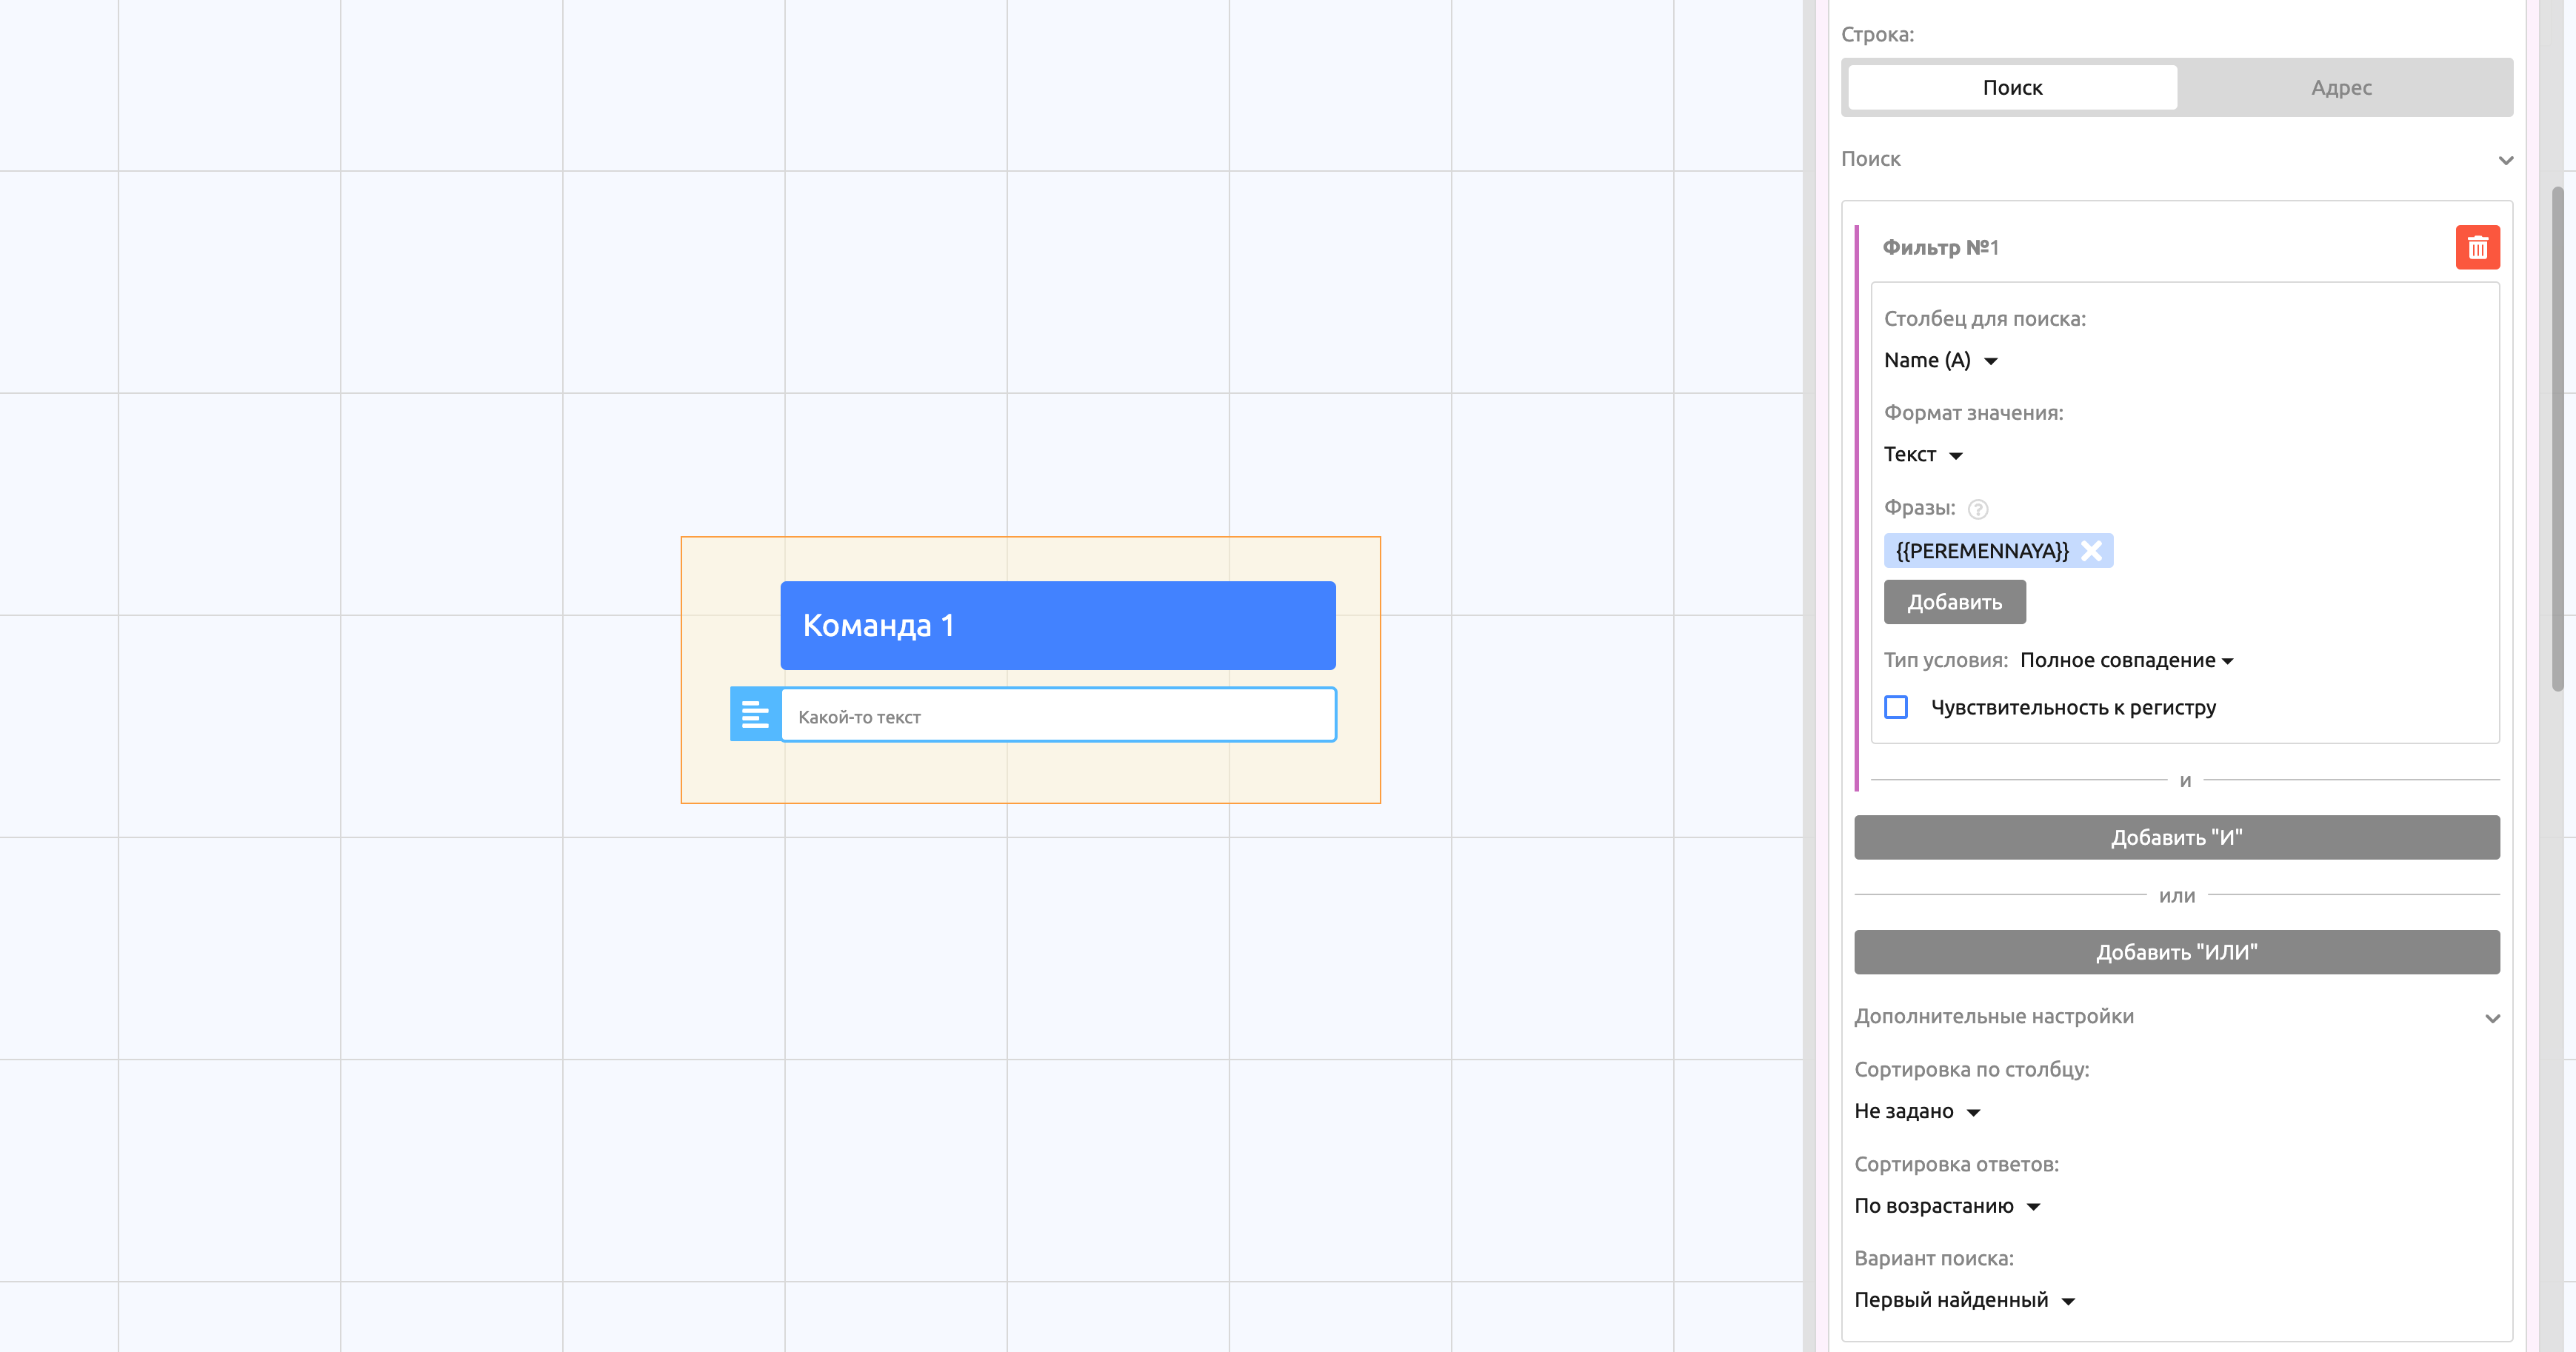
Let's go through each field:
Row — lets you choose how to find the rows you need: with filters or by entering a specific address (you can insert a variable).
Search — lets you set filters of the "AND" and "OR" types. The filter fields are:
Search column — the column name and its letter.
Value format — text, number, date, or a check whether a value is present.
Important! The first row of every spreadsheet is the header and is not included in the search.
Additional settings:
Sort by column and Sort results — let you sort the results and apply the write based on that sorting.
Example: to change the value for the user with the largest balance, select sorting by the "Balance" column and set result sorting to "Descending".Search options — First found, All, or Set number.
Writing values
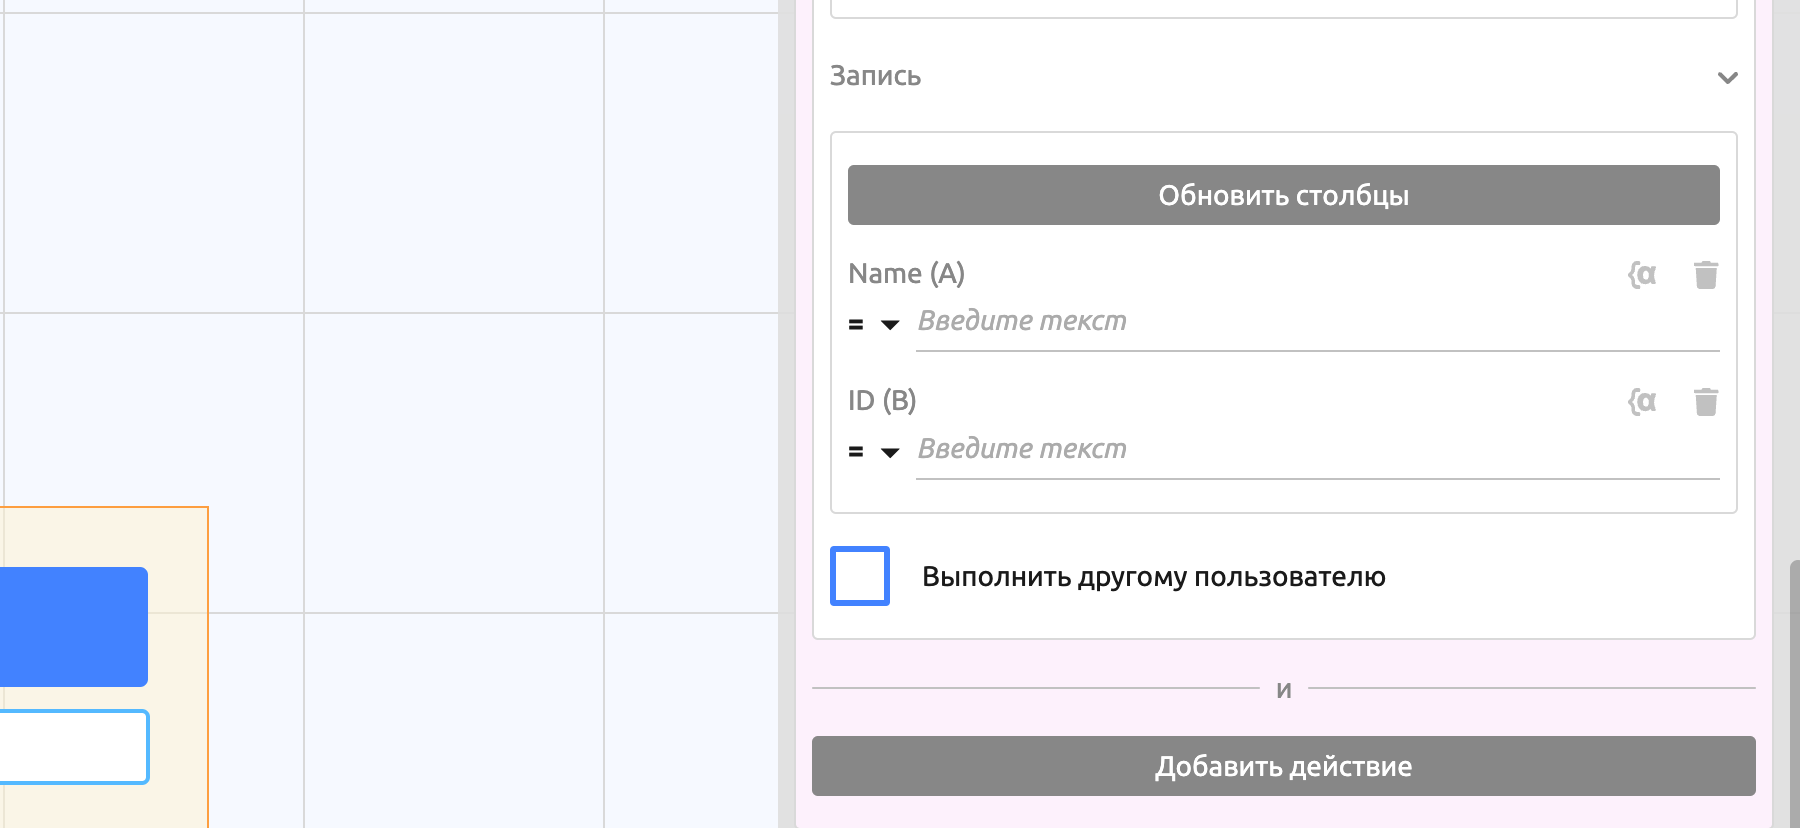
This stage shows all columns that have a header (the first row) filled in.
Rules for this stage:
Values are written according to the expression rules. Learn more: Rules for writing an expression or formula
If no value is set for a cell (it is empty), the cell is not changed.
To clear a cell, click the trash button.
With the " = " operator, the value in the cell is overwritten. With the " + ", " - ", " * ", " / " operators, the operation is applied to the value in the Google spreadsheet.
Important! A value of the Number type works with all operators, a value of the Text type works only with the " = " and " + " operators, and the other types work only with the " = " operator.
Important! If a cell has formatting, the operation follows the rules for Text (concatenation). For example: the spreadsheet has a cell with the value 100 and the currency format " ₽ ". When you add the value 100 to it, "100 ₽100" is written to the cell and the cell loses its formatting.