Store is the section where you build a full-featured online store. You can add products, set up payments, and accept orders through a convenient mini app right inside your bot.
Store tab
Important! To accept online payments, connect payment systems in the bot settings. Learn more: ⚠ Payment systems.
Important! The Constructor automatically creates a "Store" command group with system mini apps for setting up delivery and payment methods.
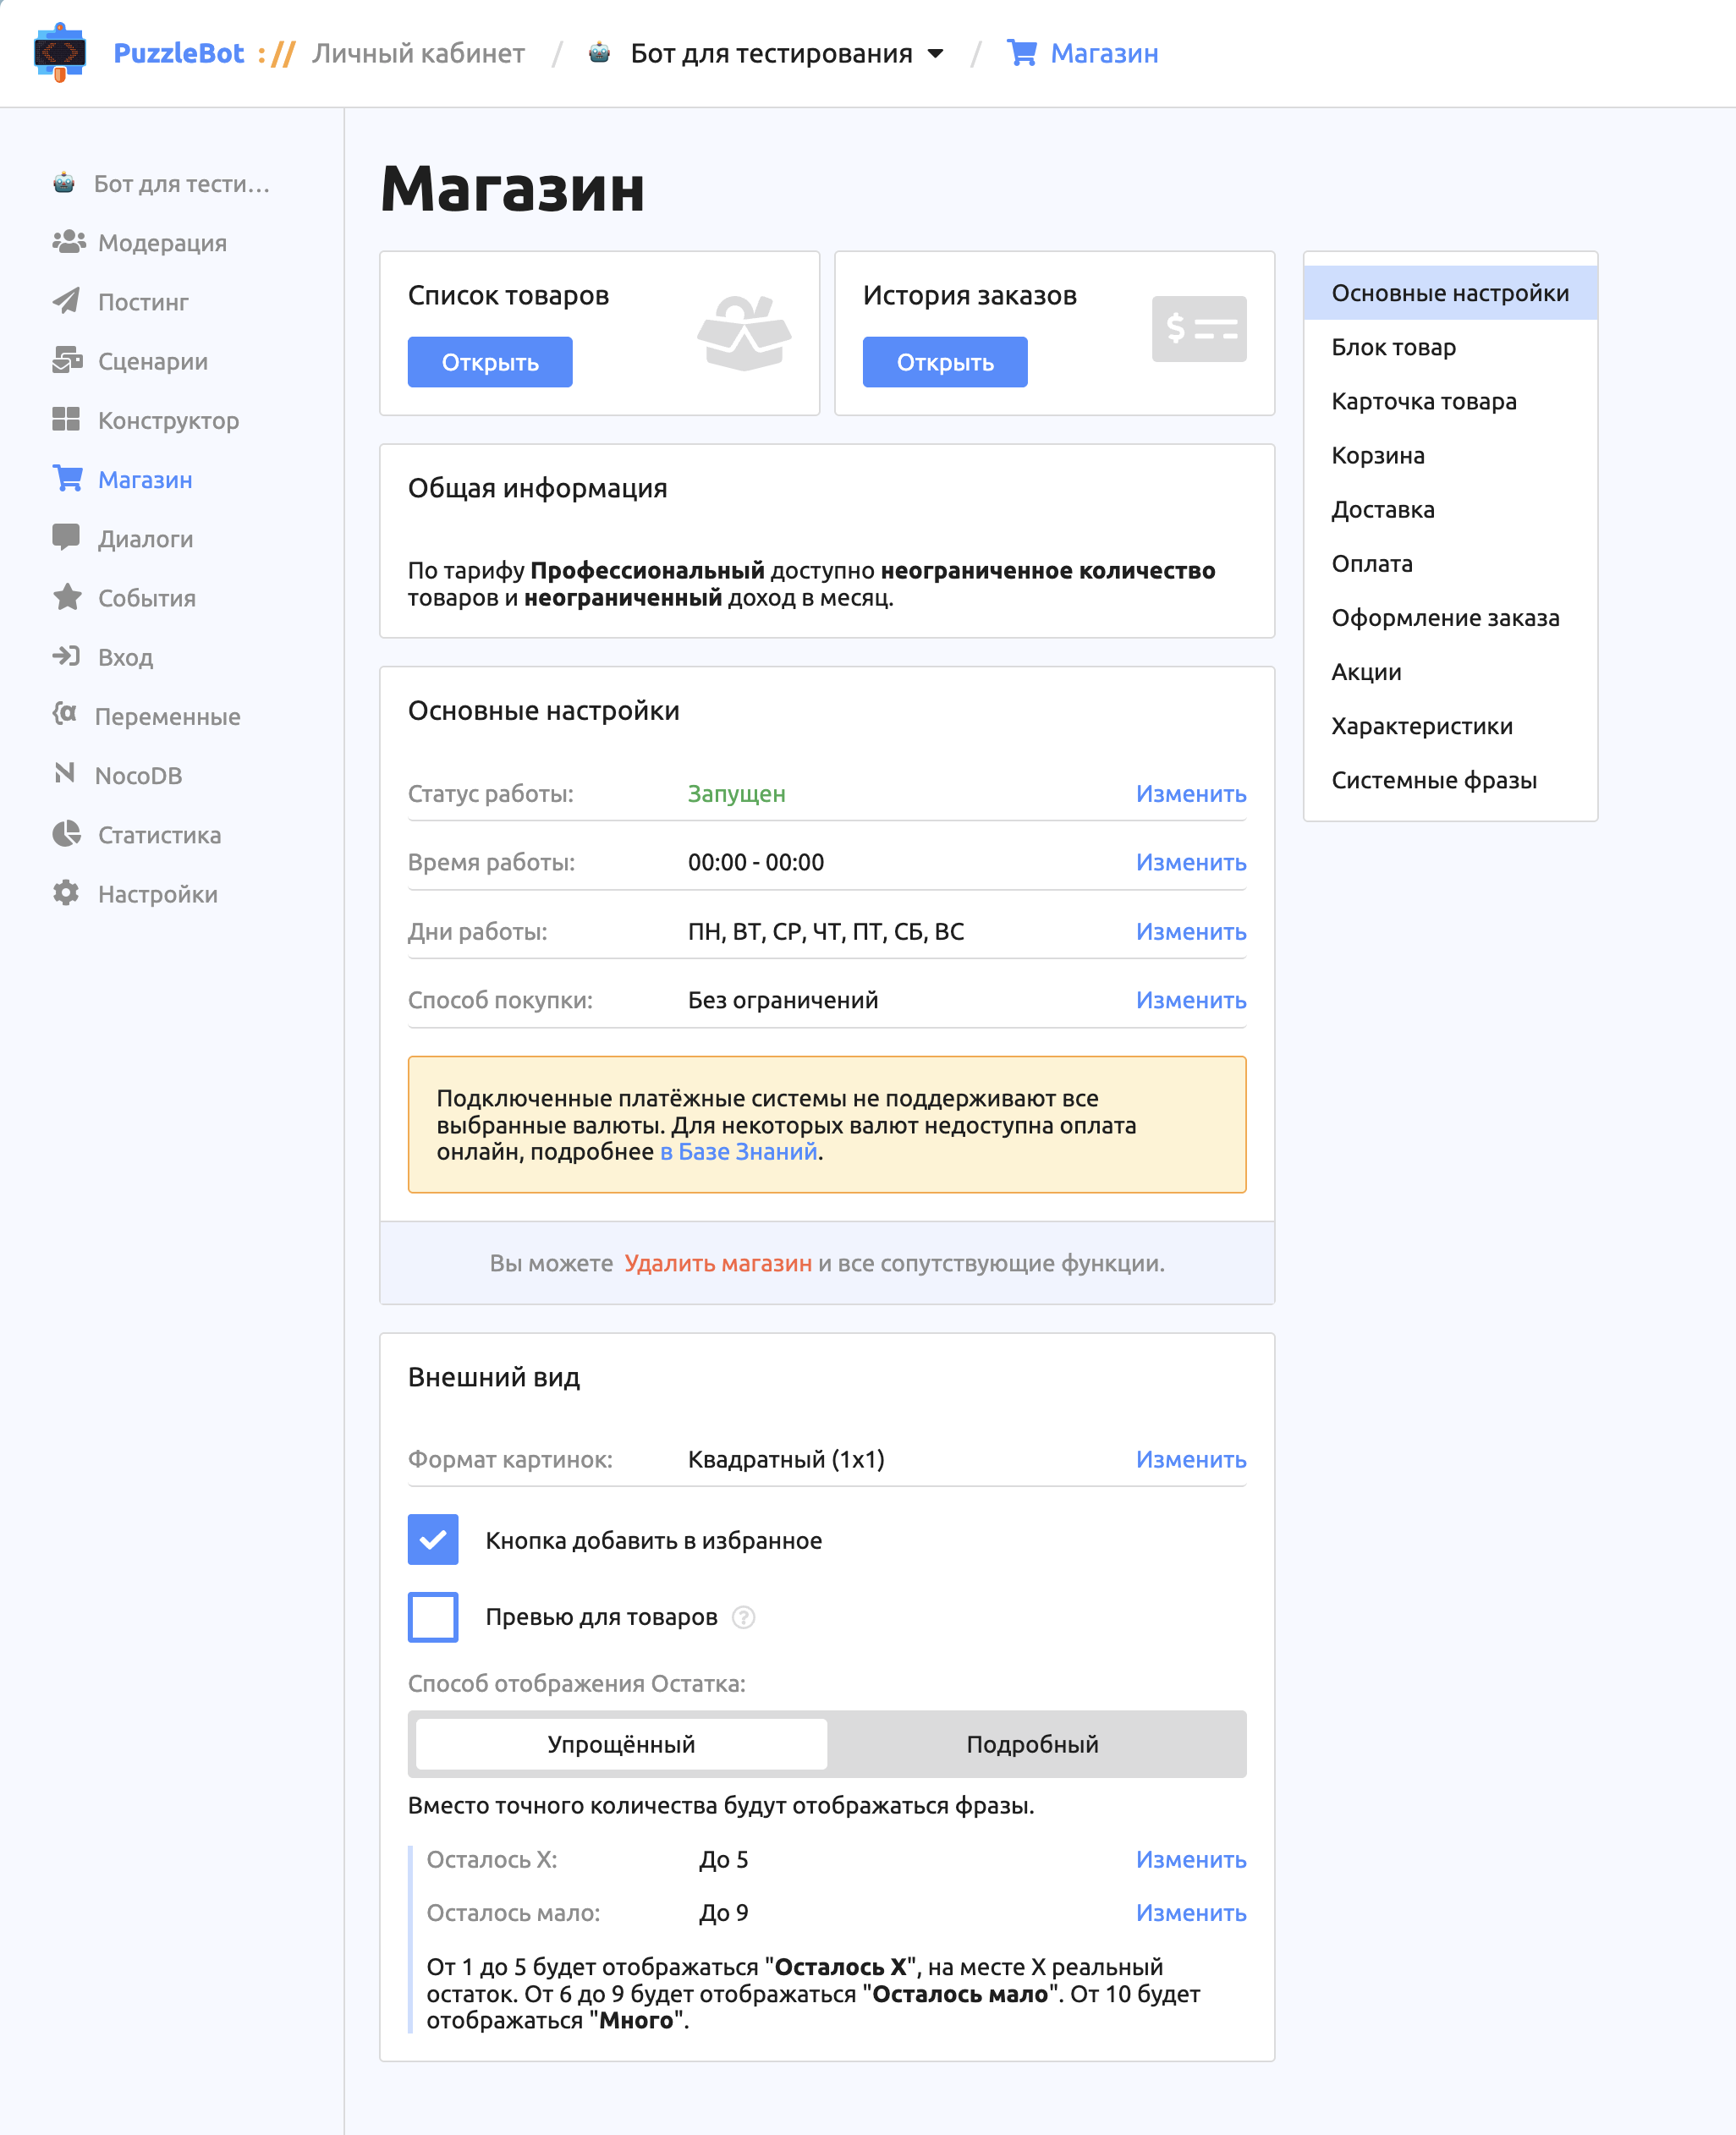
The main page of the Store tab contains the following elements and sections:
Section menu on the right — lets you move between the settings of the Store and its elements.
Product list — this button opens the product management page. Learn more about creating and setting up a product: Product list: creating products, product groups, and categories
Order history — takes you to order management and order history.
Learn more: Order historyGeneral information — shows current statistics on products, orders, and revenue, as well as the limits of your plan.
General settings — let you turn the store on or off for users, limit its working days and hours, change the purchase method, and delete the store completely along with all its settings and products.
Appearance — set the image format for product cards and enable the "Favorites" feature.
General settings
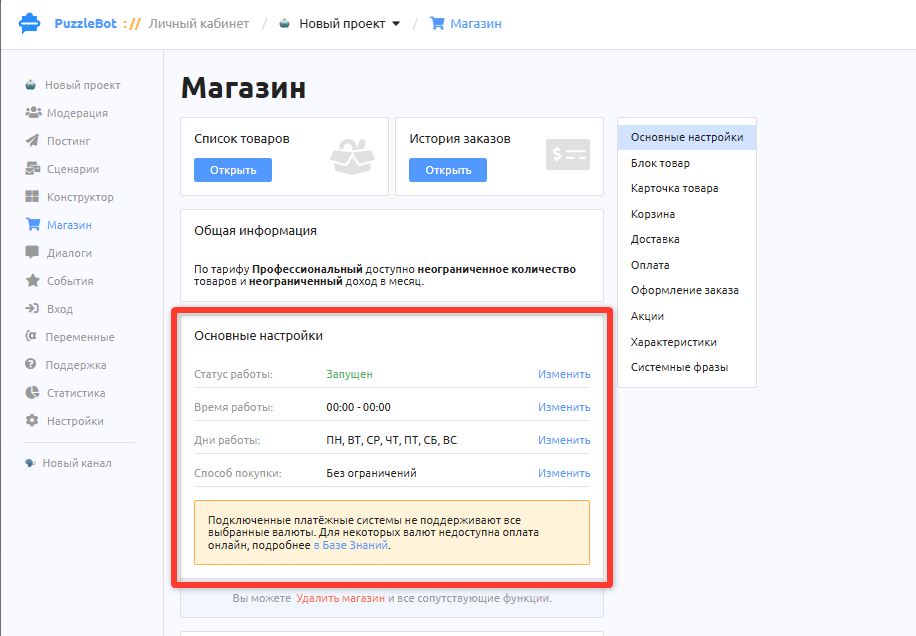
Store status. Changes the store's operating mode.
Running — the store is open and products are available for purchase.
Off — the store and its products are hidden from all users, including the owner and administrators.
Test — the store and its products are visible and available only to the bot's owner and administrators.
With the "Off" and "Test" statuses, a gray block with a message saying the Store is turned off is shown instead of the Product block.
Working hours. Users can place an order or buy anything in the store only within the specified time range. Outside these hours, they can browse the store and add products to the cart, but they cannot check out or pay for the selected products. The time is set in 24-hour format. By default, the "24/7" checkbox is selected, which removes any working-hours restrictions.
Working days. Limits the store's operation by day of the week. The store works only on the selected days. By default, all days are selected.
Outside working hours, users can add products to the cart, but when they tap the "Place order" button, they see a notification that the store is closed. You can edit the notification text in the tab: Bot — Store — System phrases.
Purchase method.
No restrictions — buyers can choose and order any number of products.
Quick purchase — when the user taps the Buy button on a product, they go straight to payment, skipping the cart step. In this mode, the user cannot choose the product quantity.
One item per customer — the user can add any number of different items to the cart, but no more than 1 unit of each product. In this mode, the user cannot choose the product quantity.
Delete store. Resets the Store tab settings to their defaults and also clears the order history. Product blocks and other Store-related elements in the Constructor tab are not deleted, except for the Store command group.
Appearance
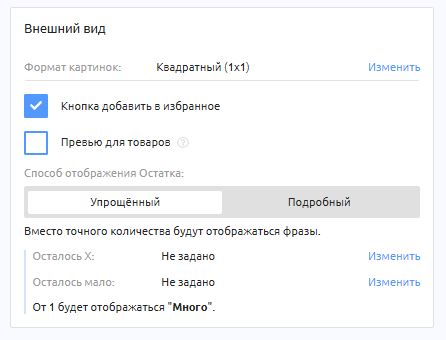
Image format. Lets you choose the aspect ratio for product images.
Add to favorites button. Adds a heart-shaped button to product cards that lets users add a product to the Favorites category.
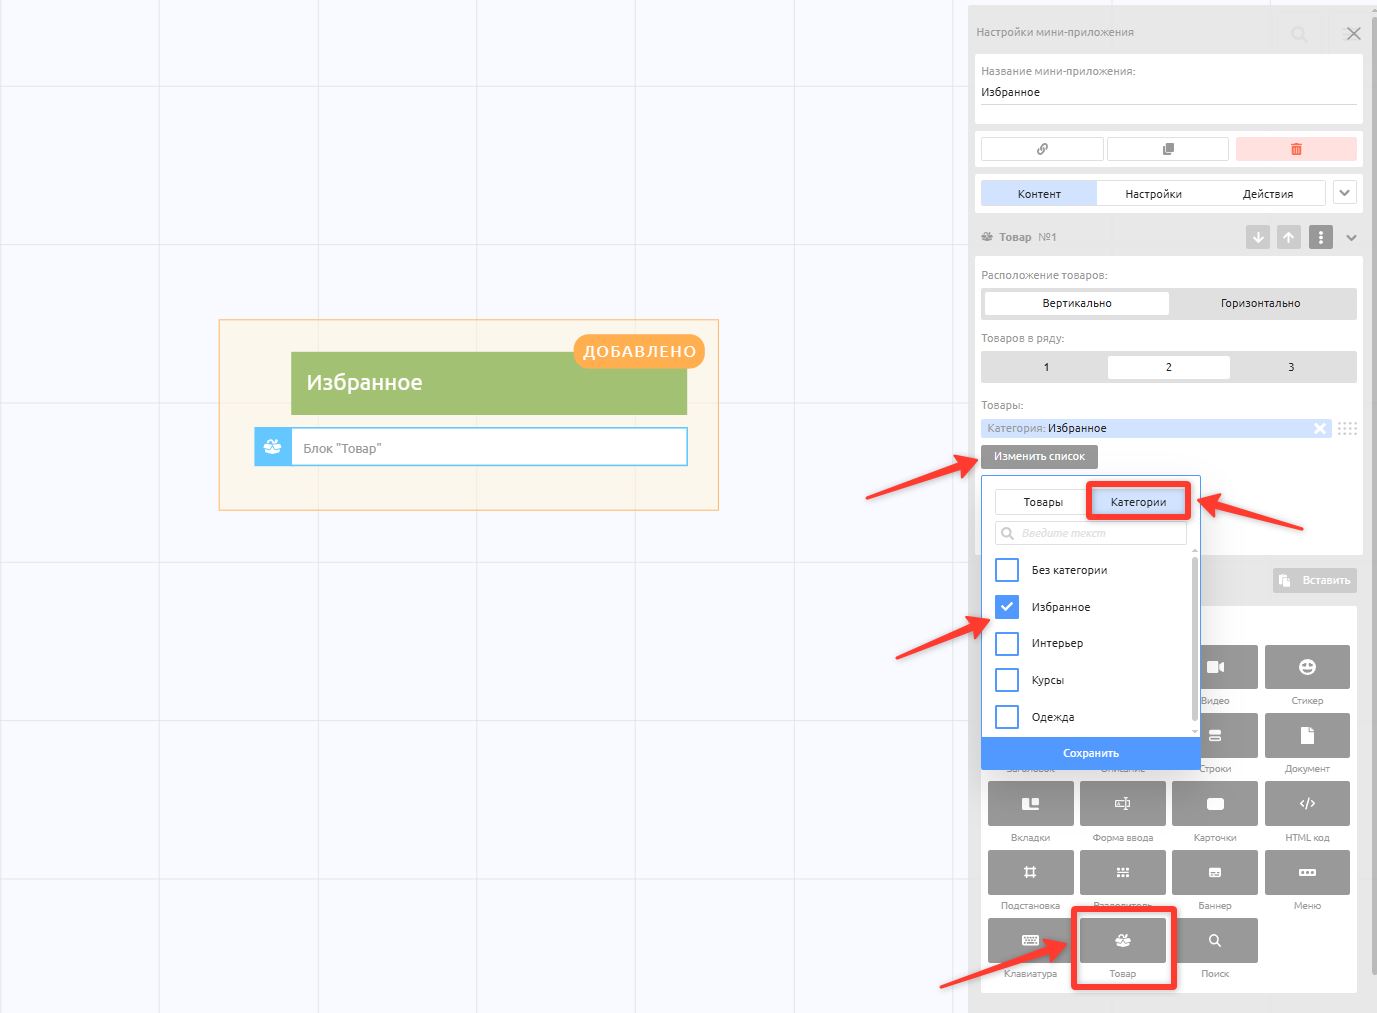
Important! For users to see the products they added to the Favorites category, add a Product block in the Constructor and select the Favorites category in it.
Product preview. When this option is on, the product settings let you set a separate image that is shown as the main picture in the general product list. This picture is not shown when the product page is opened.
Stock display mode. Sets how the product quantity is shown on the product card.
Simplified. Instead of the exact quantity, phrases such as "Few left" and "Plenty left" are shown. In the settings, you can specify what quantity counts as "few" and "plenty".
Detailed. Shows the actual stock of the product. Has no settings.
Products with unlimited stock show "plenty".
Product block
Learn more about setting up the Product block in the Constructor tab: Product block
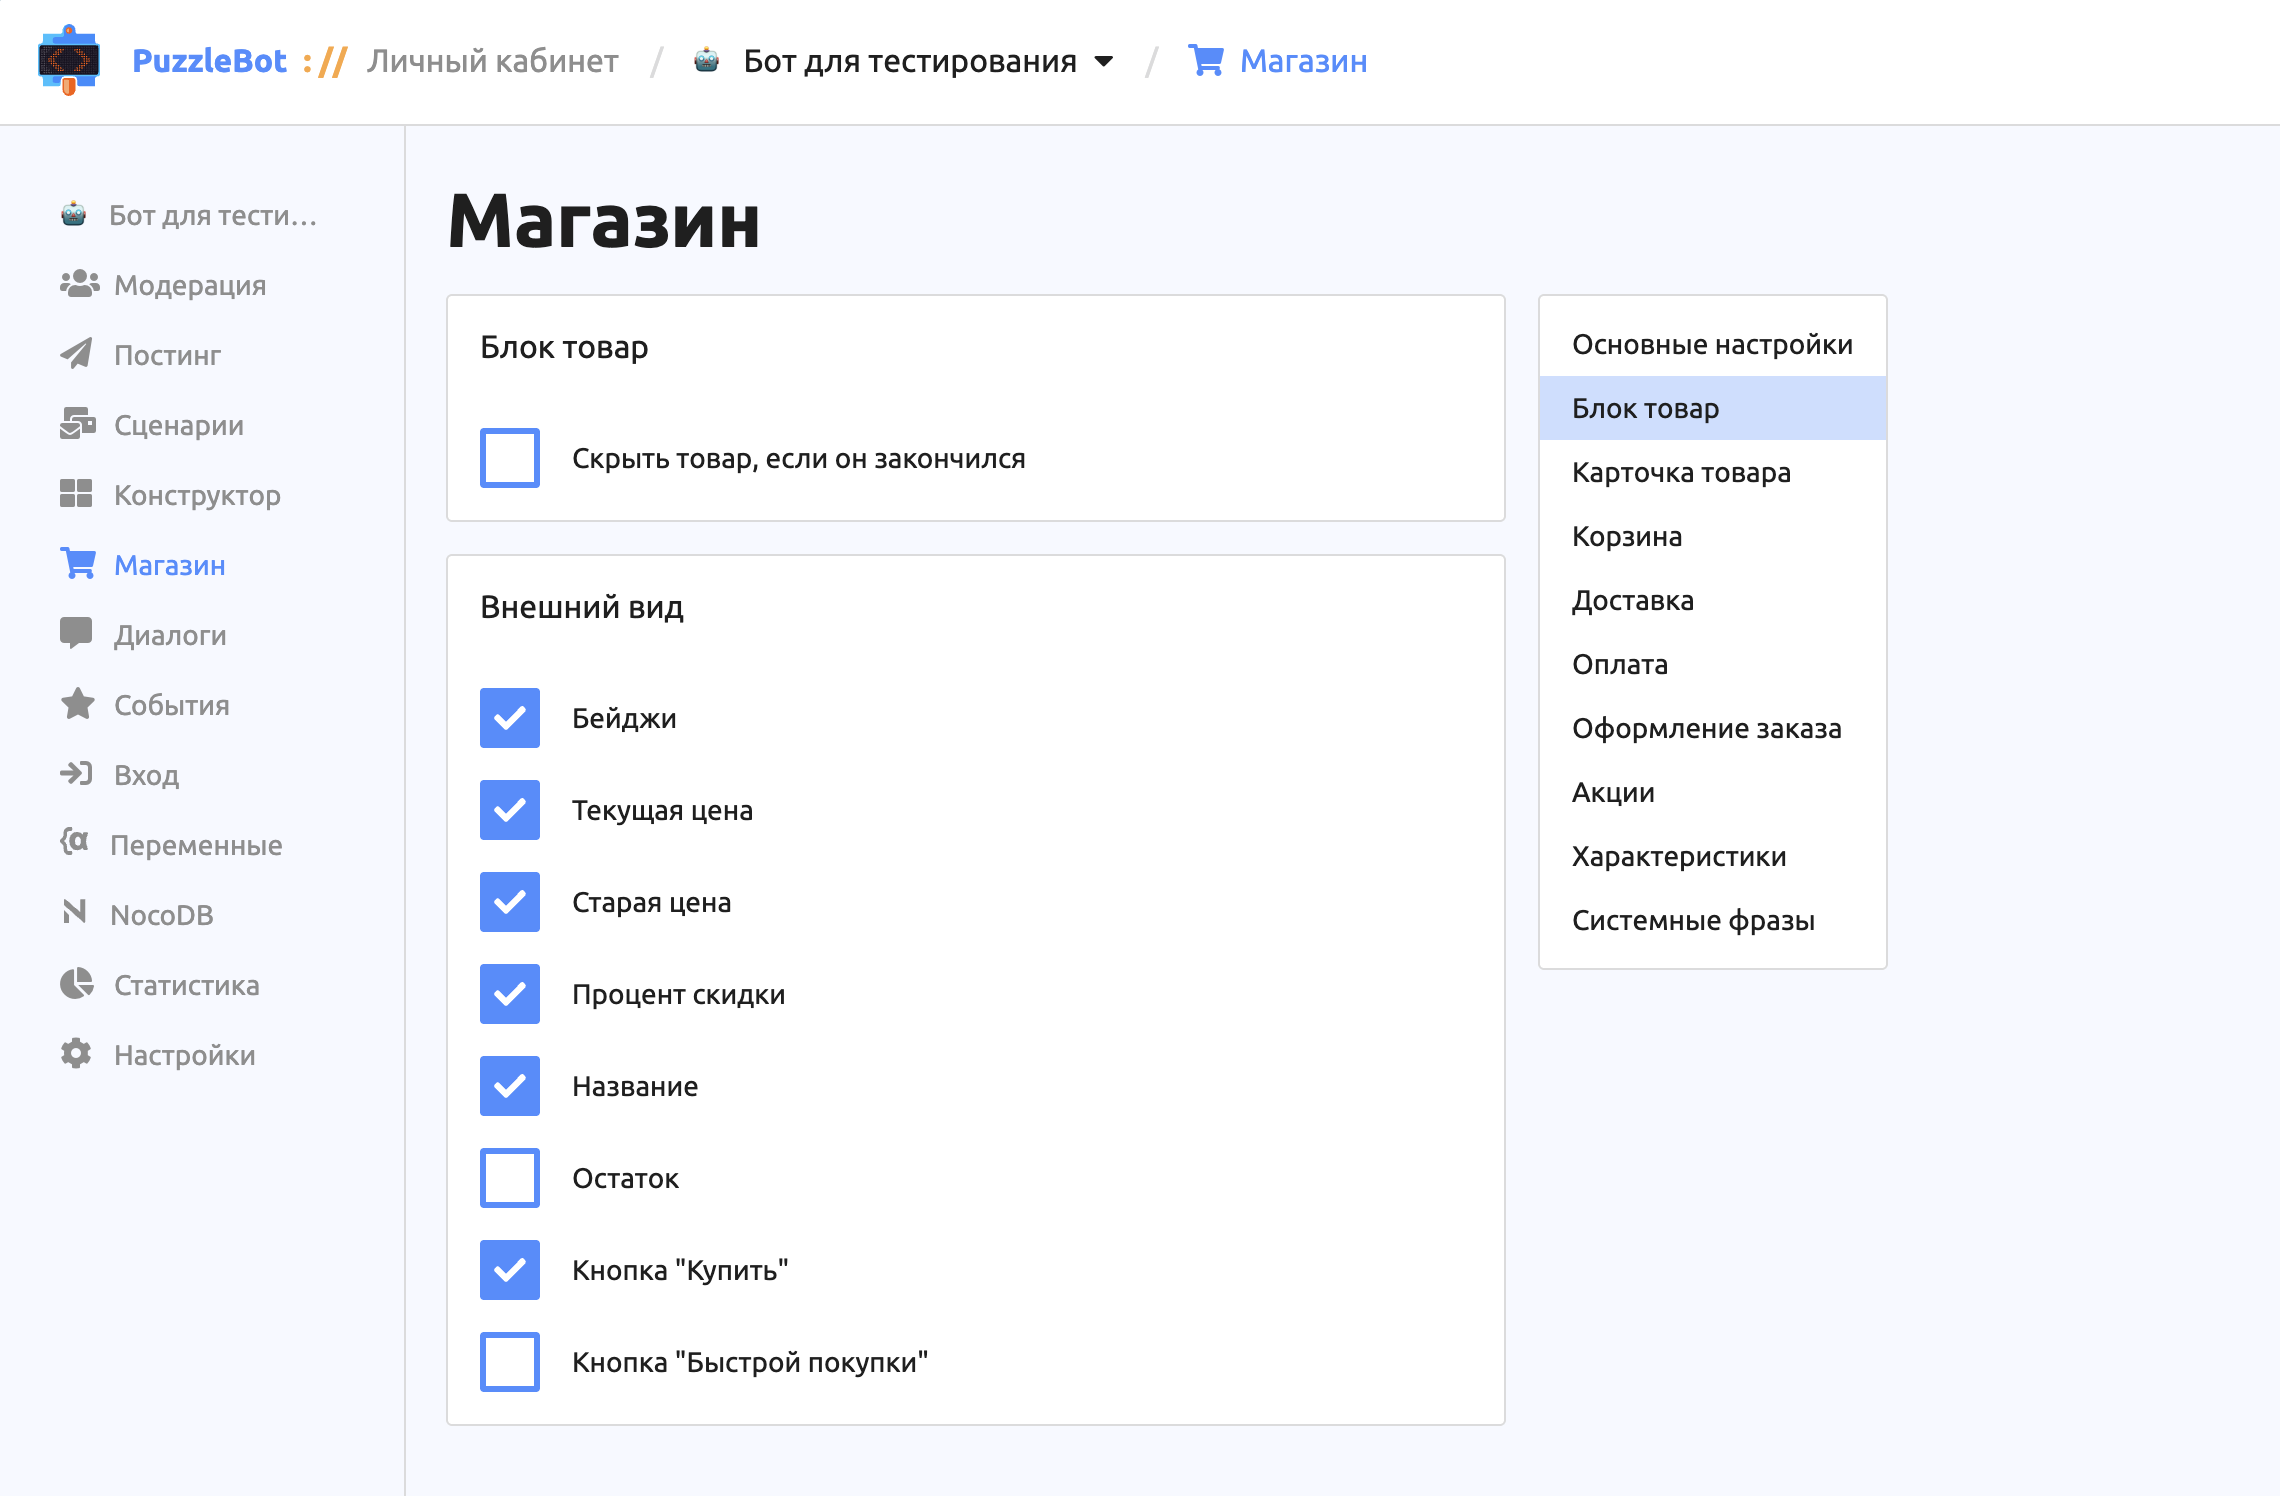
Lets you customize how product cards look in the general product list. Clearing a checkbox removes the corresponding element from the card.
Hide a product when it is out of stock. If this checkbox is cleared, an out-of-stock product is still shown in the product list, but users cannot proceed to buy it. If the checkbox is selected, the product is hidden.
Badges. Controls whether promotion labels that apply to the product are shown. Badges are set up in the Promotions section.
Current price. The product's current price.
Old price. If the product has an old price, it is shown crossed out.
Discount percentage. If a discount applies to the product, its value is shown on the card.
Name. The product name.
Stock. Shows the product's stock information.
"Buy" button. Shows the purchase button. If the checkbox is cleared, the purchase button is visible only on the product page.
"Quick purchase" button. Adds a quick purchase button.
Important! If you clear all the checkboxes, the product list shows only product images without any other elements.
Product card
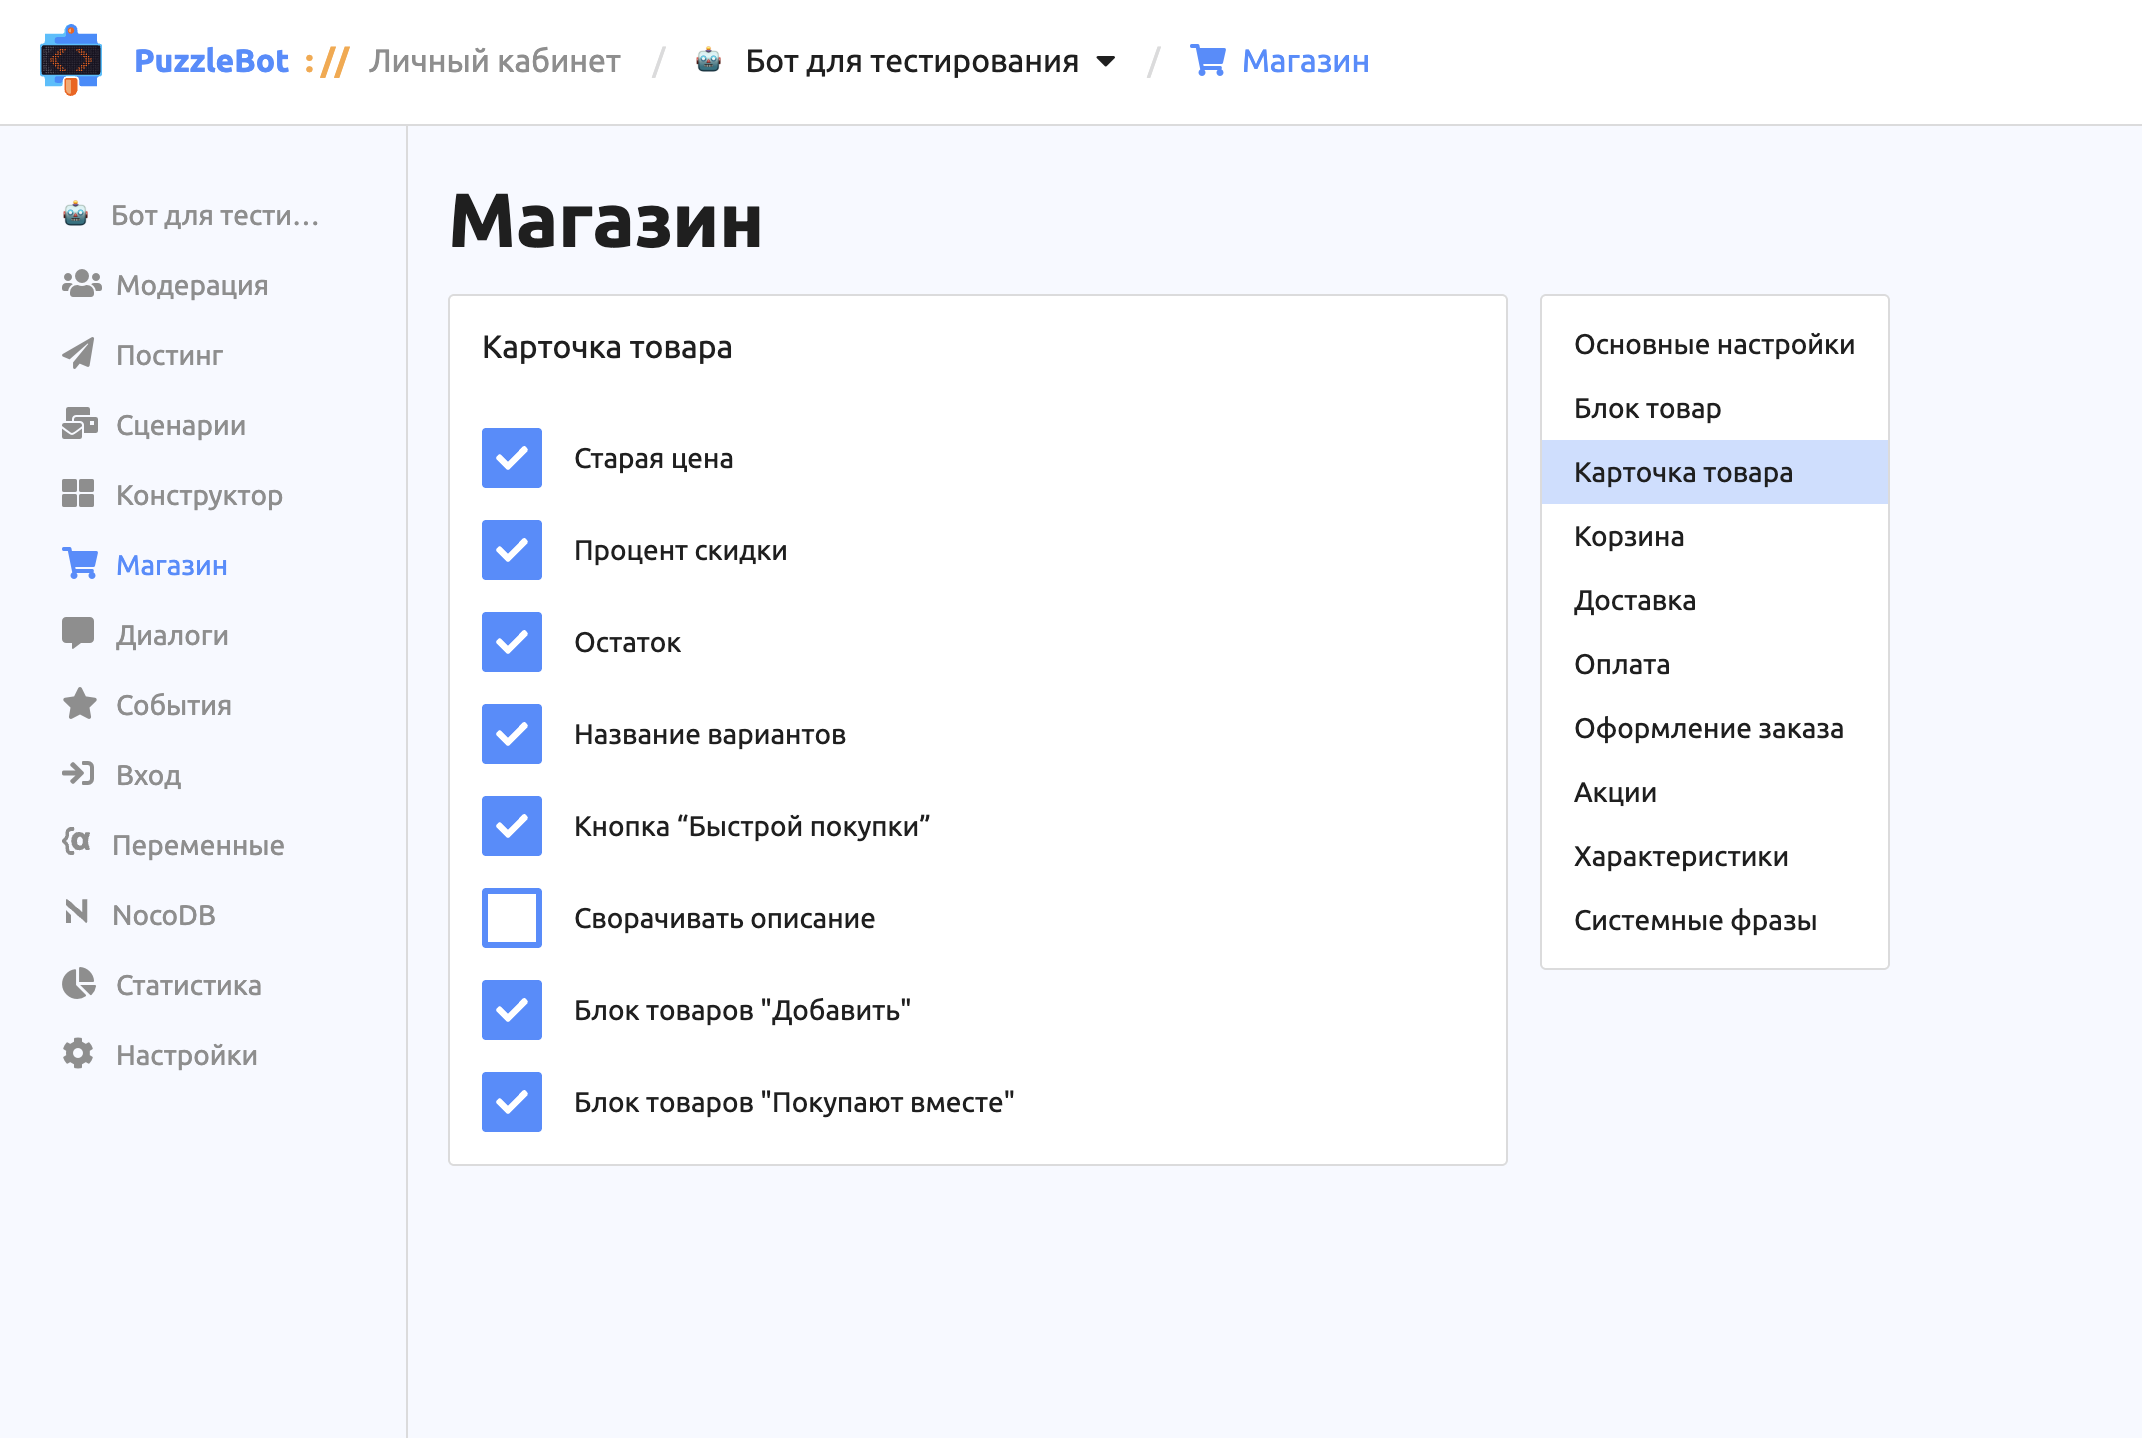
Lets you customize how a product looks on the product page.
Old price.
Discount percentage.
Stock.
Variant names. Lets you hide the names of the attributes used in a product group to display variants.
"Quick purchase" button. Lets the user go straight to checkout without adding the product to the cart. Products that were already in the cart are kept.
Collapse description. If the checkbox is cleared, a button that leads to the attributes is shown along with the full product description. If the checkbox is selected, the description is shown partially, and the attributes can be viewed when the description is expanded.
"Add" product block. Products shown right below the description.
"Bought together" product block. Products shown below the product information.
Cart
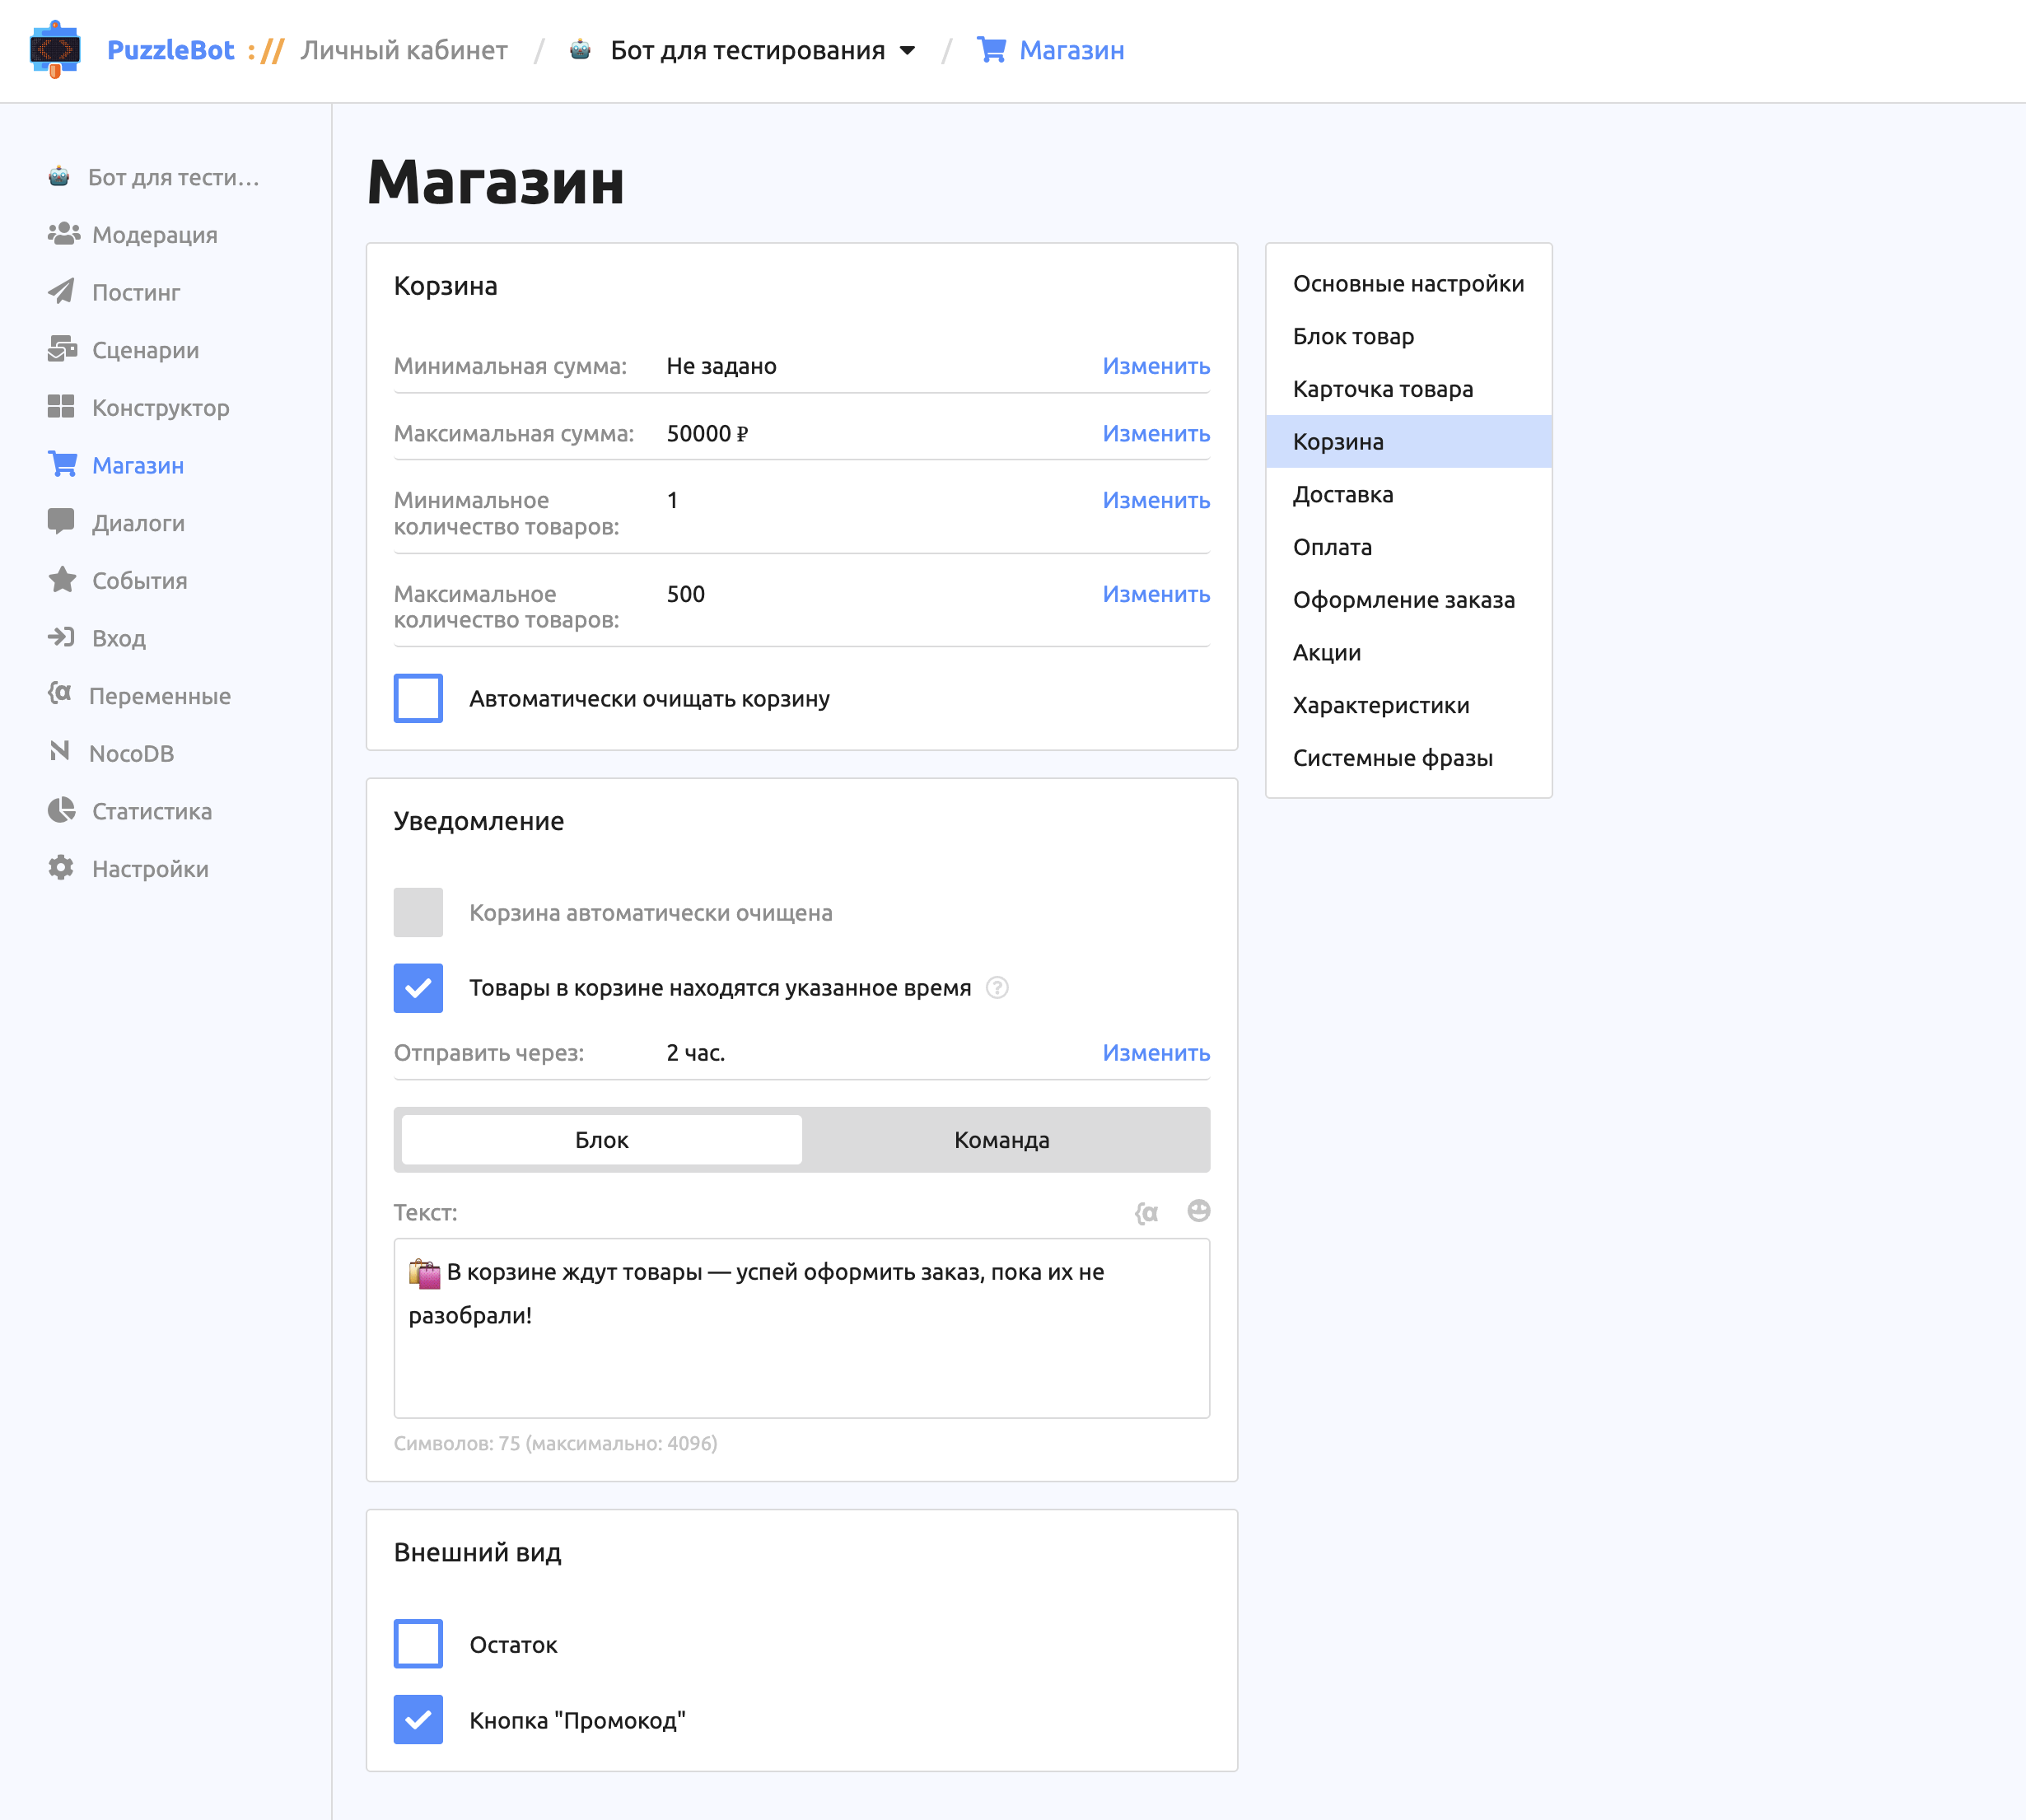
In this section, you can set up the cart's appearance and behavior.
Minimum amount. An order can be placed only if the total of the products is greater than or equal to the specified amount.
Maximum amount. An order can be placed only if the total of the products is less than or equal to the specified amount.
Minimum number of products. An order can be placed only if the cart contains the specified number of products or more.
Maximum number of products. An order can be placed only if the cart contains the specified number of products or fewer.
Clear the cart automatically. When this checkbox is selected, the "Clear cart after" field appears, where you can set the period after which the user's cart is cleared automatically.
Notification
Cart cleared automatically. This checkbox is available only when "Clear the cart automatically" is on. When enabled, the user receives the specified text or command after the bot clears the cart automatically.
Products have been in the cart for the specified time. Sends the specified text or command to the user after the specified time has passed.
Appearance
Stock. Shows the product's stock in the cart.
"Promo code" button. If you use promotions of the promo code type, this button appears in the cart and lets the user enter a promo code to get a discount on the products in the cart.
Important! If the "Promo code" button is hidden, users cannot use promo codes.
Delivery
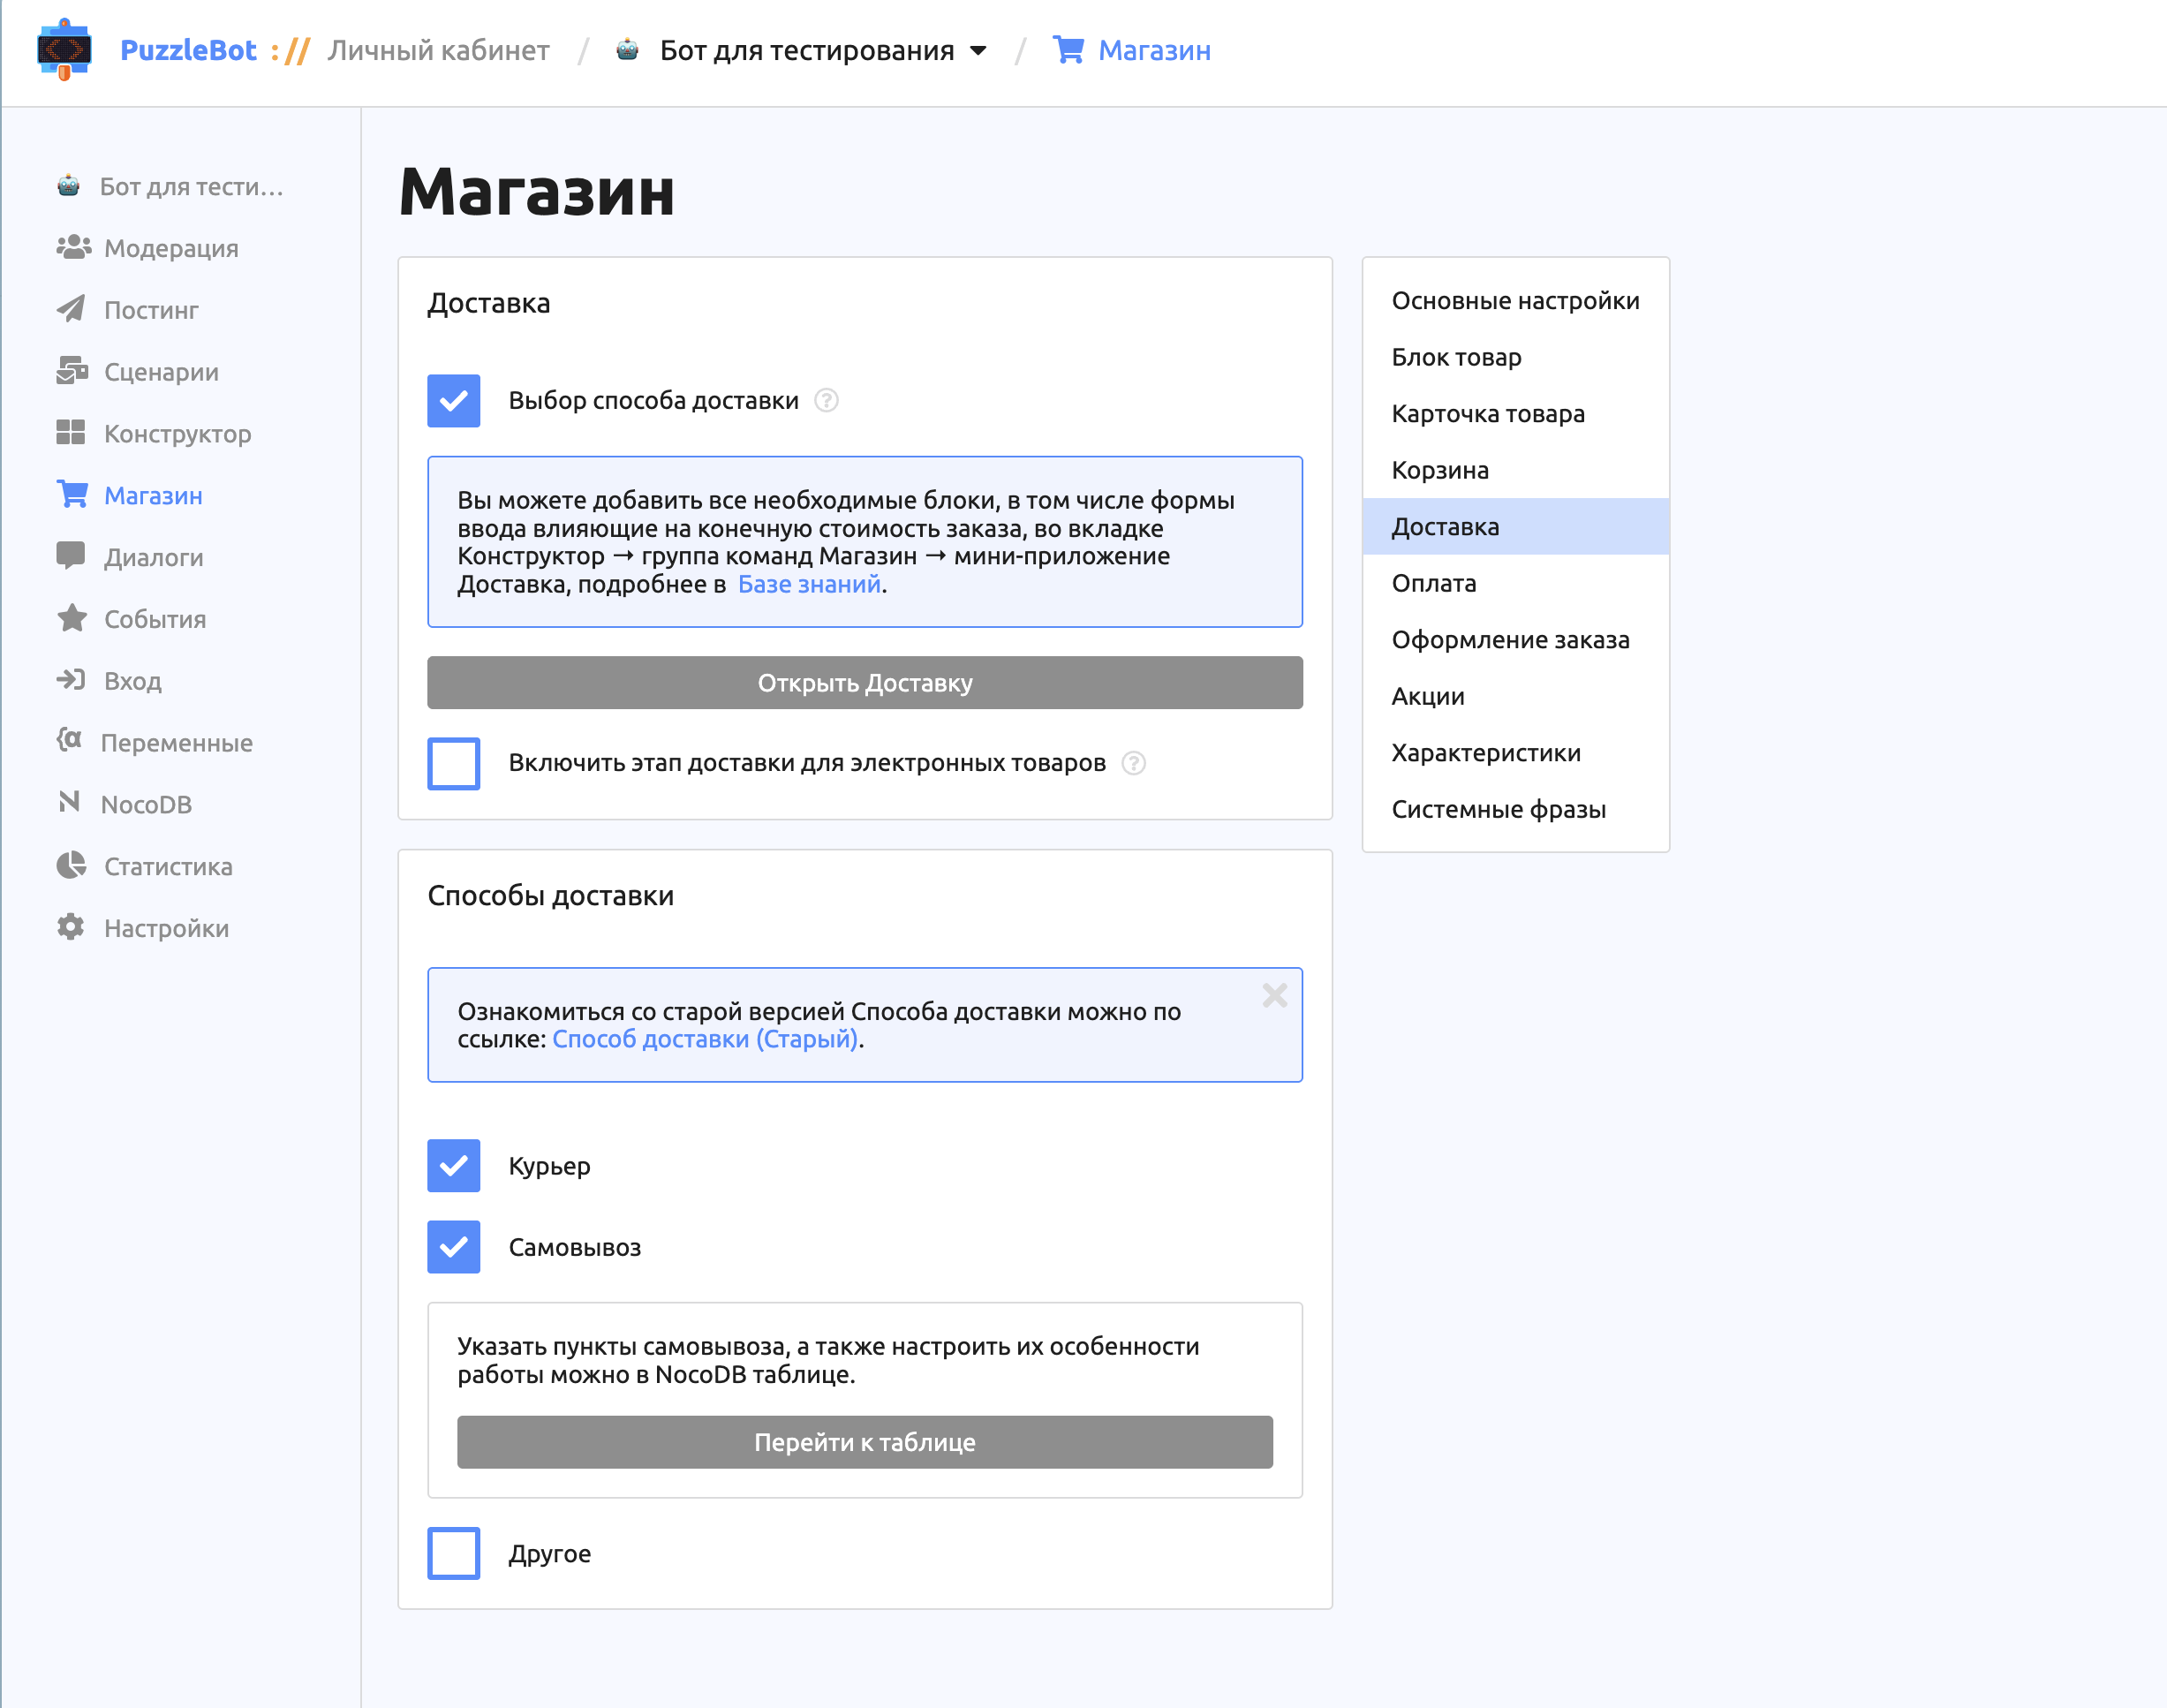
In this section, you can turn delivery in the store on or off and set up delivery methods.
Delivery method selection. Clearing this checkbox turns off the delivery step for all products in your store. Users skip this step automatically when placing orders.
Enable the delivery step for digital products. The delivery step is off for digital products by default, but you can turn it on if needed.
Delivery methods
Courier. If enabled, the user can choose "Courier" when arranging delivery and go on to enter the address.
Pickup. For this method to work, add and set up addresses in a NocoDB table — to do this, click the "Go to table" button. In the table, specify the Address, Longitude, and Latitude for each pickup point.
Other. When this delivery method is chosen, the customer sees only the blocks you created and set up in the "Delivery" mini app in the "Store" command group.
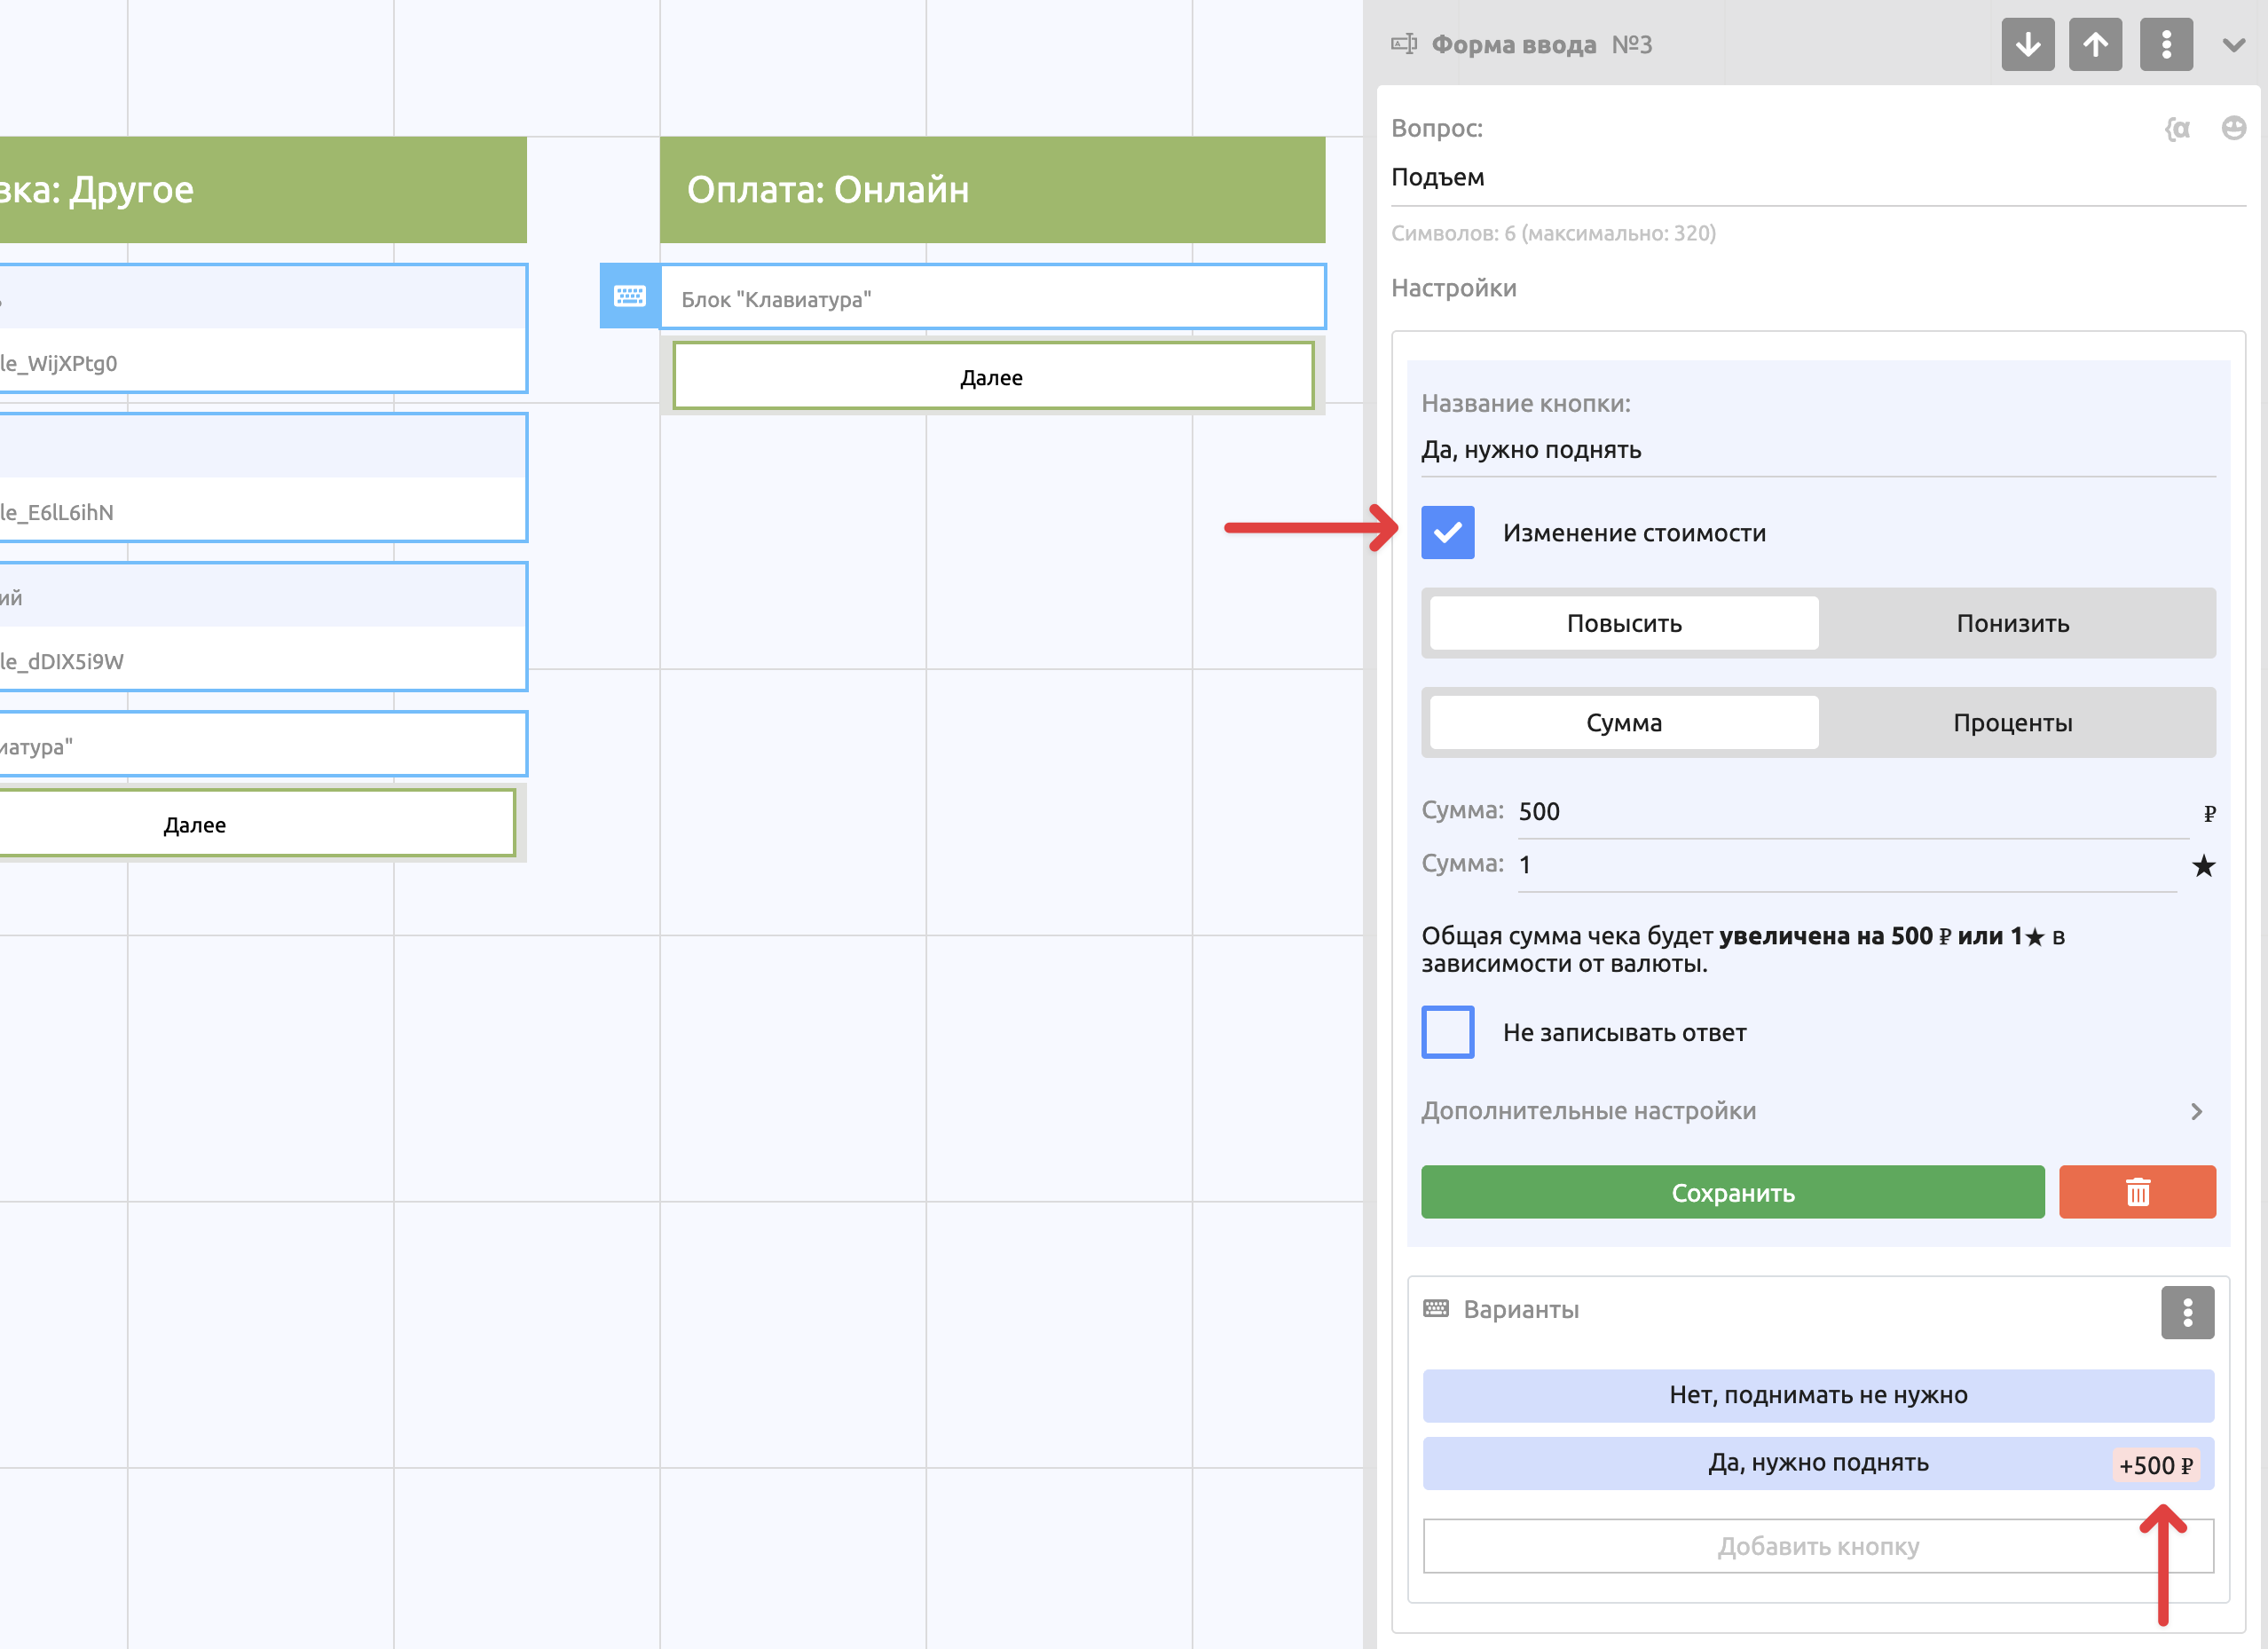
In the "Store" command group, input forms get an extra "Change cost" setting that lets you affect the order total.
Payment
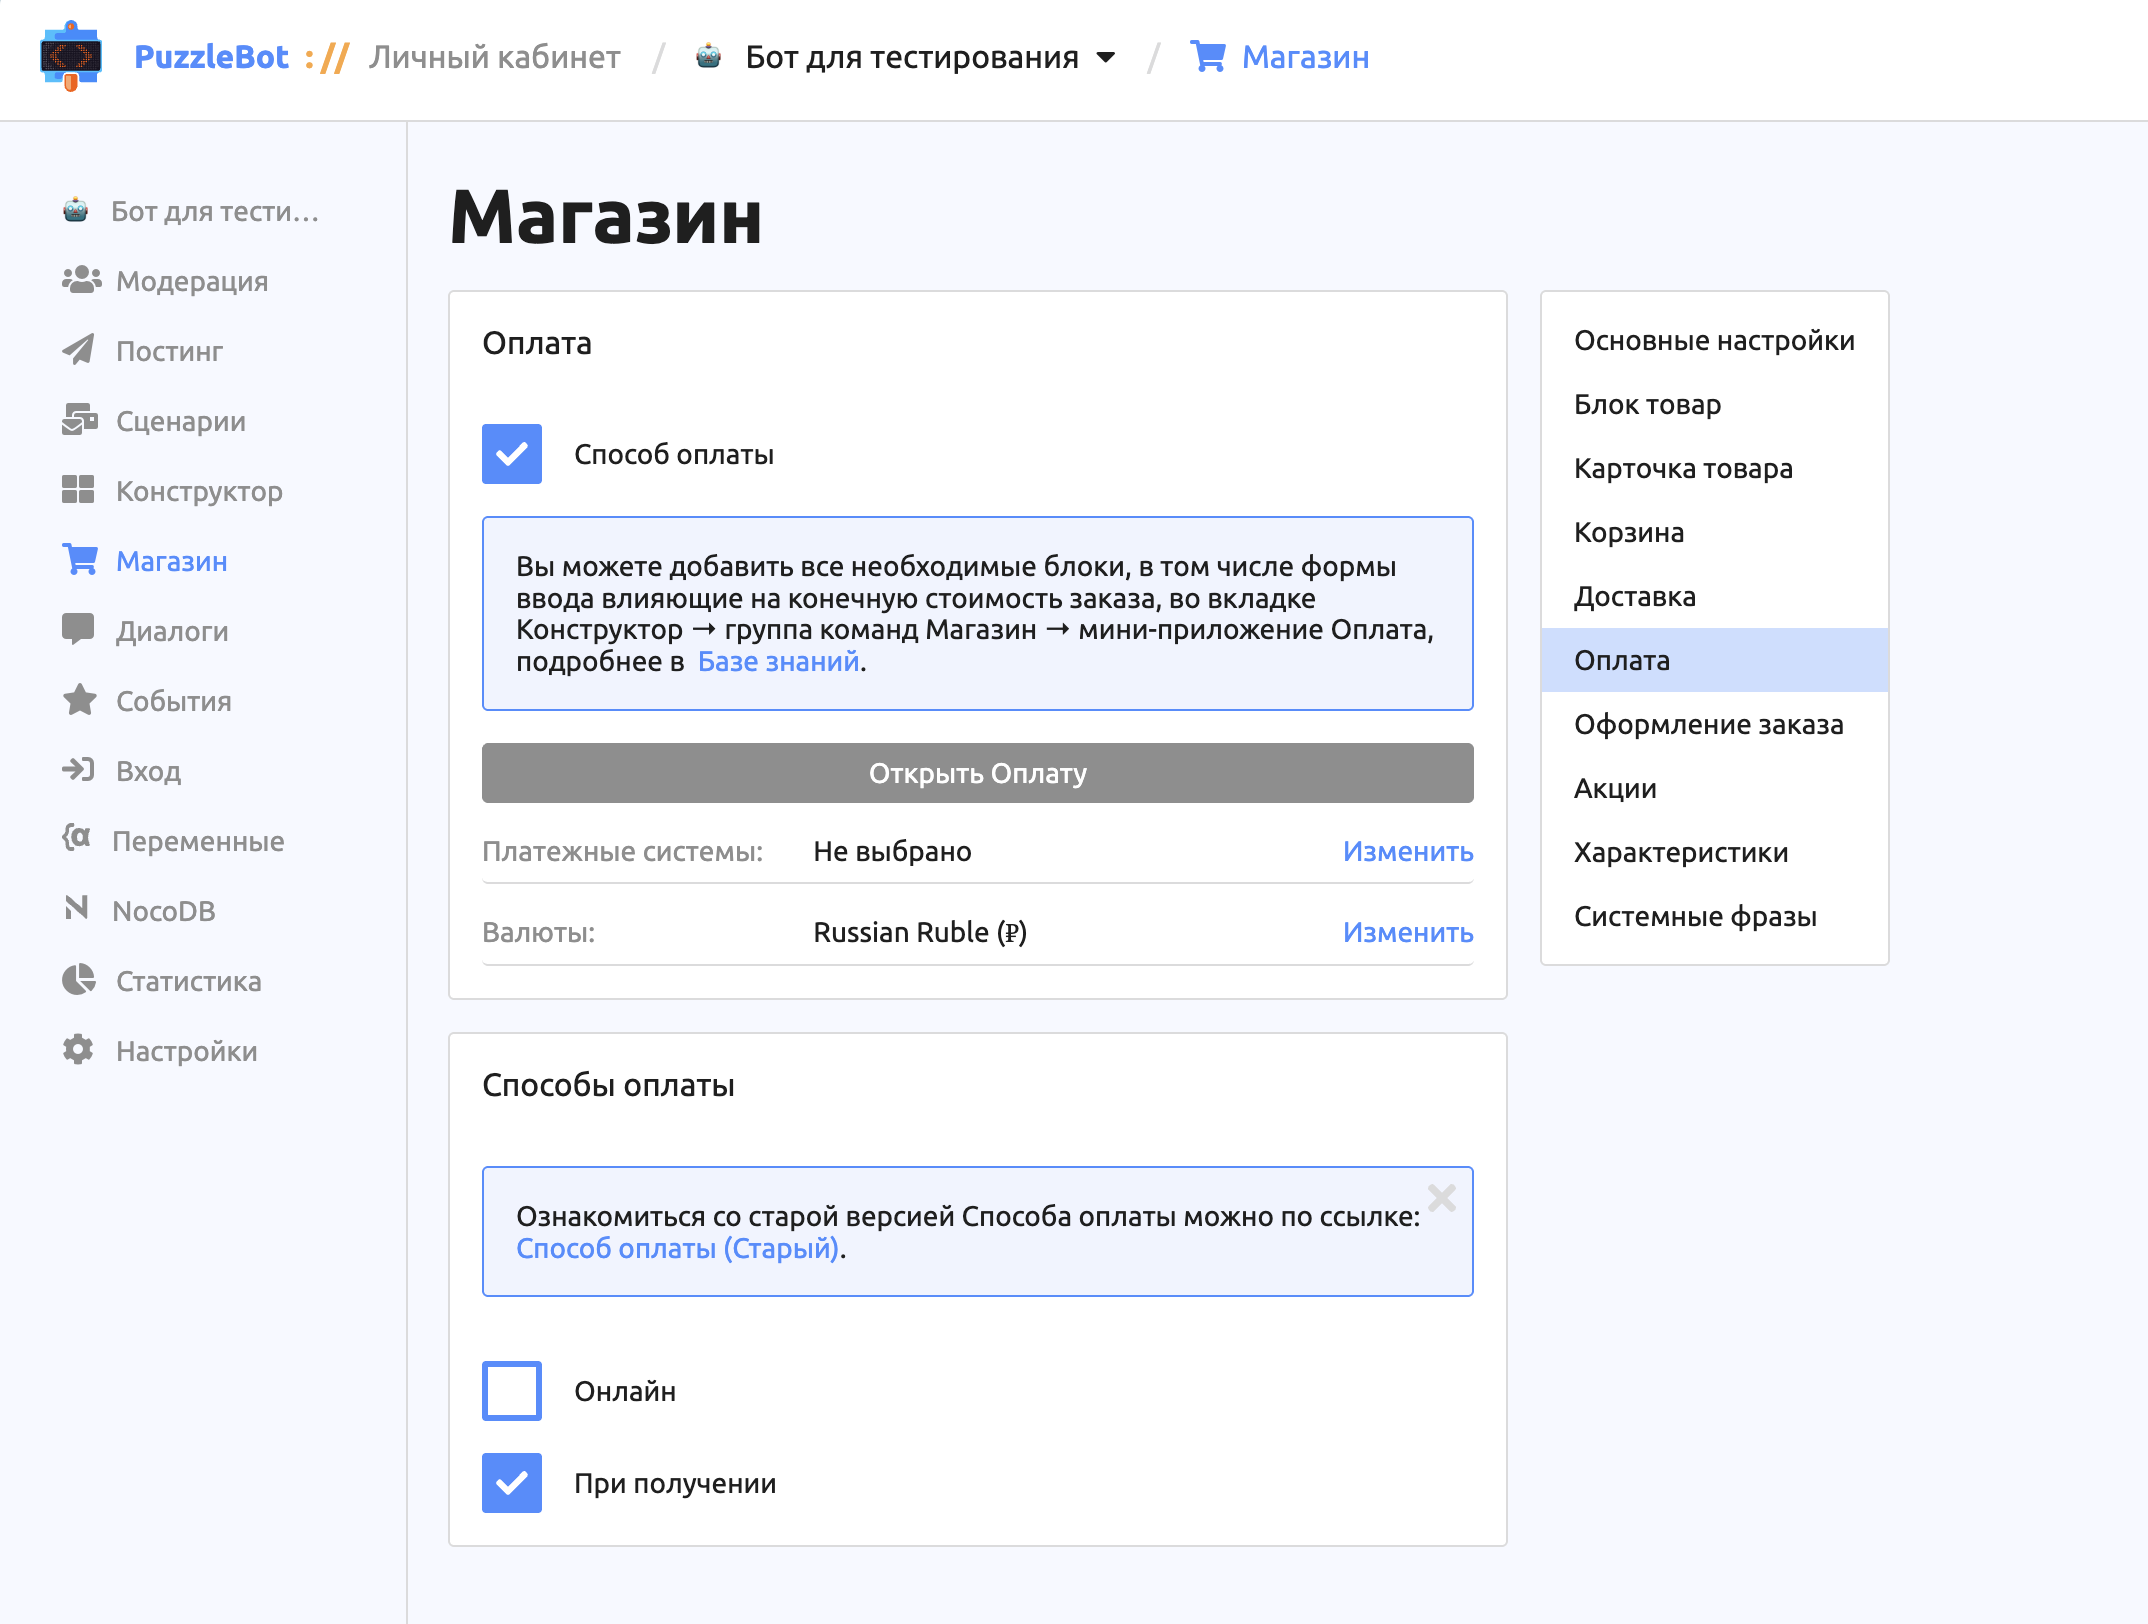
On this screen, you can turn payment in the store on or off and set up payment methods and currencies.
Payment method. When this is off, your store has no payment step. Users can place orders without paying.
Payment systems. Clicking "Edit" takes you to the bot's payment system settings.
Currencies. In the drop-down list, select the currencies to be used in your store.
Important! If you specify several currencies, you need to set a price for every product in each currency. When the user opens a mini app with a Product block, they are asked to choose the currency in which prices are shown.
Payment methods
Online. Lets users pay online in the store, provided payment systems are connected: ⚠ Payment systems.
On delivery. Lets users complete the order without paying.
Checkout
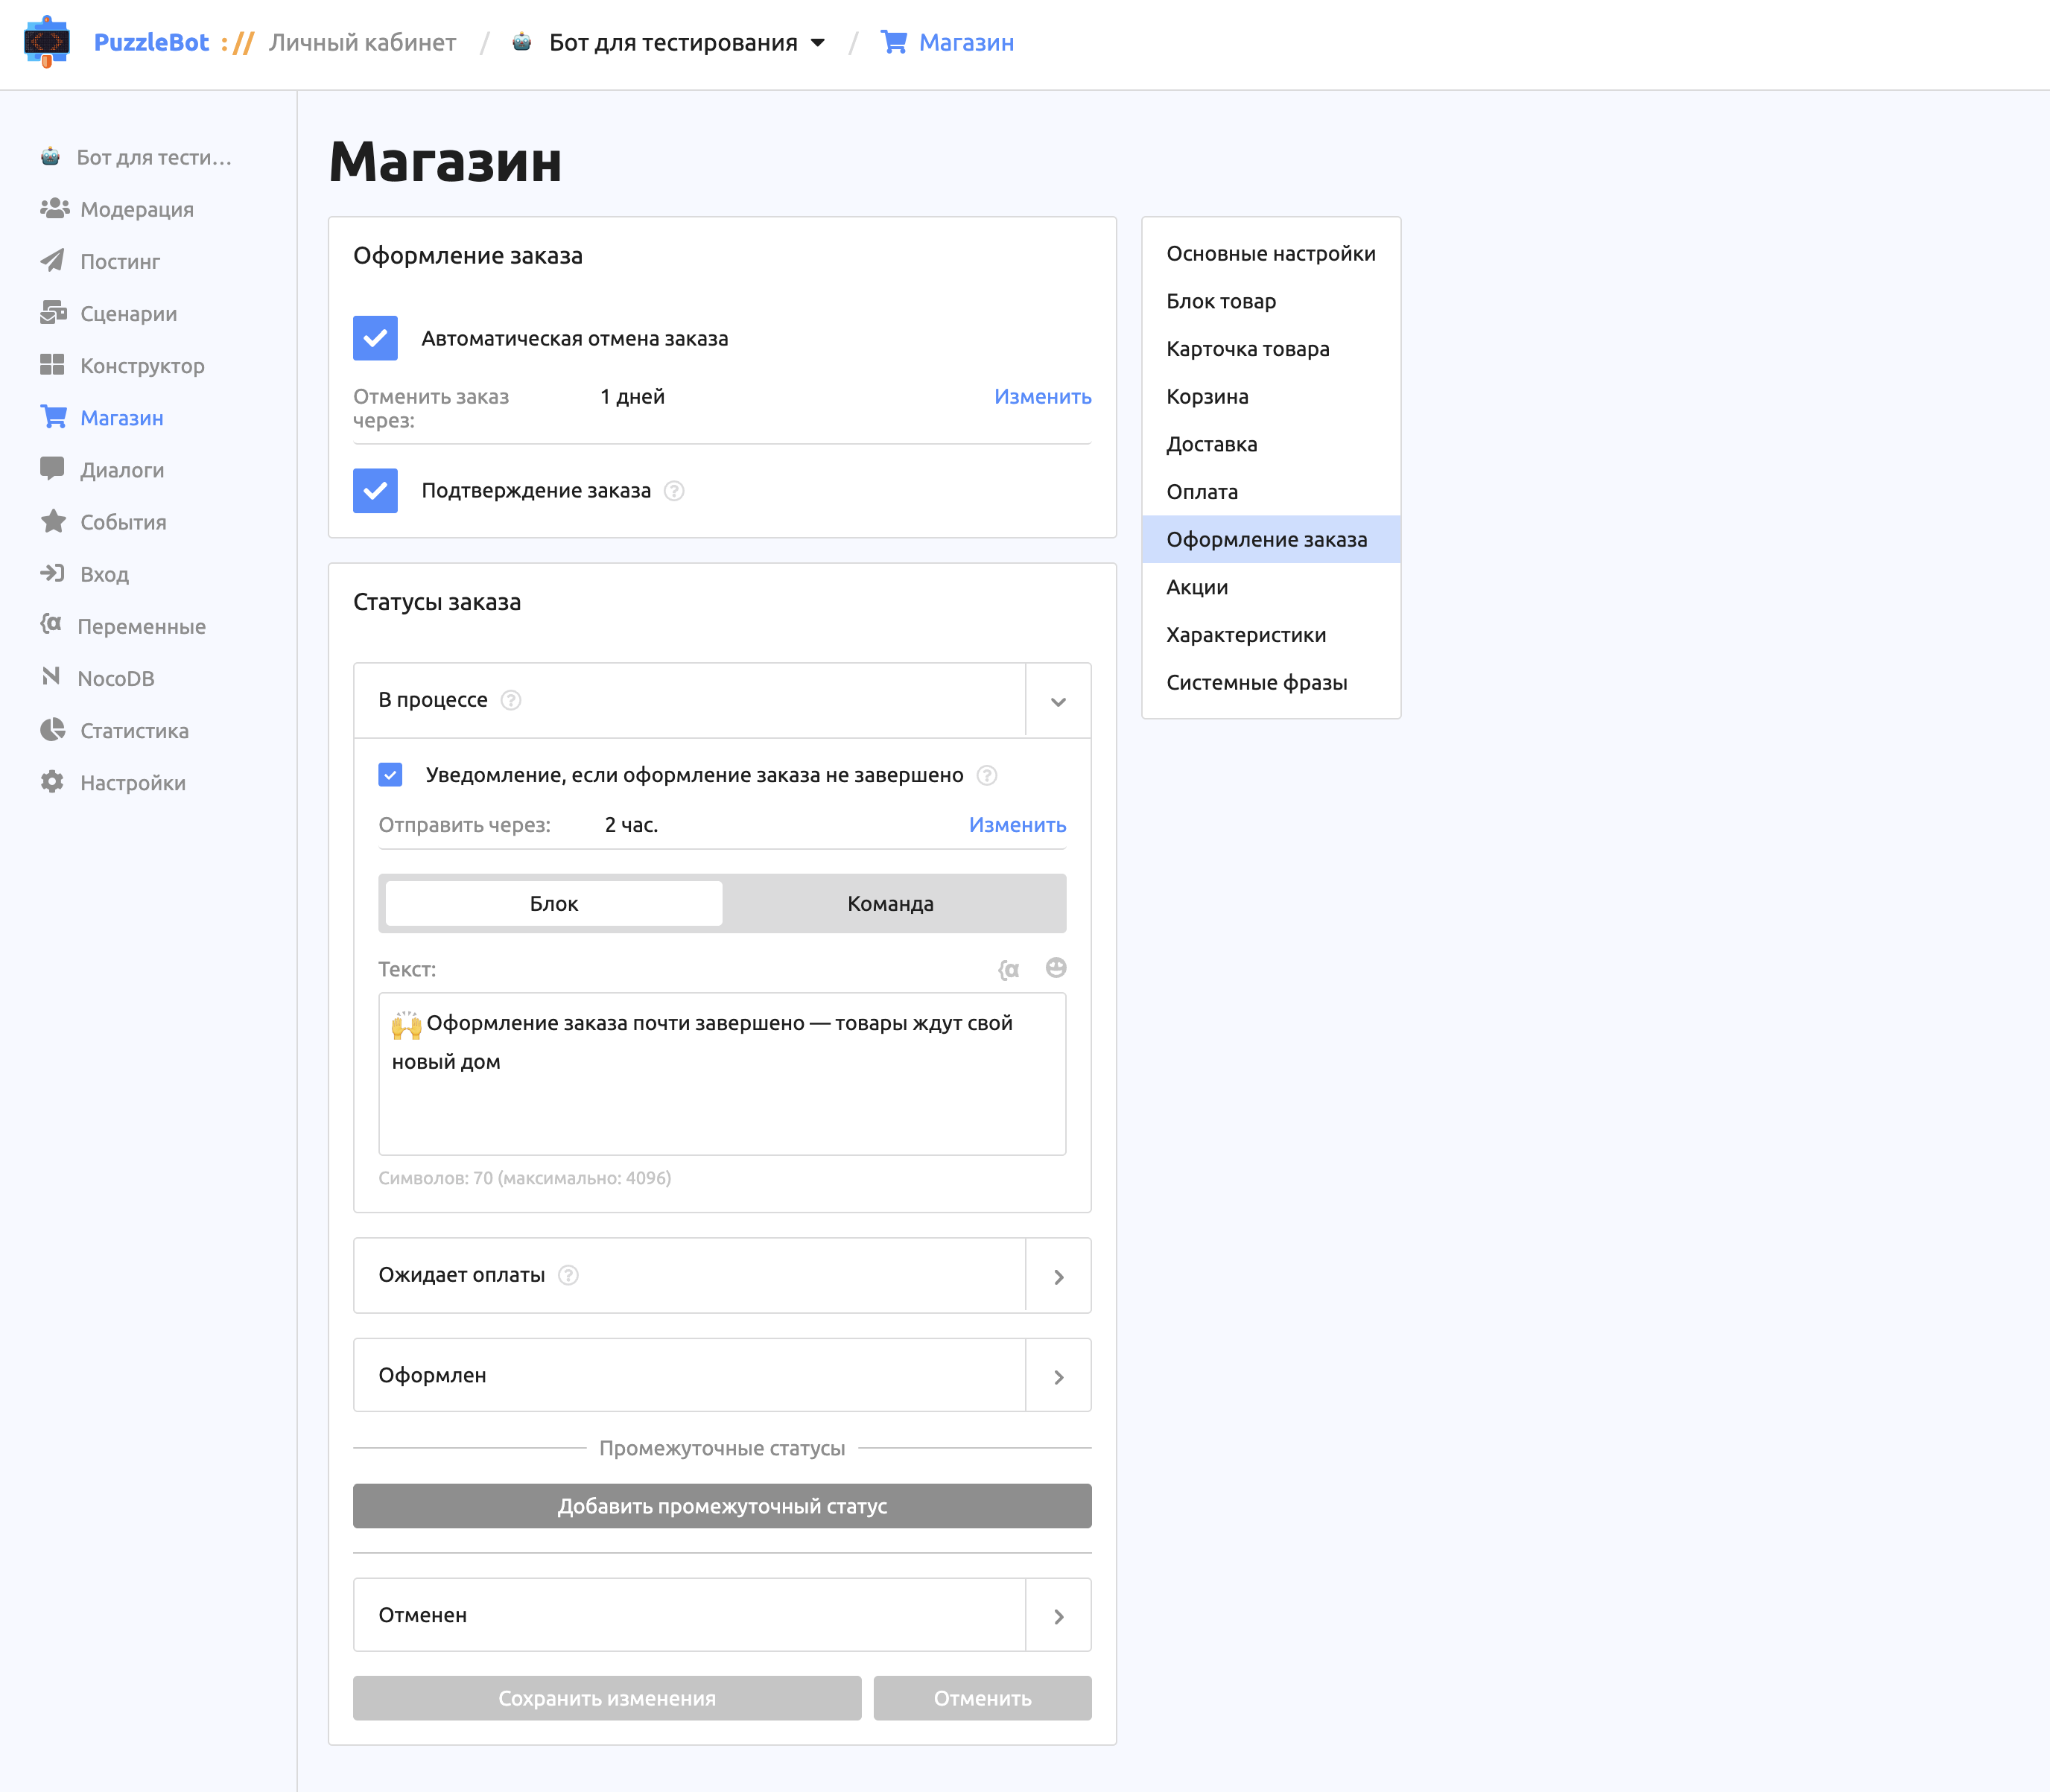
This section lets you fine-tune how users place an order.
Automatic order cancellation. When this checkbox is selected, you can set the period after which an order that was created but not paid for is canceled automatically.
Order confirmation. When this checkbox is selected, the user is asked to confirm the order before the final checkout step.
Order statuses
In addition to the system statuses (In progress, Awaiting payment, Placed, Canceled), you can define your own intermediate statuses with their own hierarchy. For example, for the "Paid" status you can add child statuses such as "Being packed" or "Handed over for delivery". For each intermediate status, you can set how it is displayed on the orders page. For any status, you can specify a text or command that is sent to the user when their order moves to that status.
In progress. The status when the user has moved from filling the cart to checkout but has not completed it.
Notification if checkout is not completed.
Awaiting payment. The status when the user has chosen the online payment method but has not paid yet.
Notification while awaiting payment.
Placed. The status when the order has passed all the steps required to place it.
Notification if checkout is completed.
Canceled
Notification on manual cancellation. The user receives this notification if they cancel the order themselves or if a store administrator cancels it manually.
Notification on automatic cancellation.
Promotions
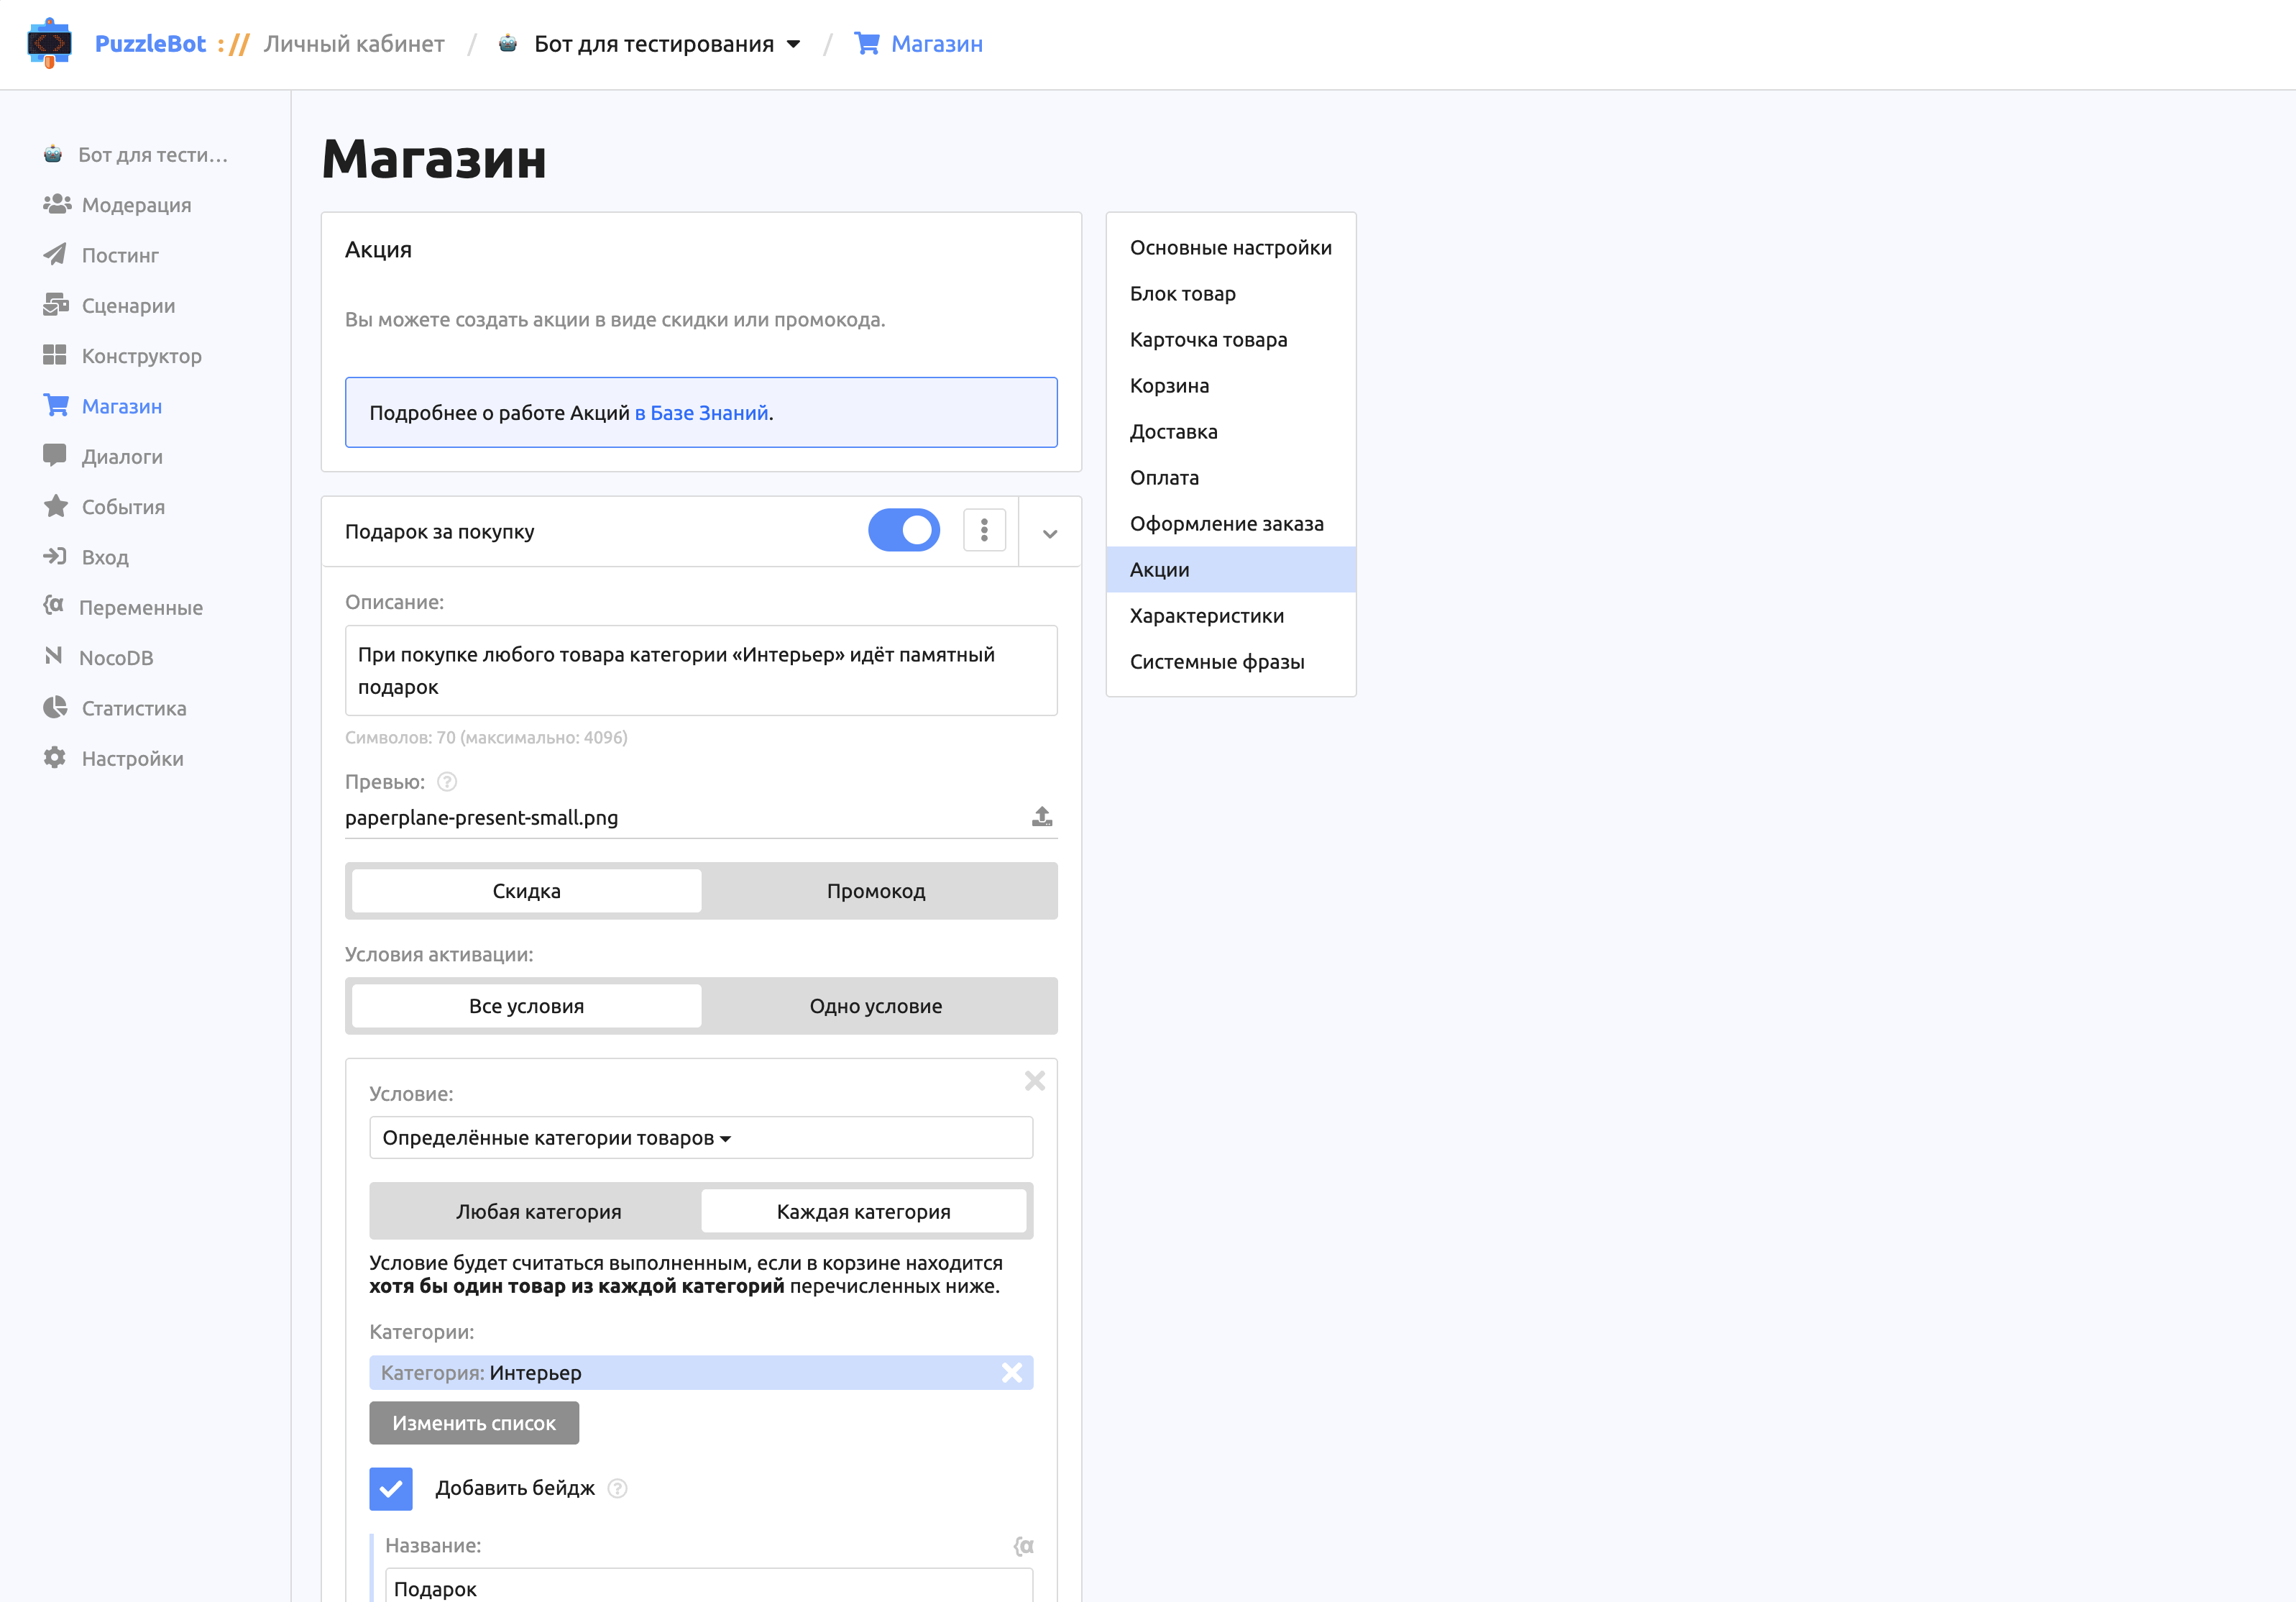
Lets you create various promotions and discounts for products or product categories.
Learn more in the article: Promotions
Attributes
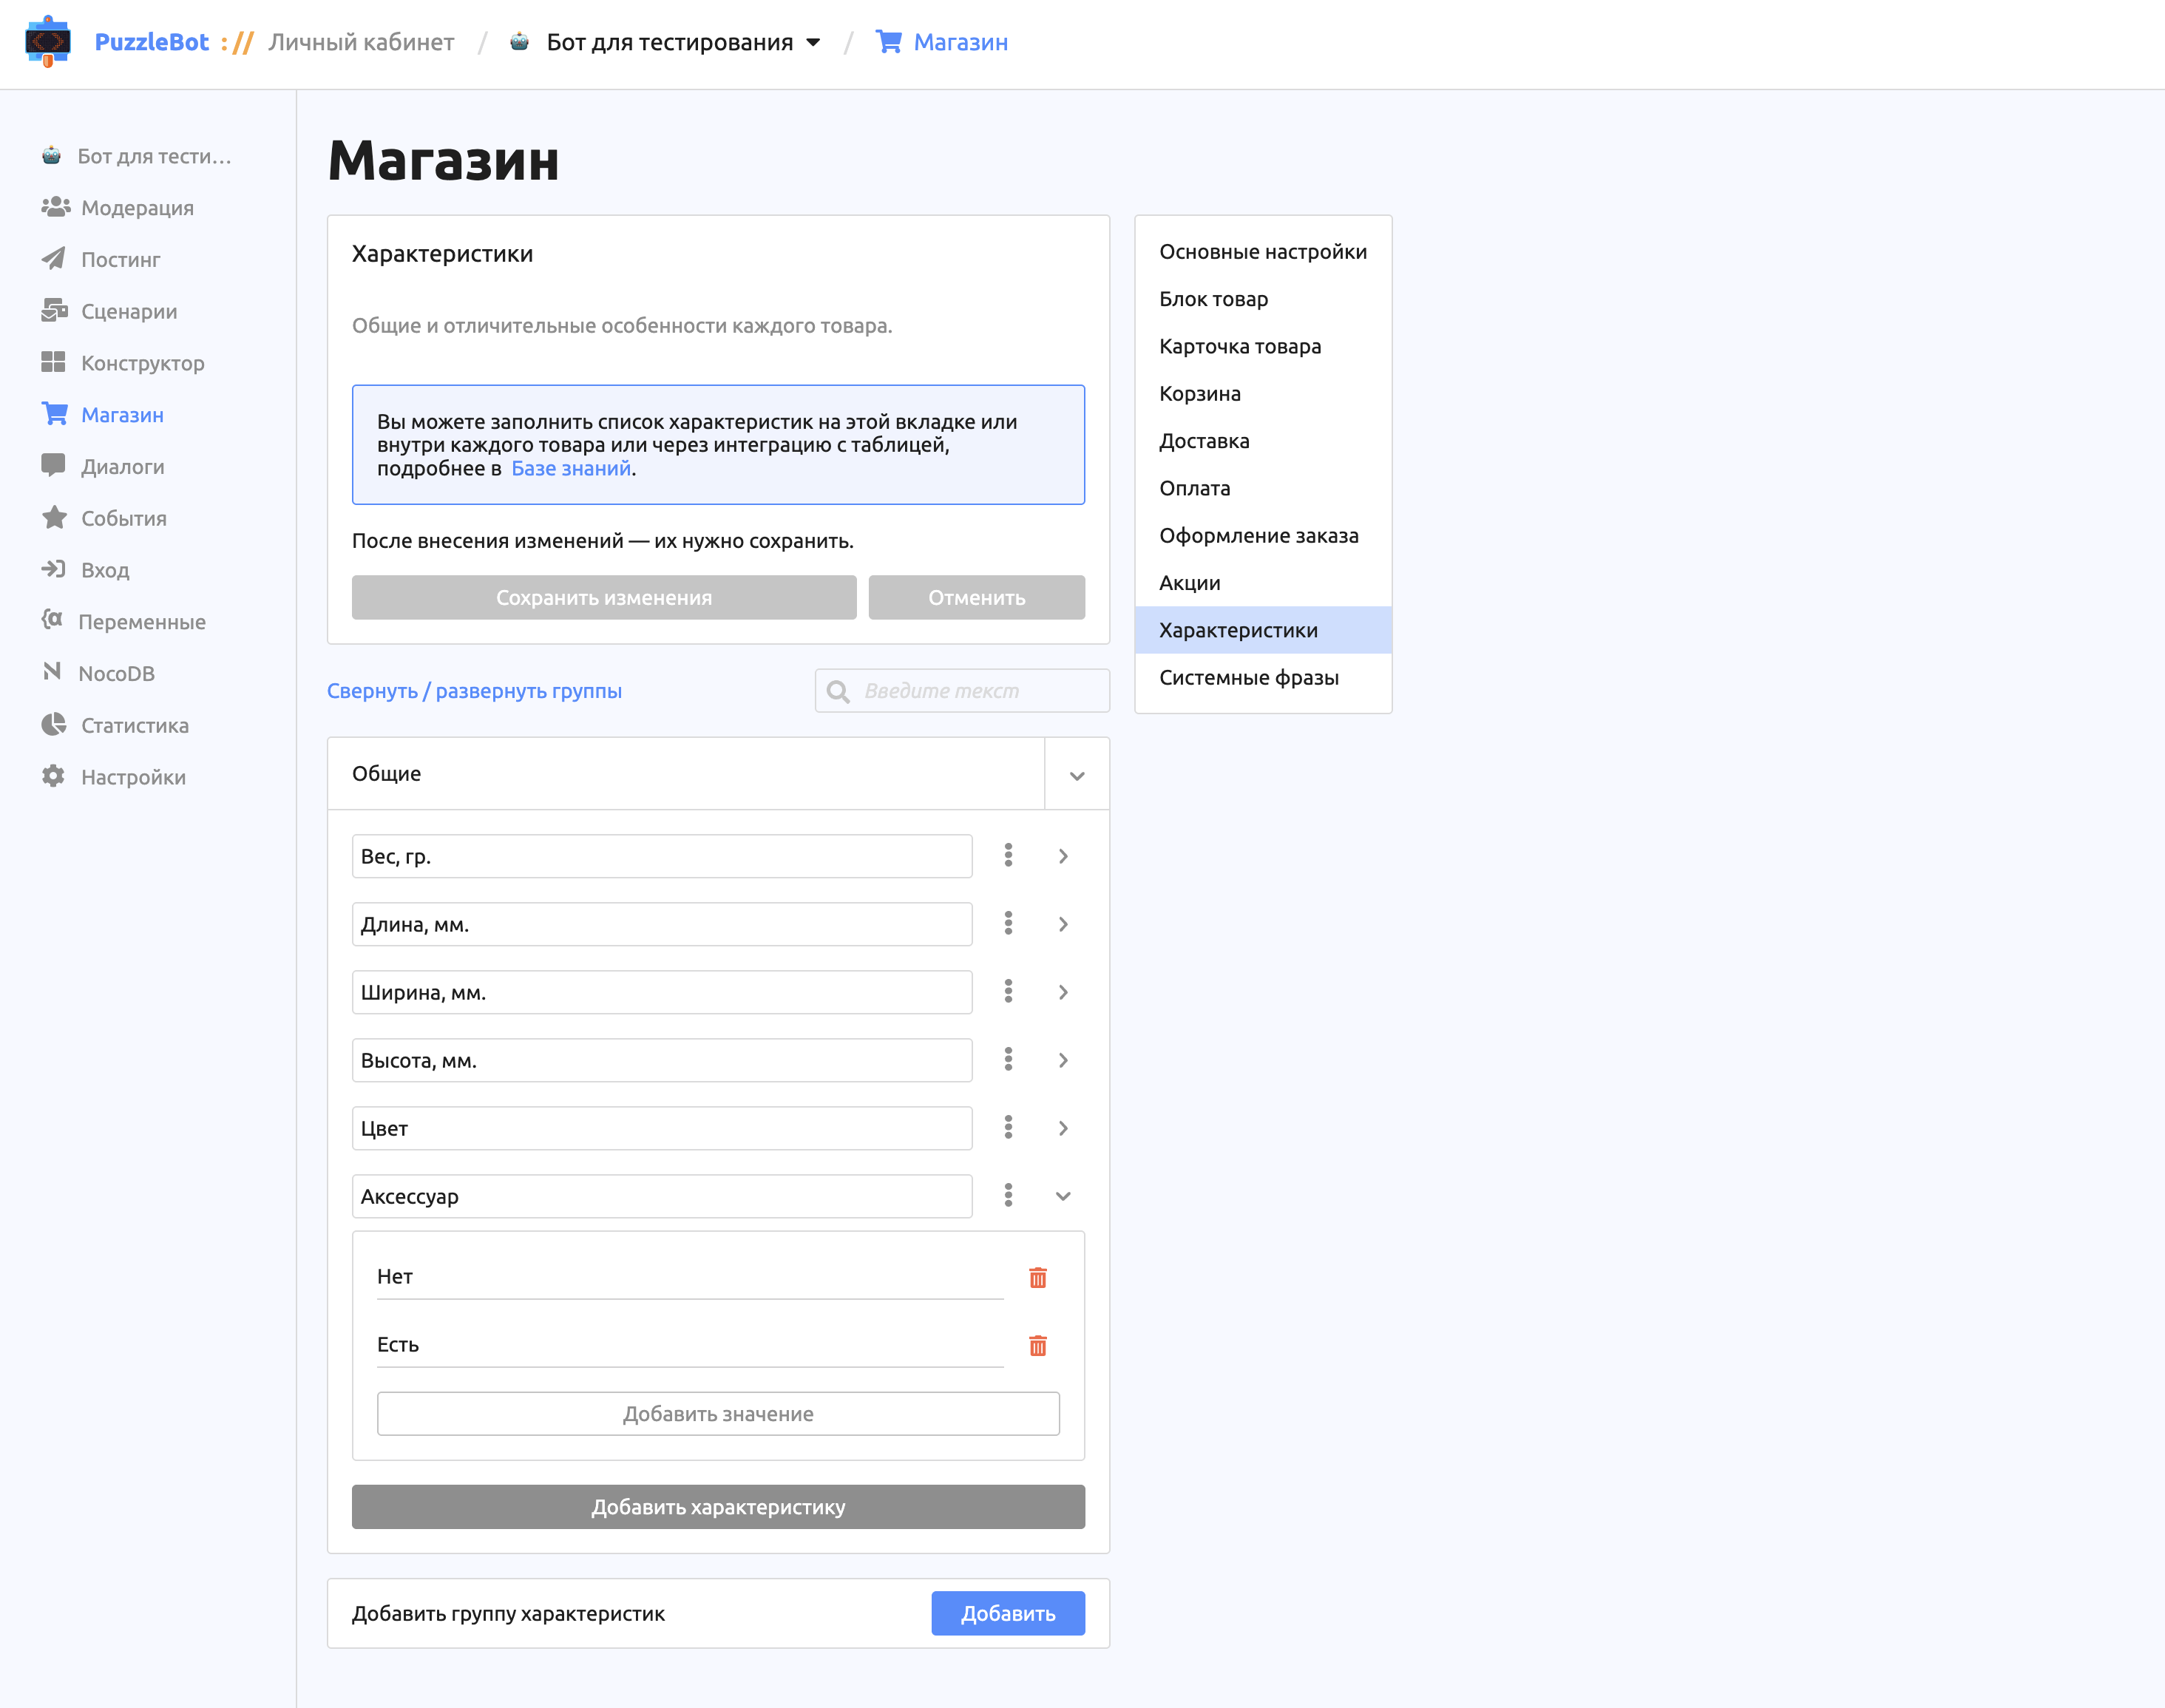
In this section, you can create and set up individual product properties, such as weight, dimensions, color, and the like.
Once attributes are created, you can select them when creating a product, in the Attributes section.
System phrases
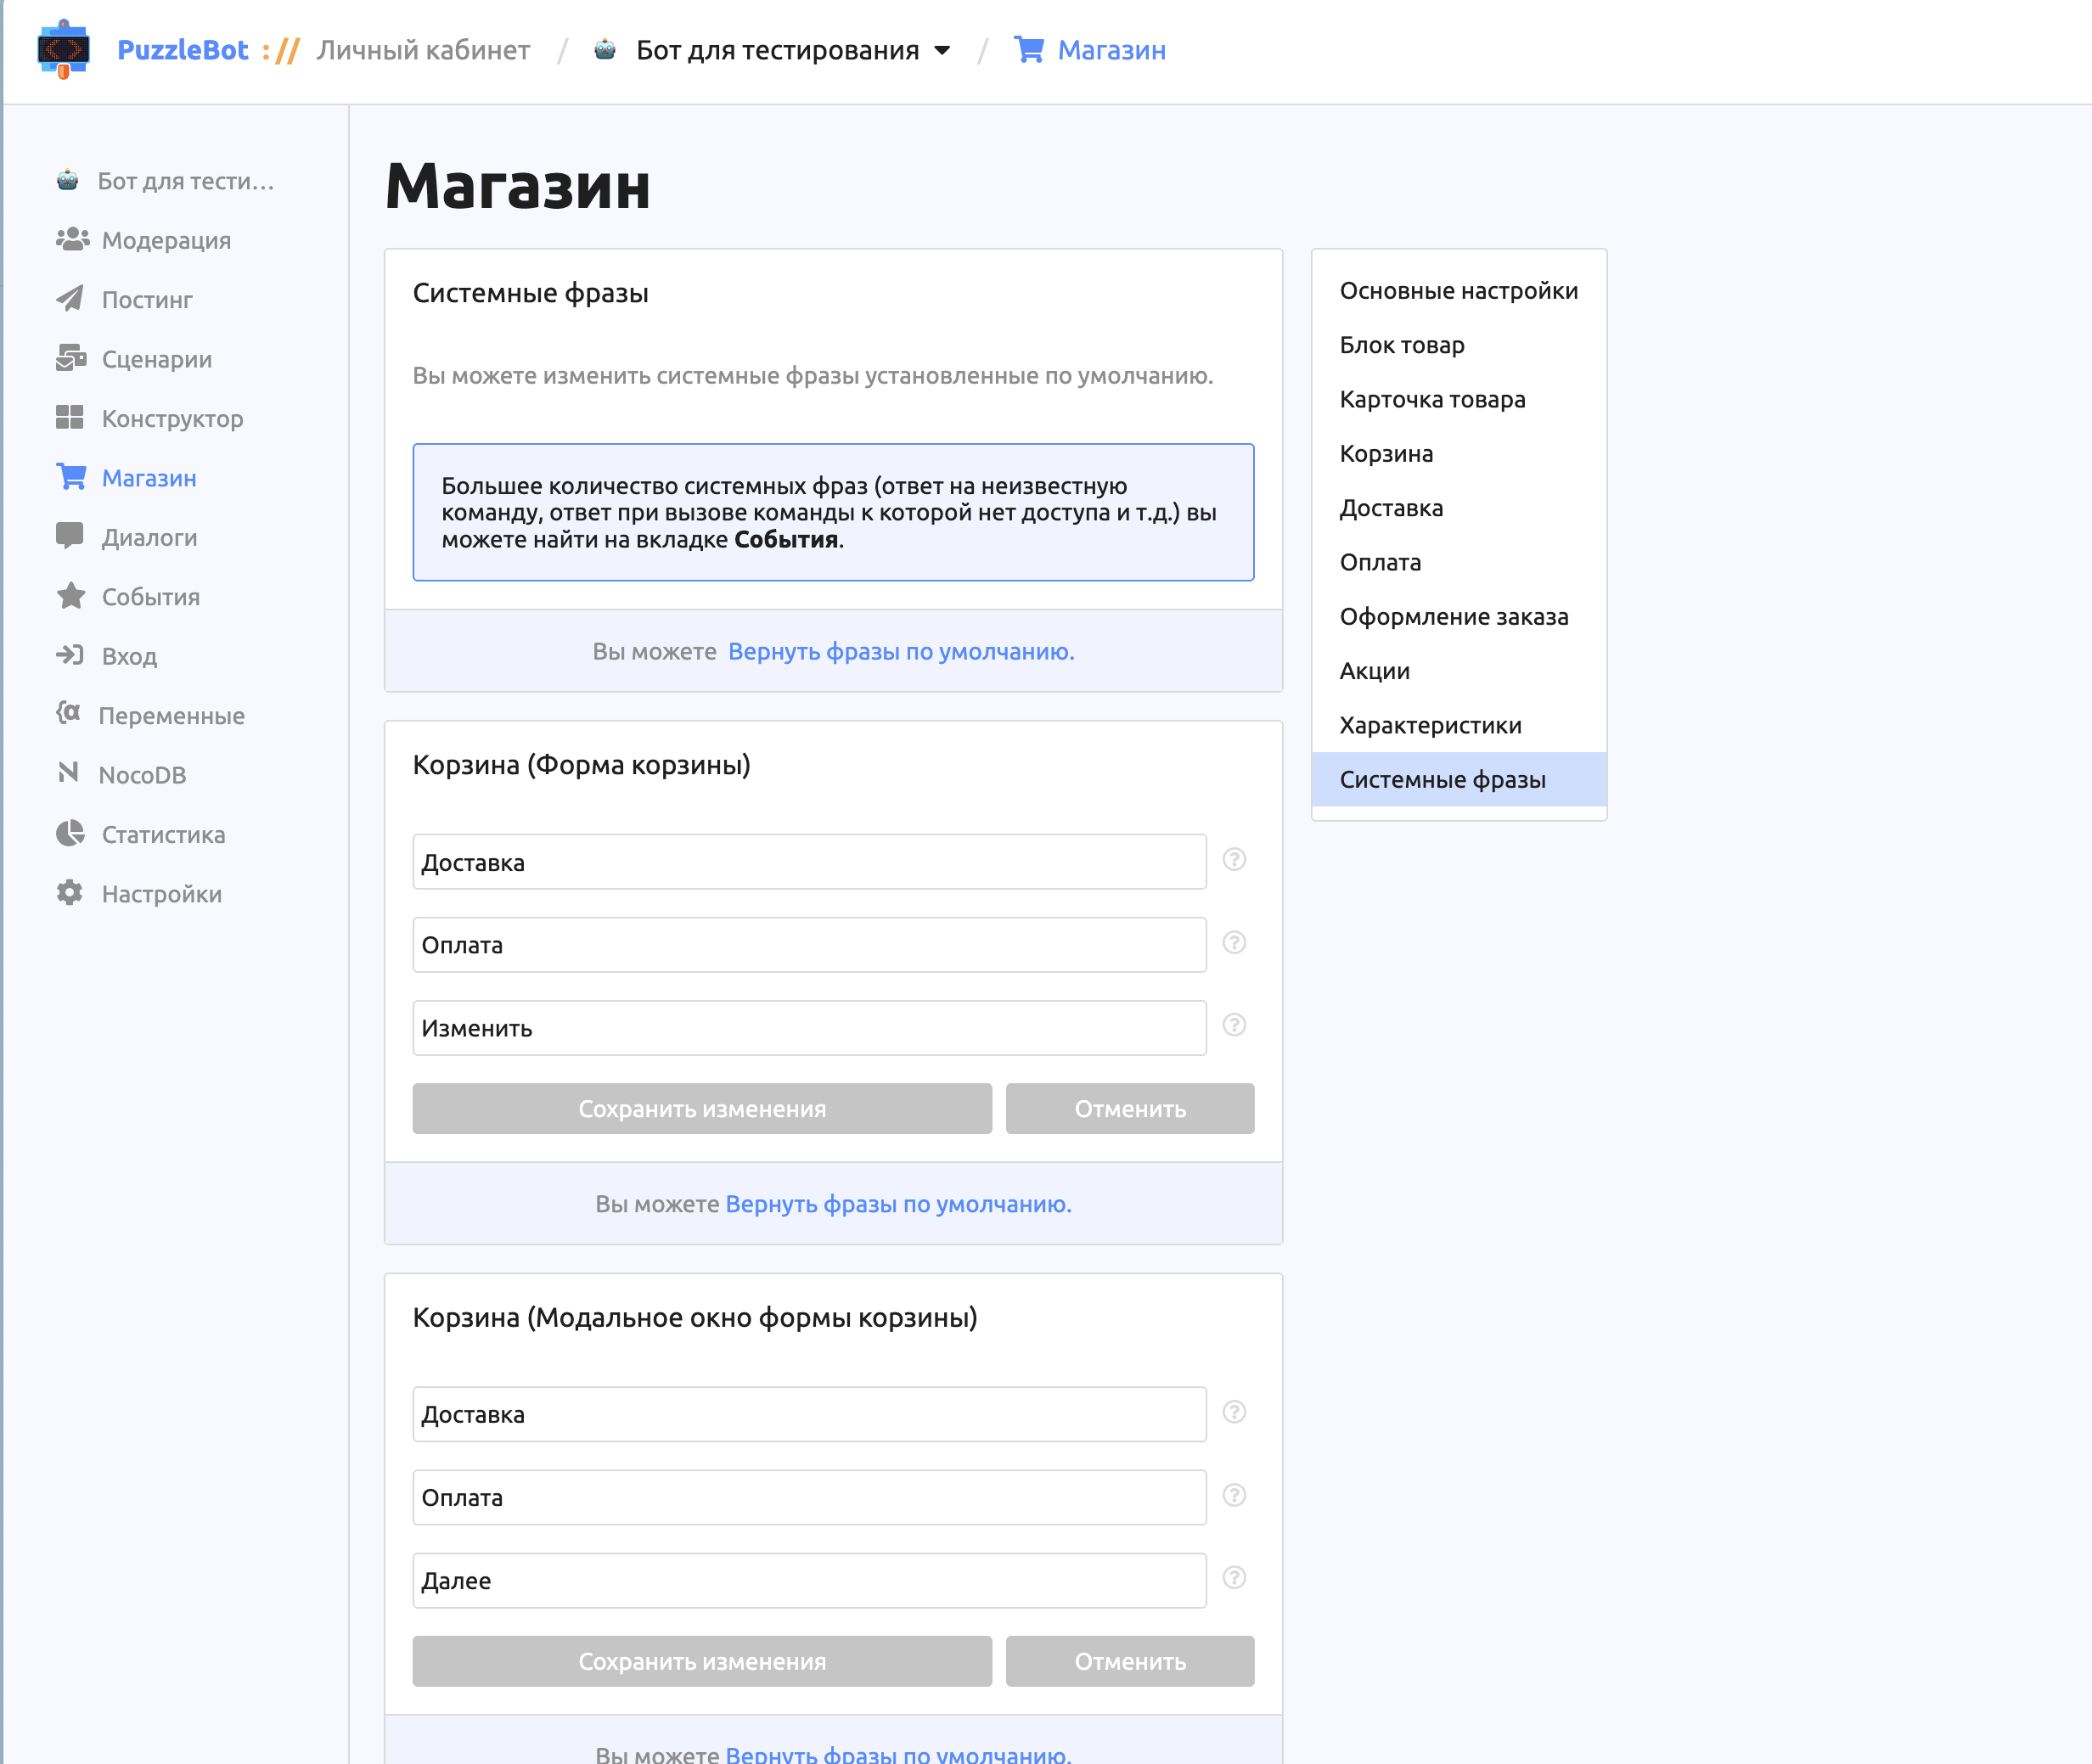
In this section, you can edit system phrases, such as the names of the buttons in the cart.