This article covers the interface and features of the Moderation tab.
For a quicker introduction to the tab, watch the video overview:
00:07 — Interface of the whole tab
00:34 — Creating categories
00:44 — What categories are for
01:06 — Category settings
01:36 — Changing users' categories
01:41 — Selecting users
02:12 — Moderation in resources
02:12 — Changing users' rights and permissions
02:21 — Changing categories' rights and permissions
Moderation is the section for working with the subscribers of your connected bots. Here you can:
See the number of users and detailed information about each one, and change their individual data and processes.
Create and edit categories and assign them to users.
Export users.
What the user table can do
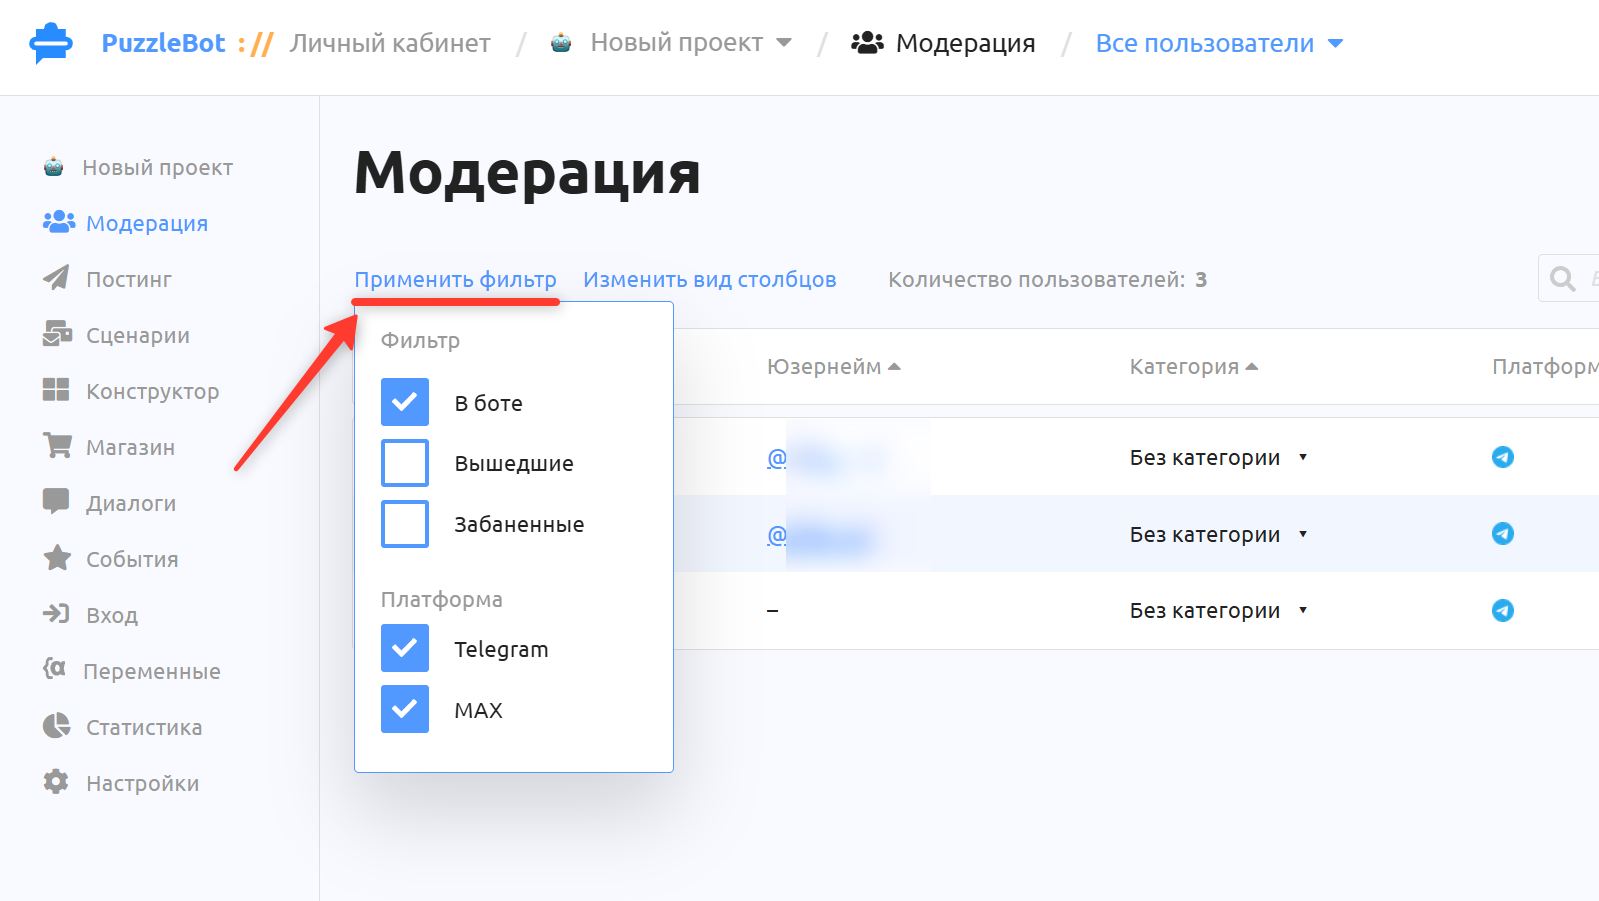
Apply filter lets you choose which users to show on the page. You can show only users of Telegram or Max bots, and also view users who left or were blocked.
Users who left are users who stopped the bot themselves. They can start the bot again and keep using it.
Blocked users are users you blocked yourself by clicking the block button. They can't use the bot until you unblock them.
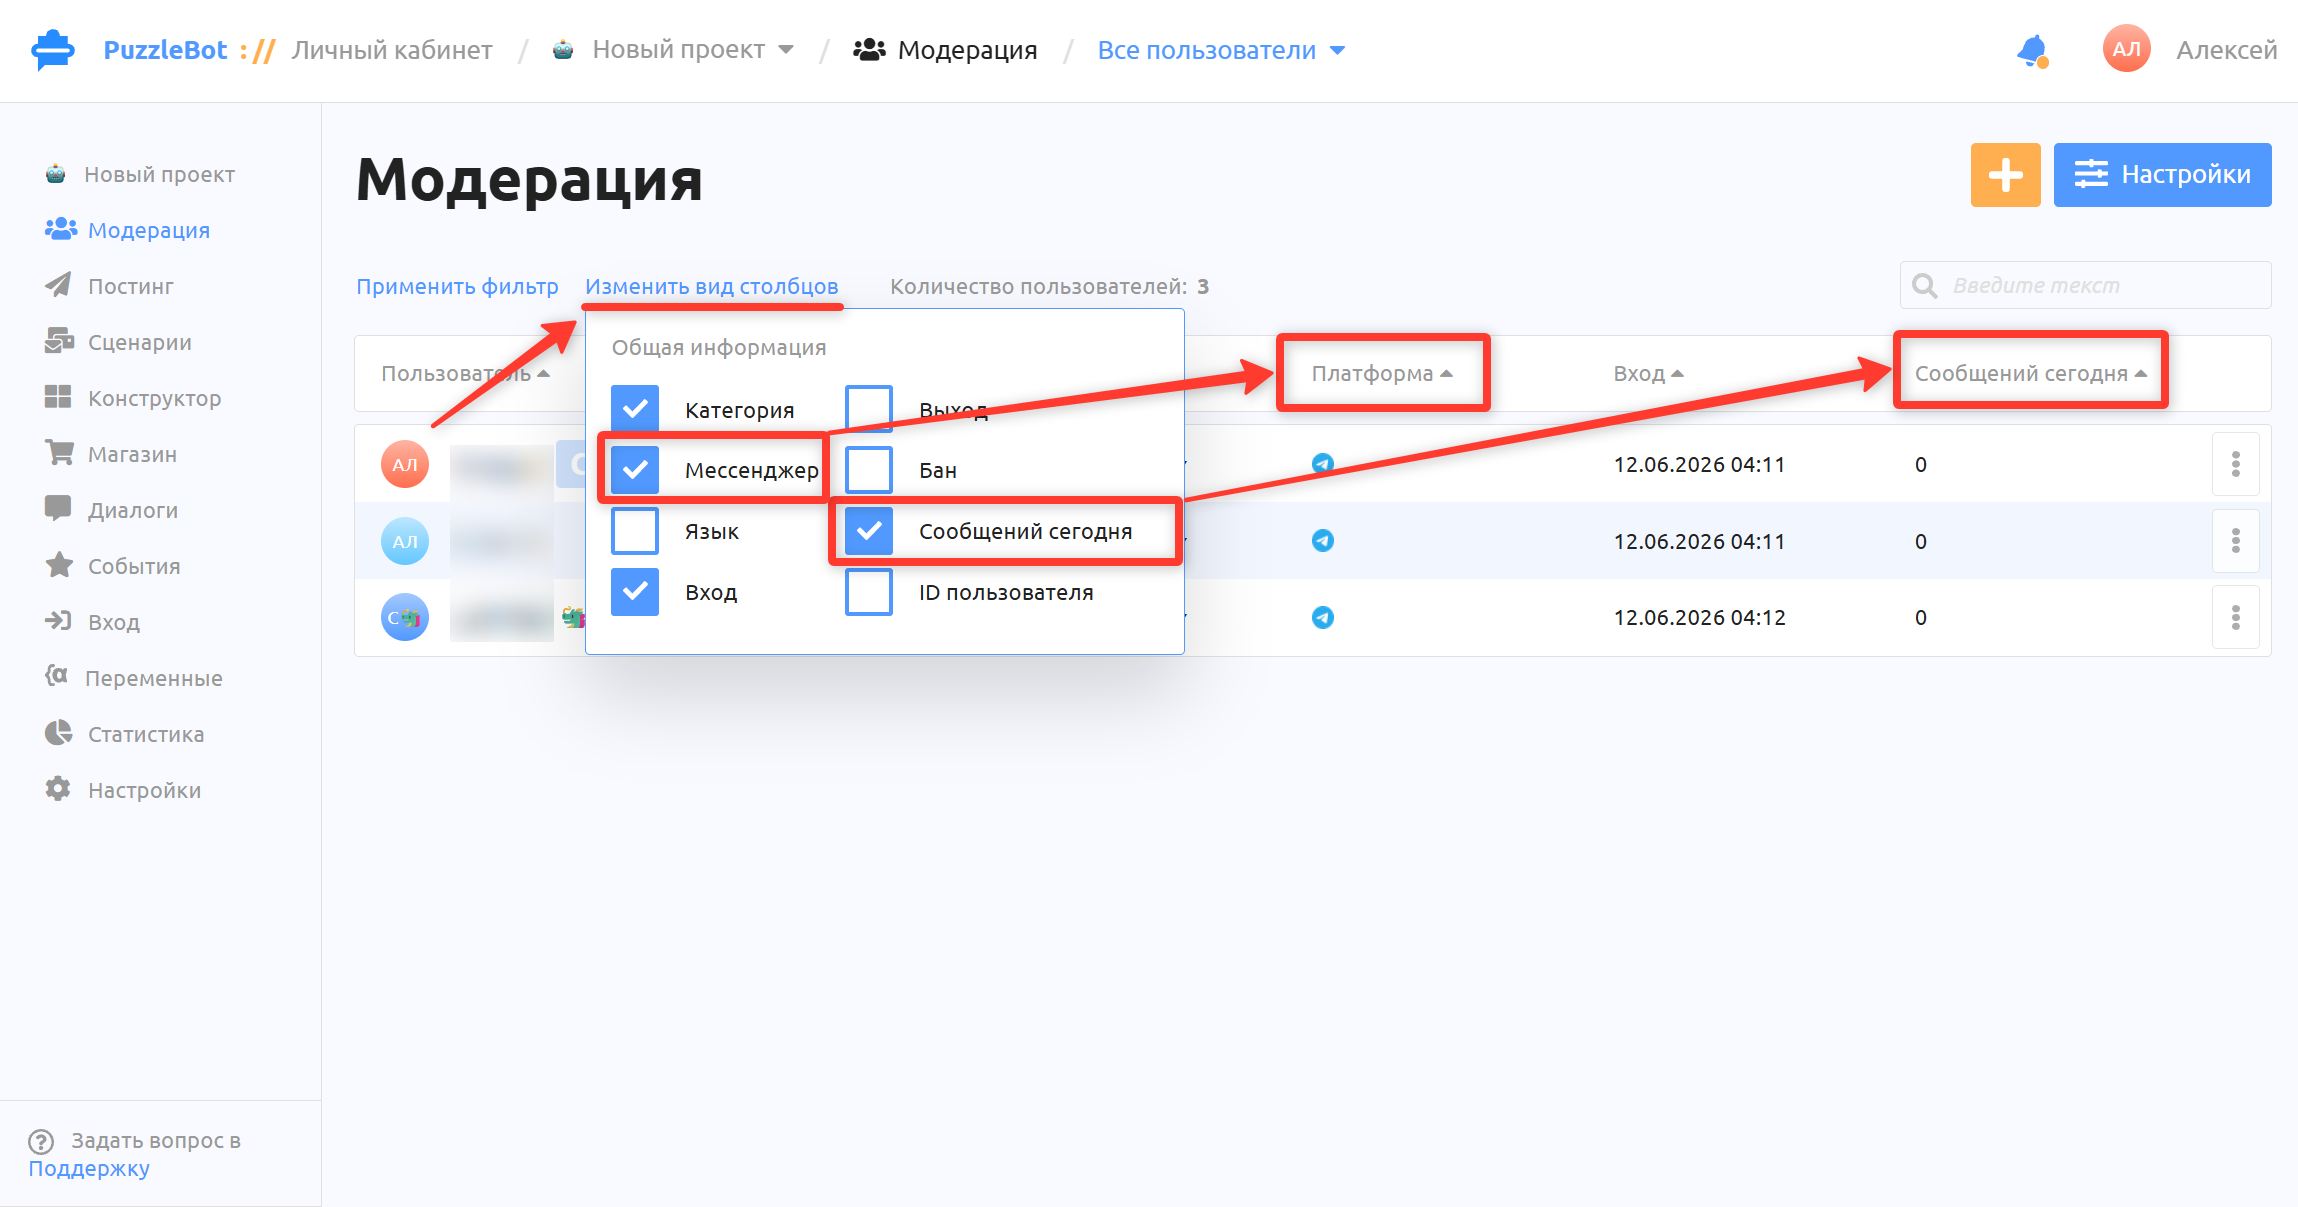
Change columns lets you add extra information columns to the user table.
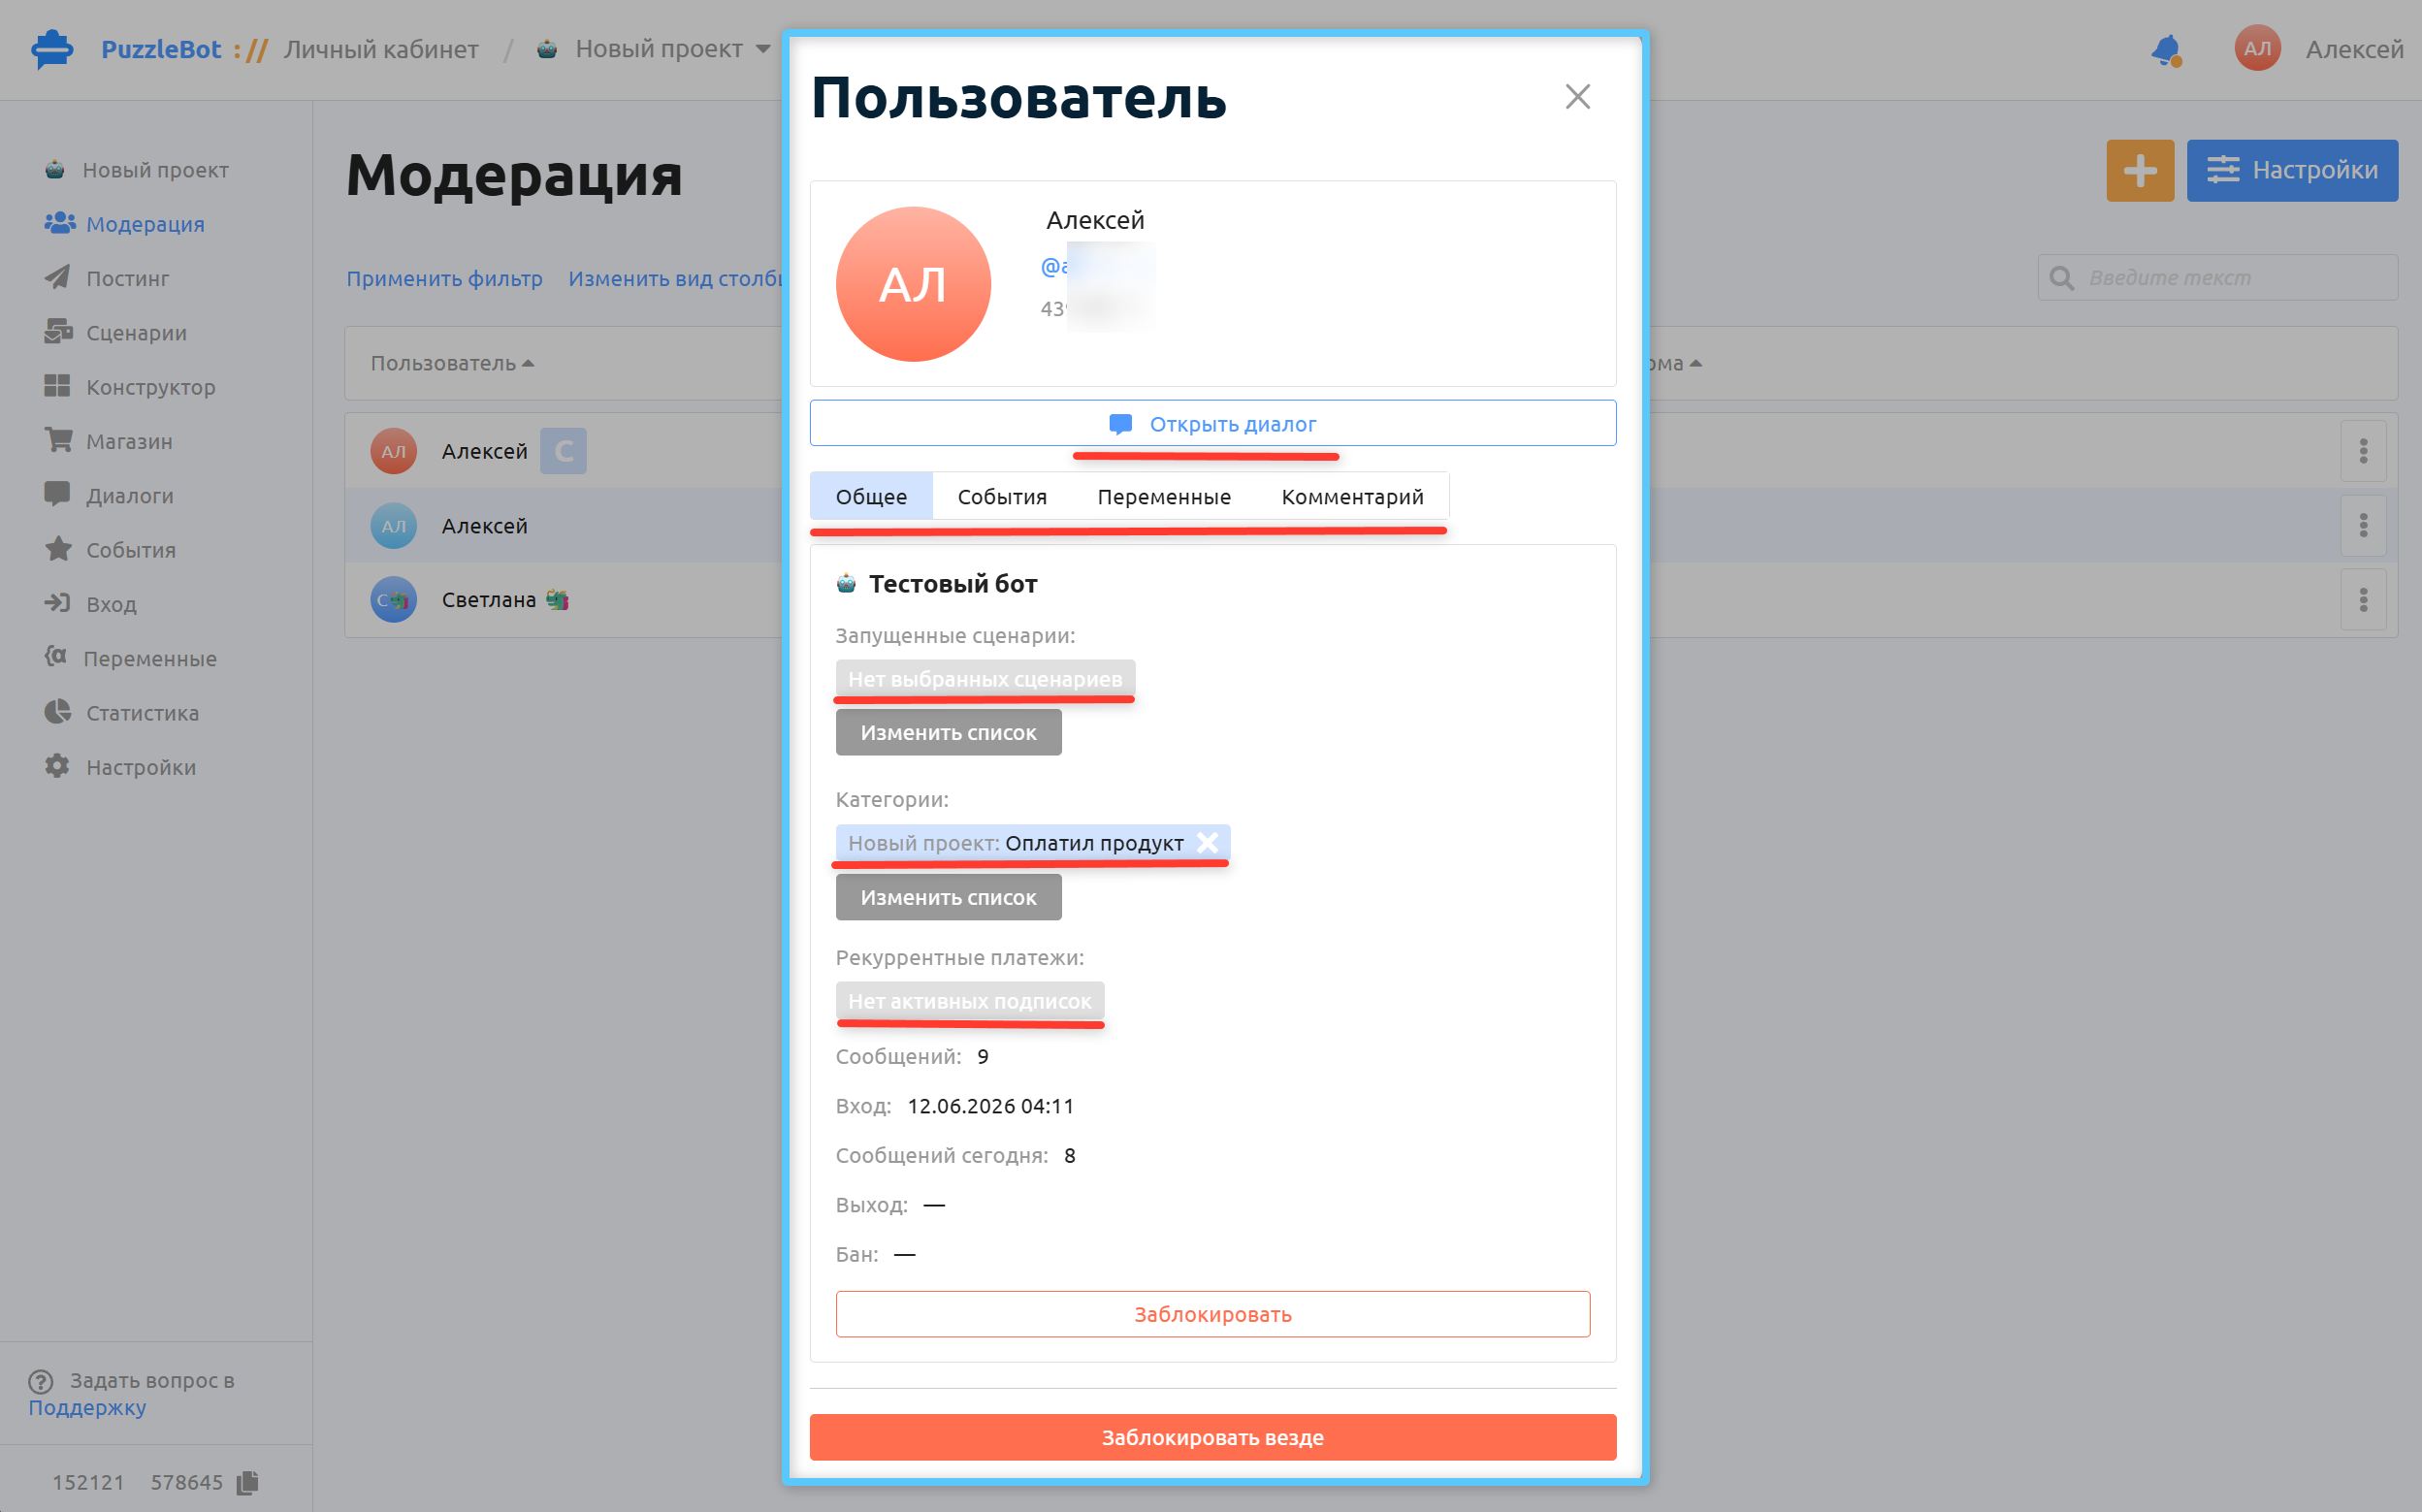
Click a user to open a card with detailed information about them.
Open dialog takes you to the "Dialogs" section, to the dialog with the selected user.
Running scenarios shows which scenarios from the "Scenarios" section are running for the user. You can stop or start scenarios manually by clicking "Change scenario".
Categories shows which categories are assigned to the user. Edit list lets you assign or remove categories manually.
Recurring payments shows the subscription name and whether the user has autopayments enabled for your products.
Block and Block everywhere let you block the user in the current bot or everywhere, including resources (channels and groups).
Events is a subsection where you can filter and view the date and time of the user's events, such as changes of categories and variables, payments, orders, scenario launches and so on.
Variables is where you can view and change the values of the user's variables. Only variables you created in the Variables section are shown. Values of system variables are not shown.
Categories
Categories group users so that you can apply individual actions and permissions to them: for example, send targeted broadcasts, change rights in a group, or restrict or allow access to certain commands and sections of the bot. You can assign categories to users manually, or automatically in the bot when users perform certain actions or call commands. Learn more in the article about categories.
Creating categories
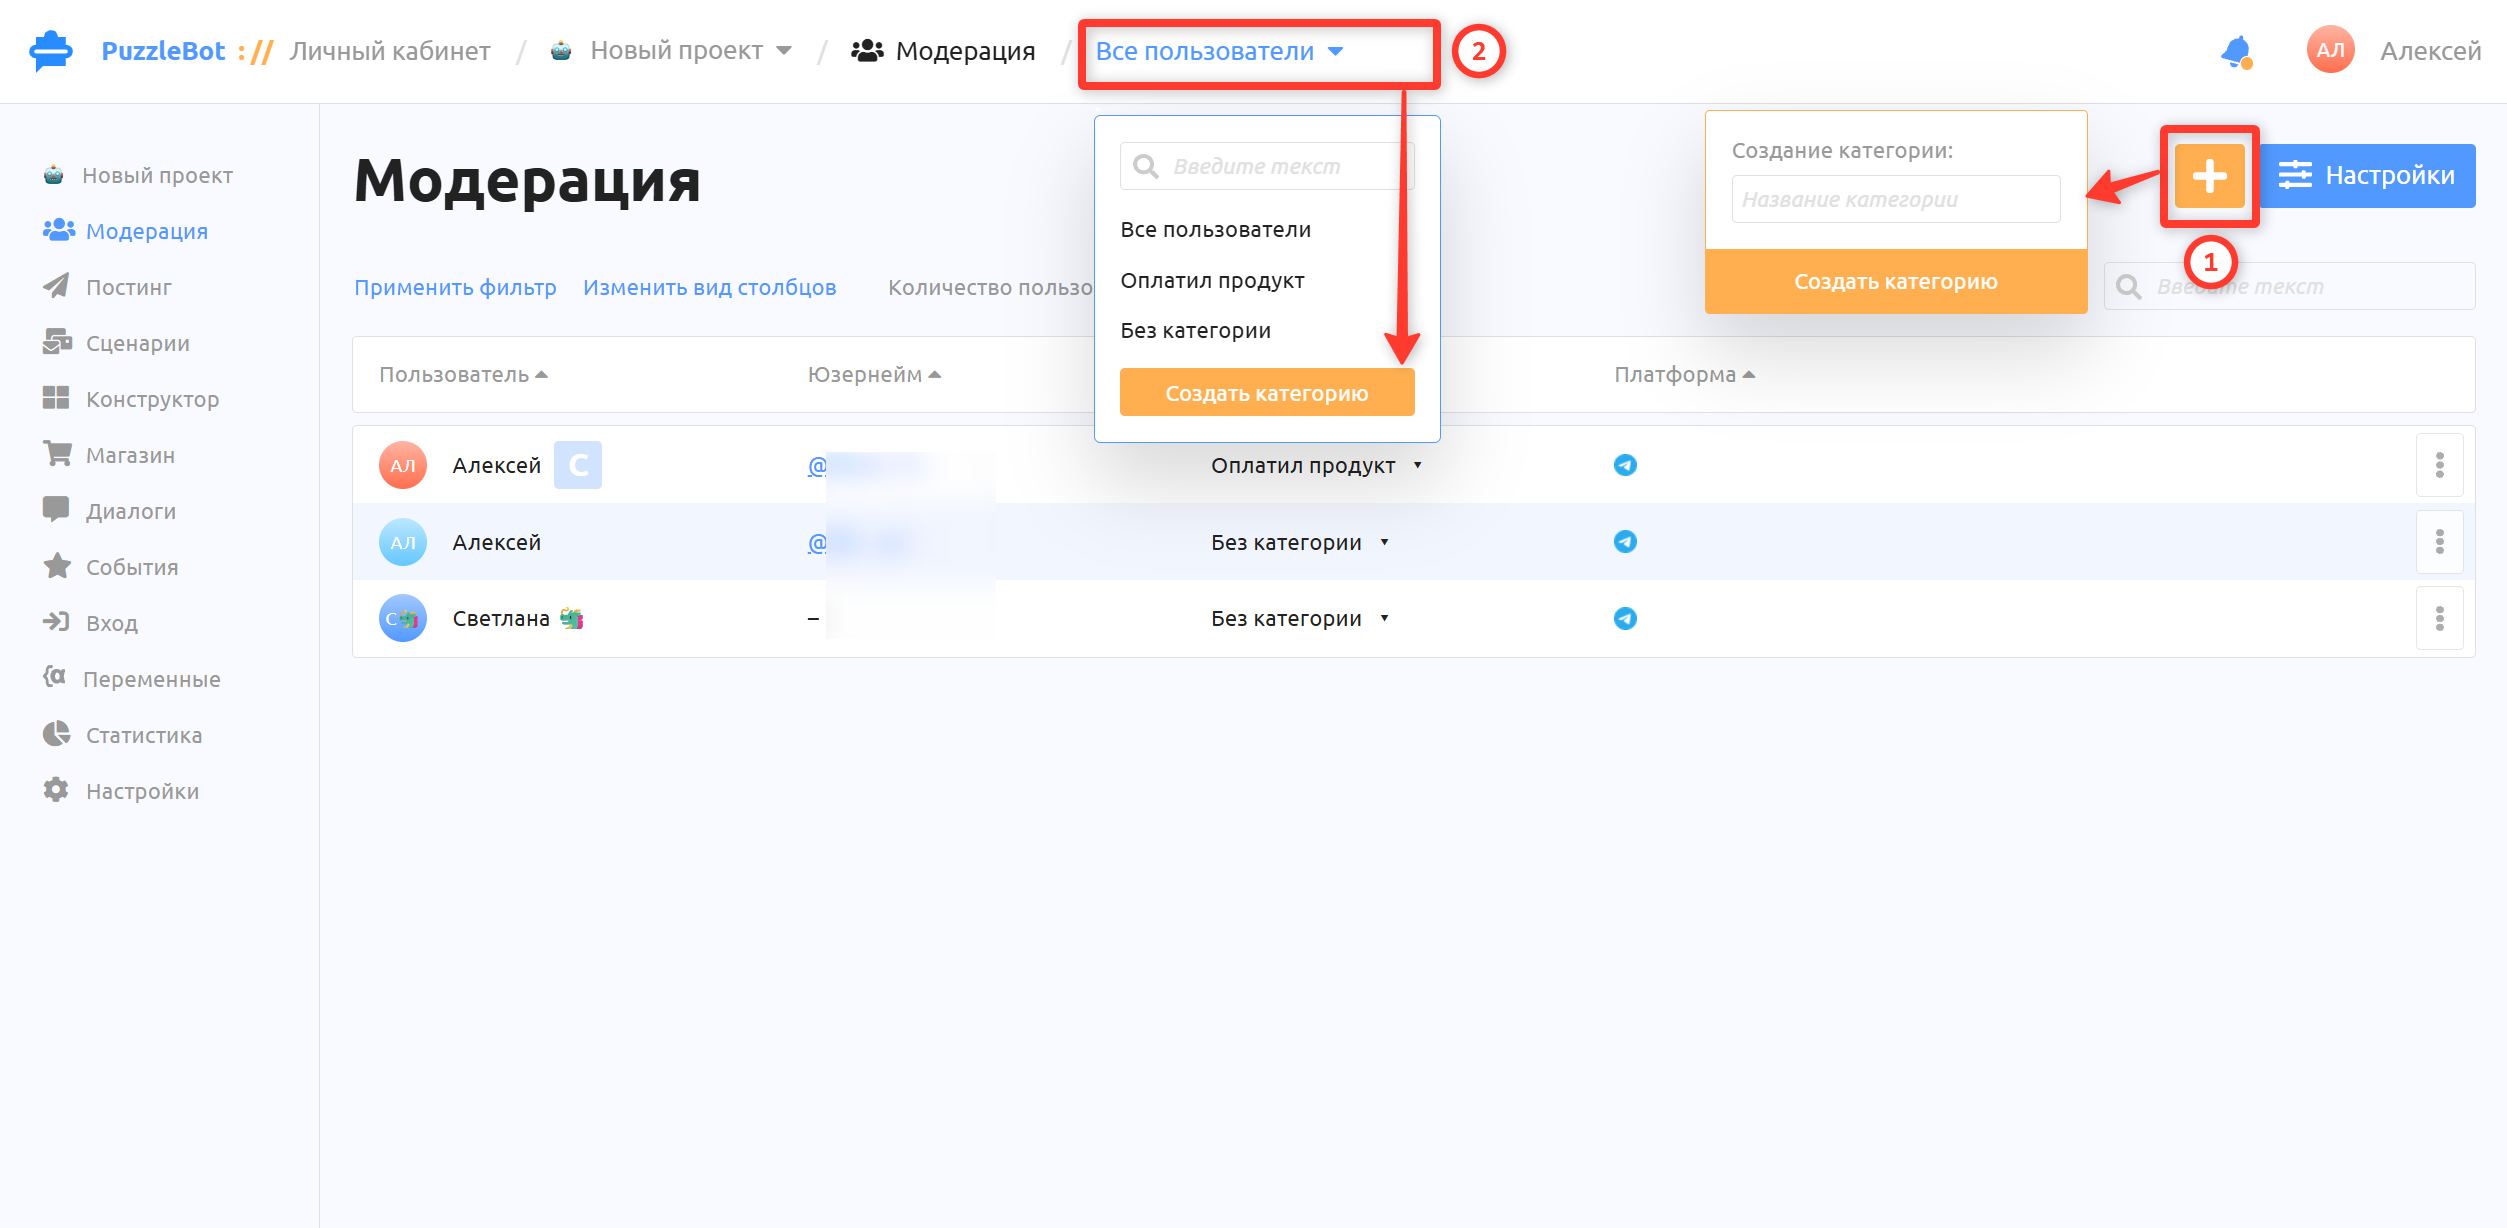
There are two ways to create a category:
Click the plus button [+] → enter the category name → Create category.
Click the category name at the top of the page → Create category → enter the category name → Create category.
Deleting and renaming categories
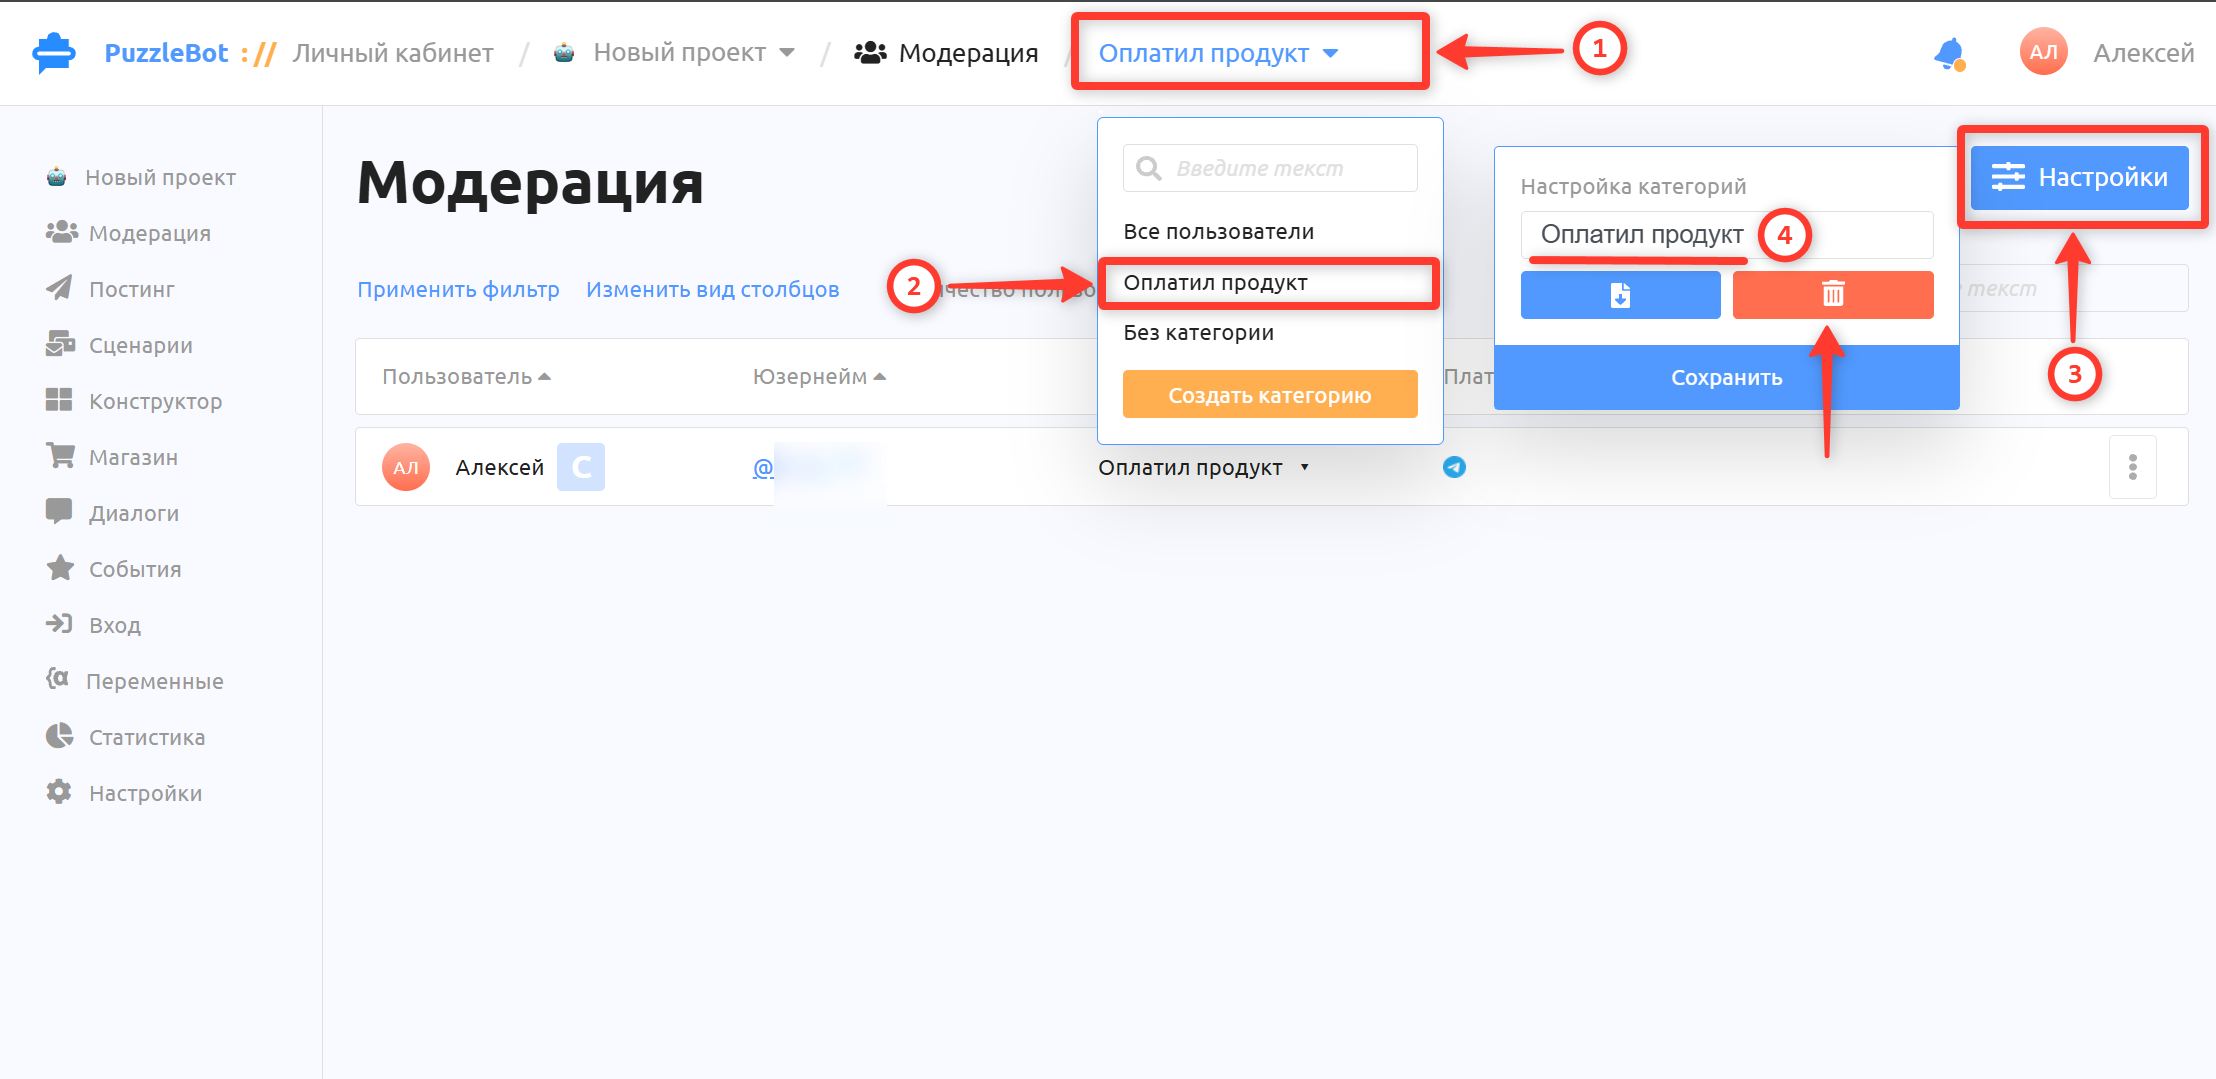
To delete or rename a category:
At the top of the page, select the category you want to change or delete.
Click "Settings" → enter the new category name → Save.
Click the red trash button if you want to delete the category.
Important! The "All users" category can't be deleted or changed.
Assigning categories to users
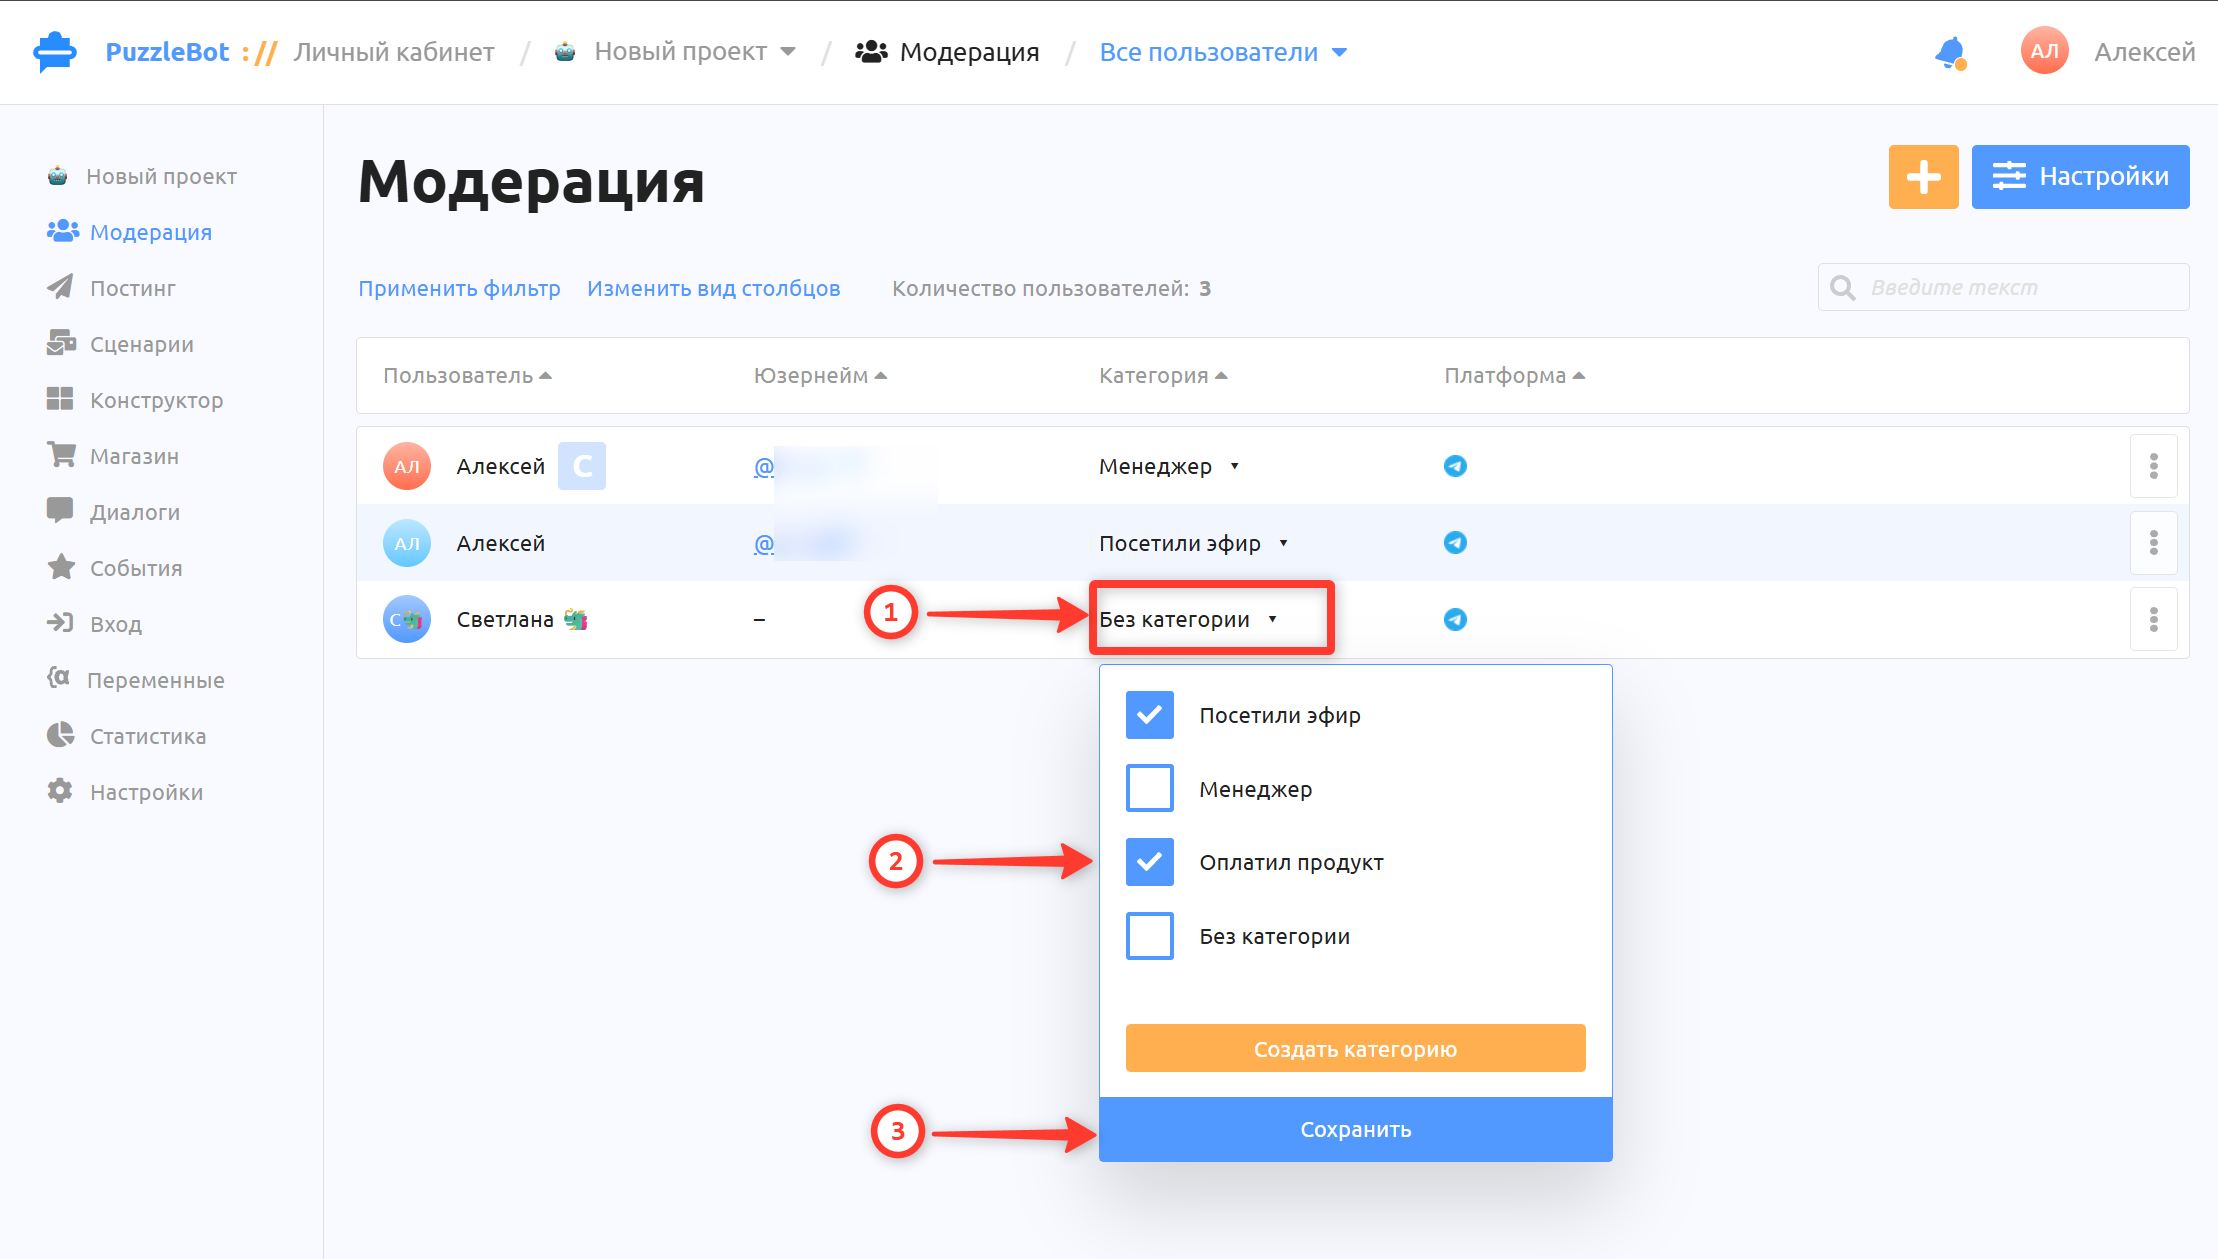
Click the category next to any user to change that user's categories.
Assigning categories or blocking users in bulk
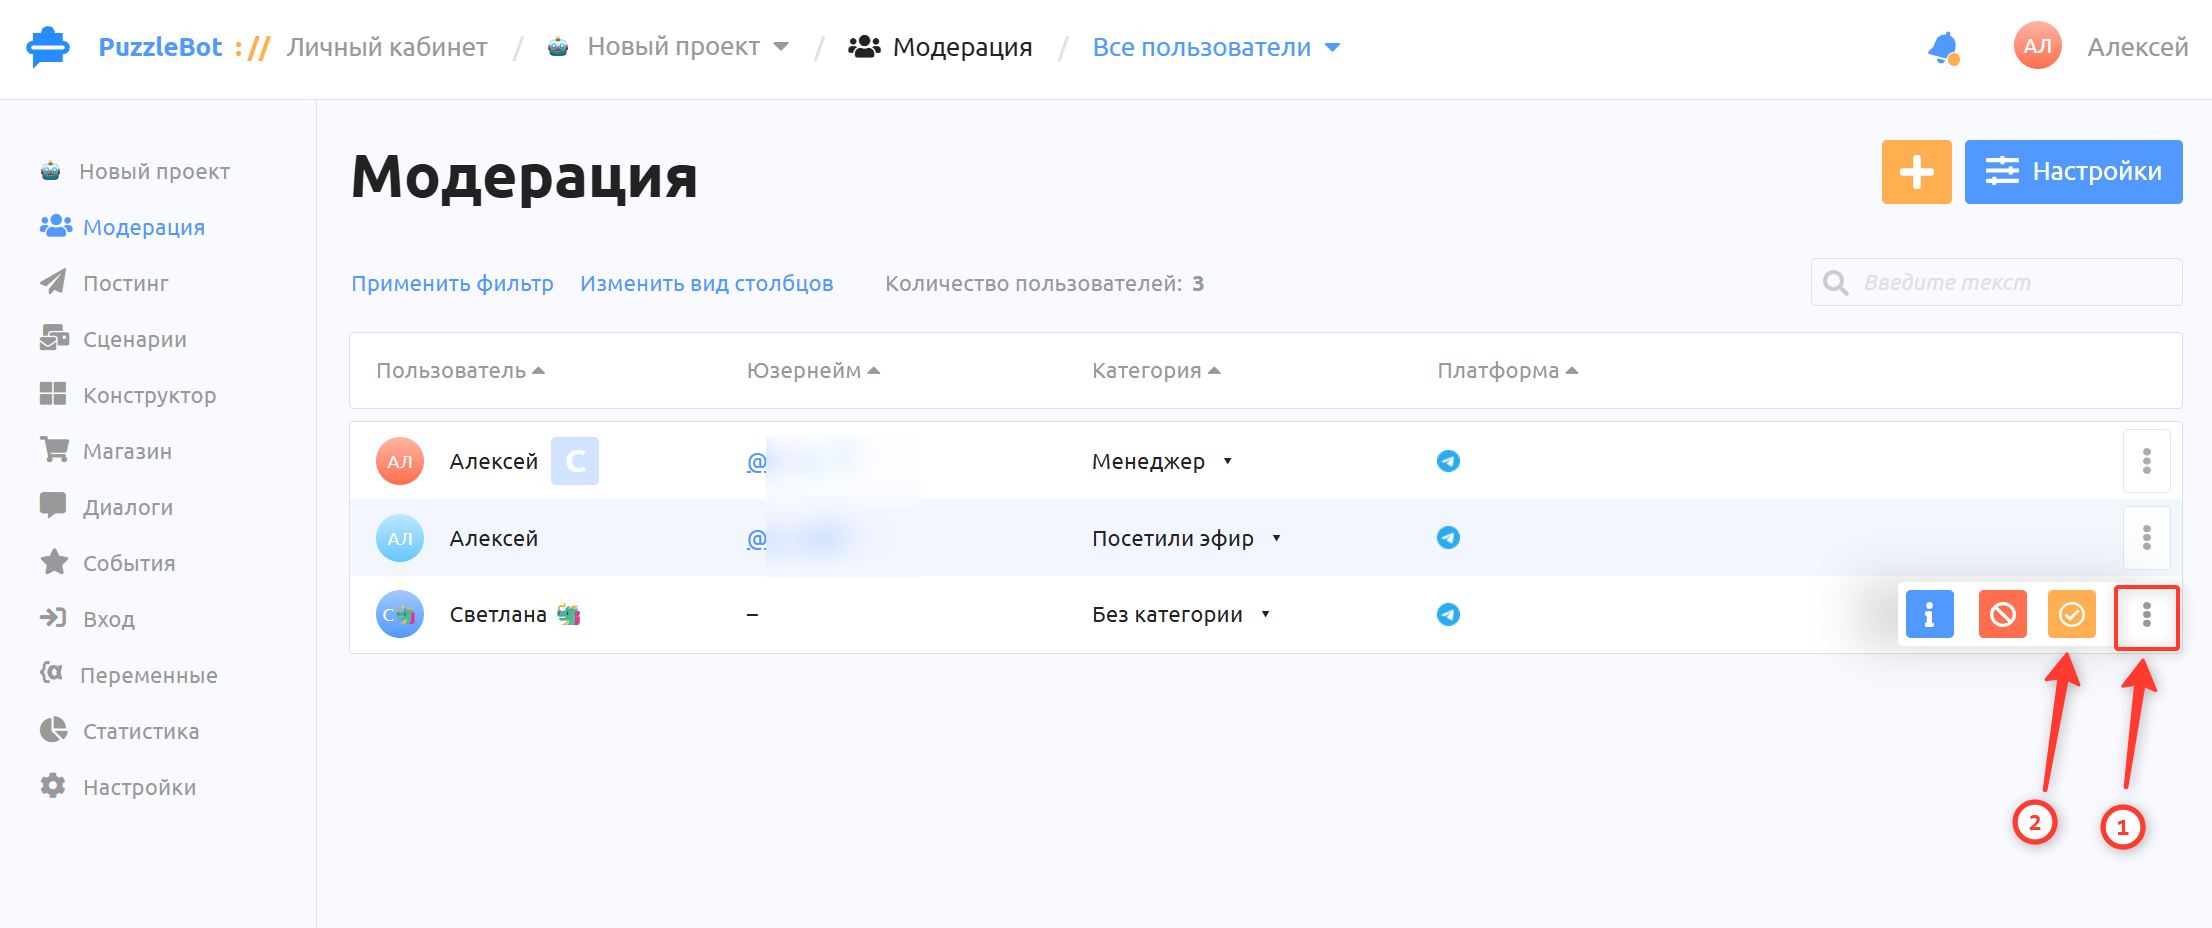
Click the three dots next to any user and select the checkbox.
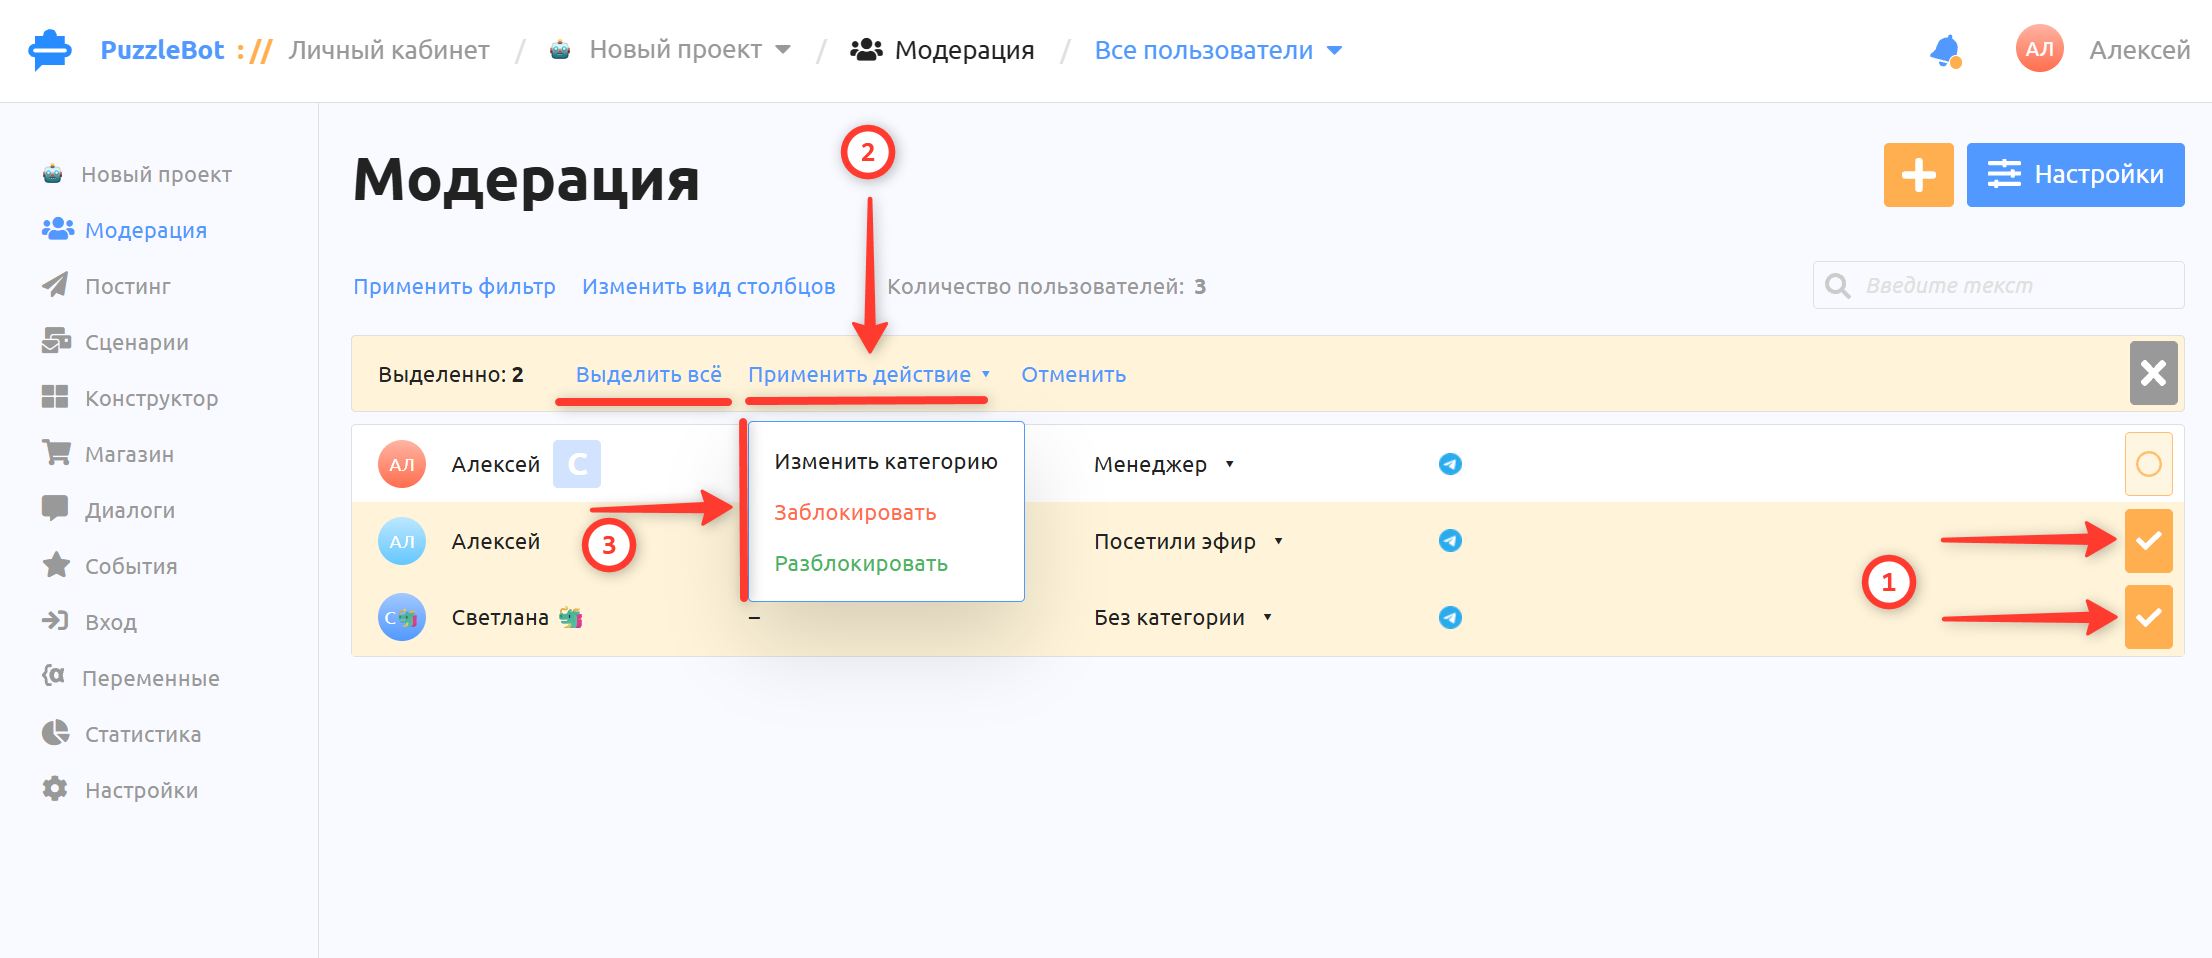
Select the checkboxes next to all users you want to assign the category to, or click "Select all".
Click "Apply action" → "Change category" → select the categories → click Save.
Select Block/Unblock if you want to block users in bulk.
Learn more about adding categories automatically in the bot and using them:
Exporting users
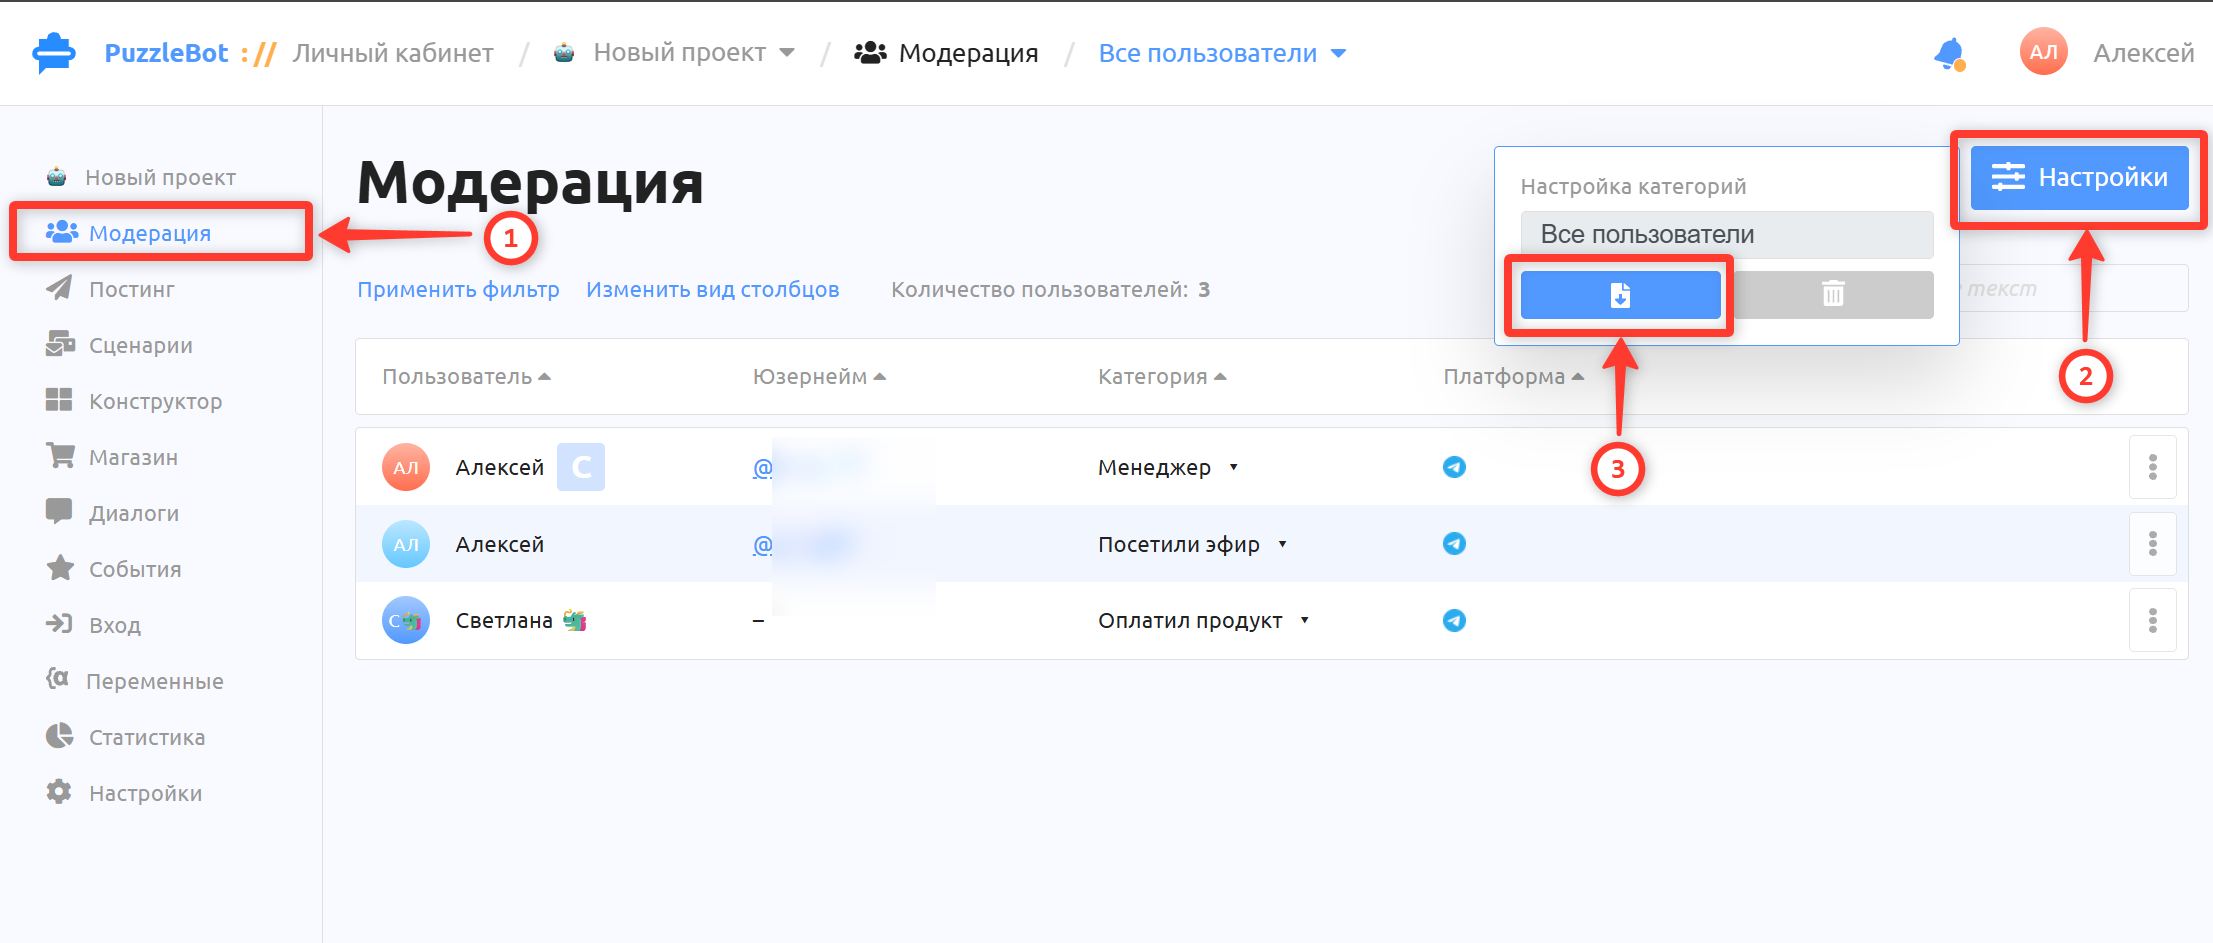
To export users, select the "All users" category (it is usually selected by default), then click "Settings" and the export button. A file with the list of subscribers will be downloaded to your device in csv format.