This article covers the interface and features of the Posting tab.
To get to know the tab more easily, we recommend watching the video overview.
00:05 — Interface of the whole tab
00:46 — Post statuses
01:17 — Modal window interface
01:53 — Multiposting, or sending to several places
02:32 — Additional settings
02:50 — Changing a post's status
03:08 — Editing a published post
As your project runs, your bots and resources build up a subscriber base. You can send broadcasts to these subscribers from the Posting section.
Posting is the section where you create and send a post to the audience of a bot or a resource (channel or group).
Creating a post
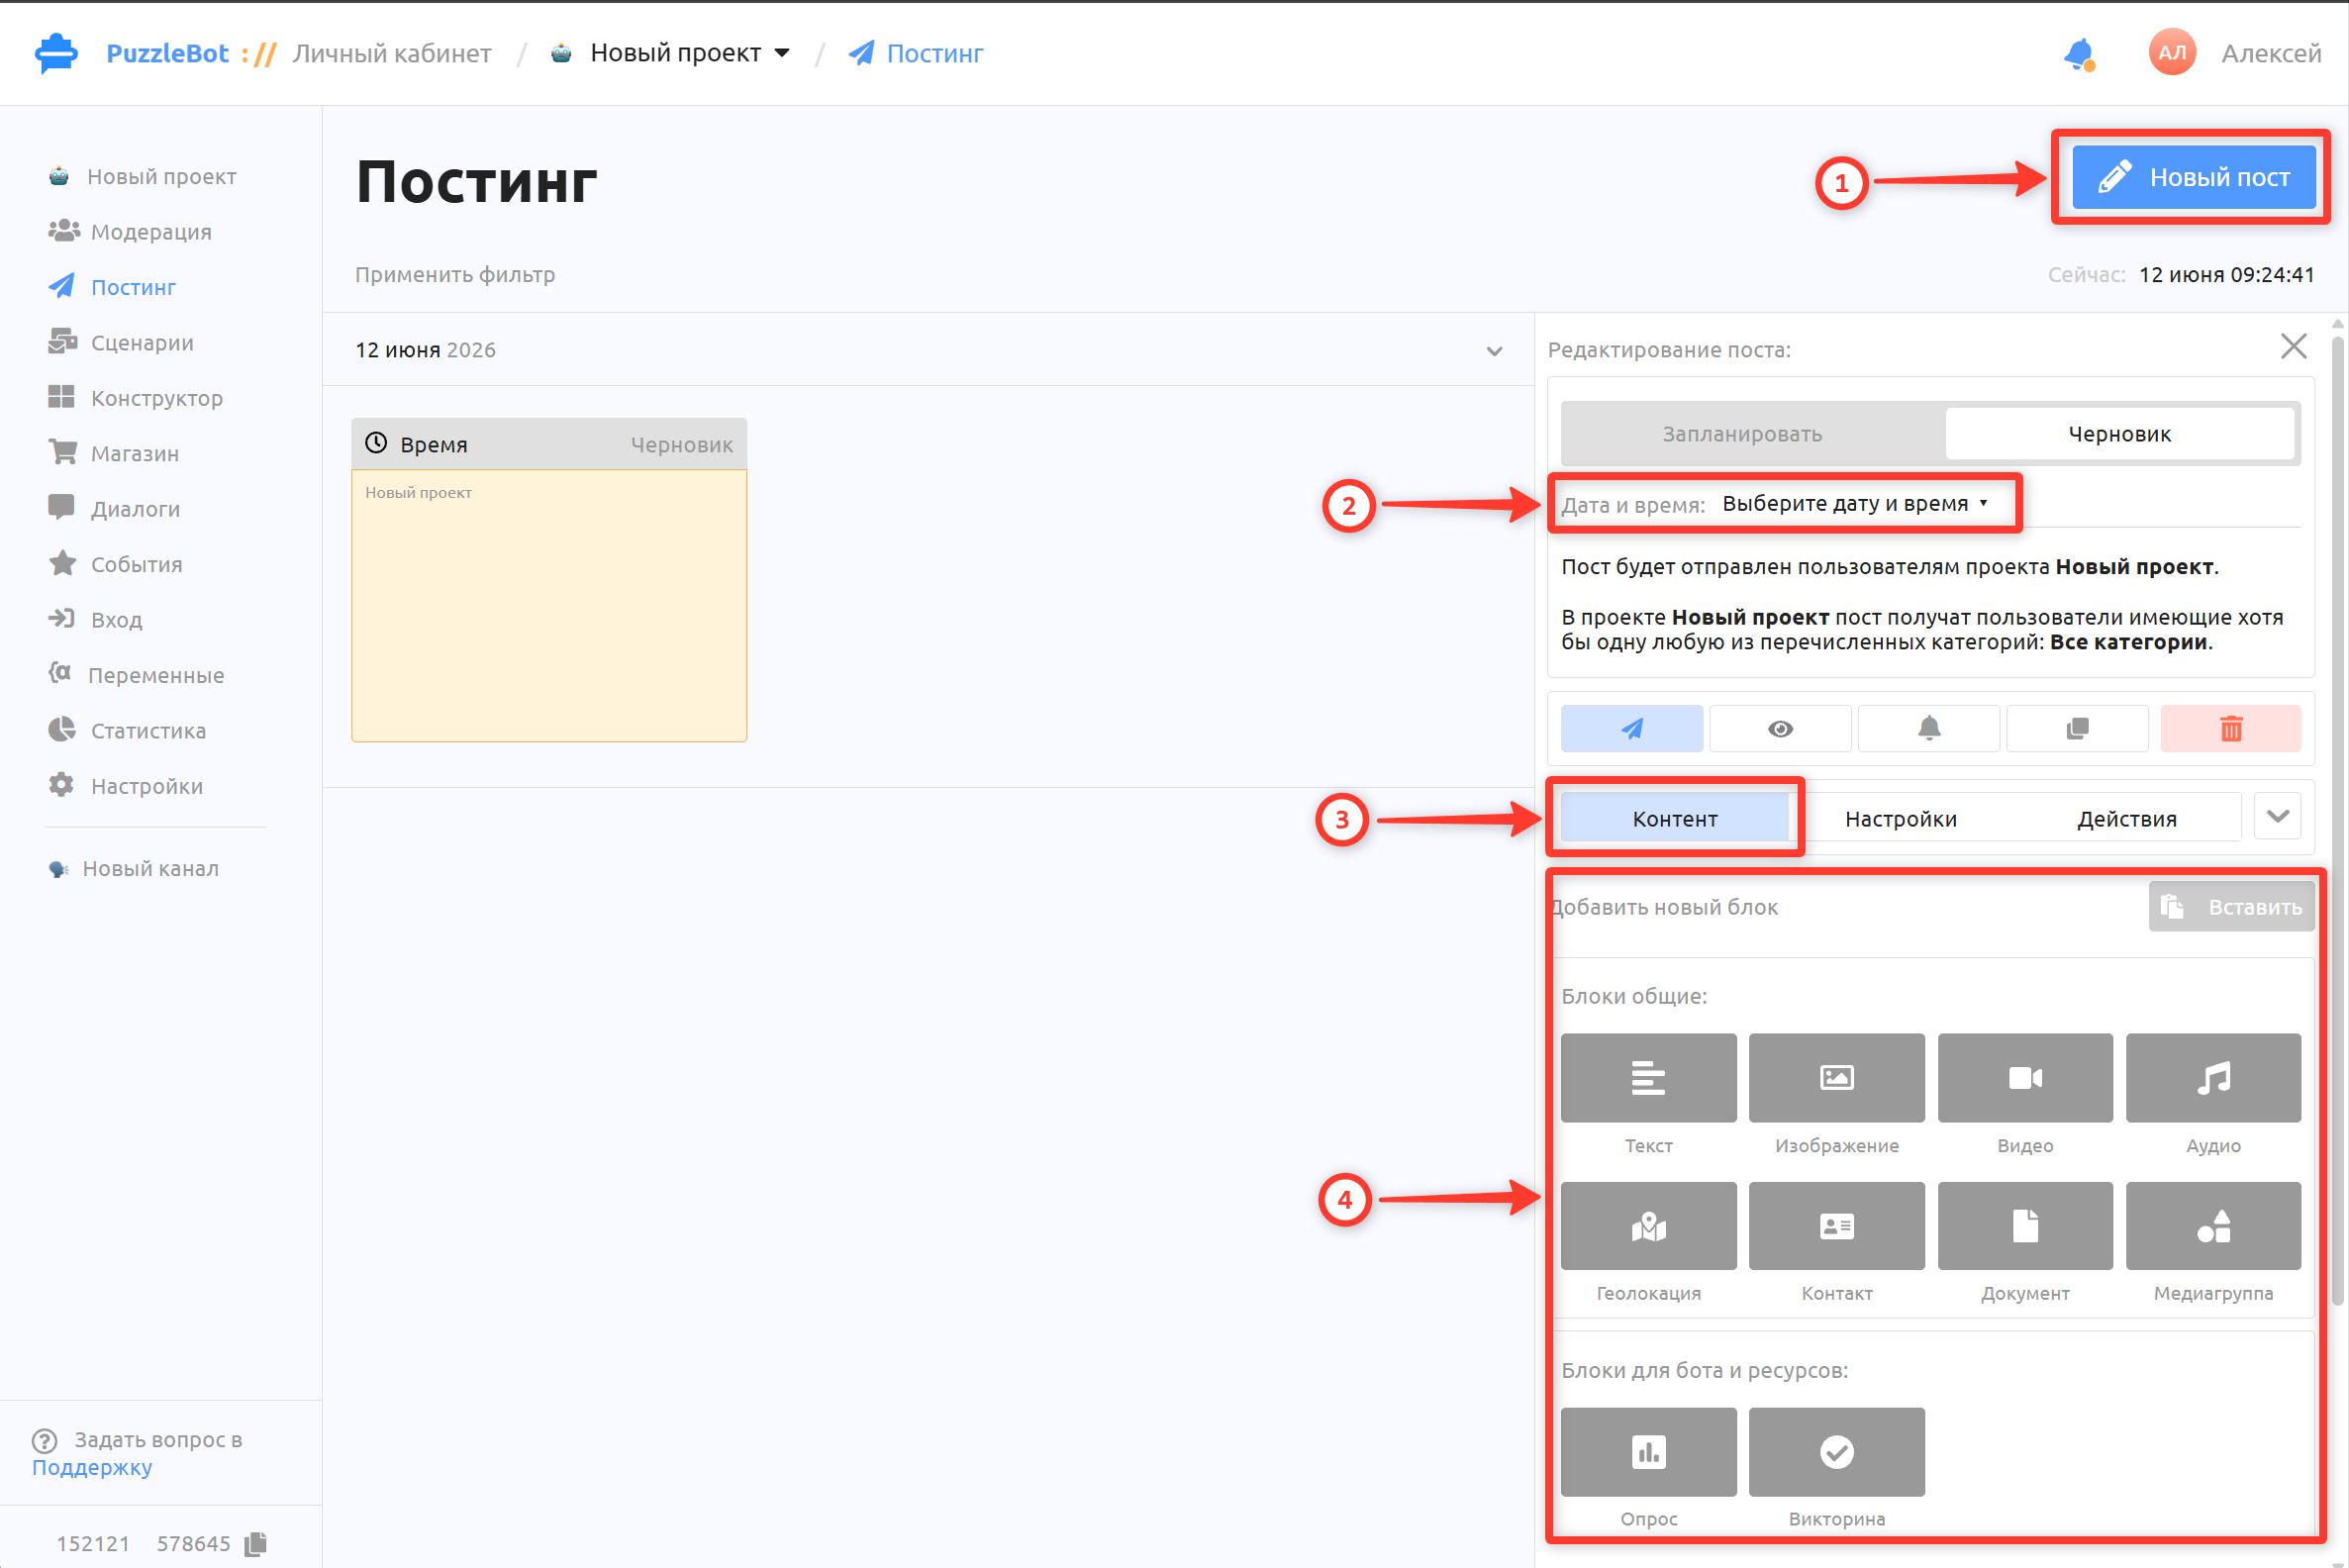
Click the "New post" button. The settings for content, send time and destination appear.
Select the send date and time if the post is planned for a specific day and time, or leave them unchanged to send the post right after it is created.
Select the "Content" tab to create the post content.
Add and fill in the blocks you need for the post: Text, Images, Video and so on.
Note: A post and its content can also be created on the Constructor tab, in any command. To send a post created in a command, in the post settings select the Actions tab → Add action → Send command or condition → enter the name of the command with the post.
Post settings
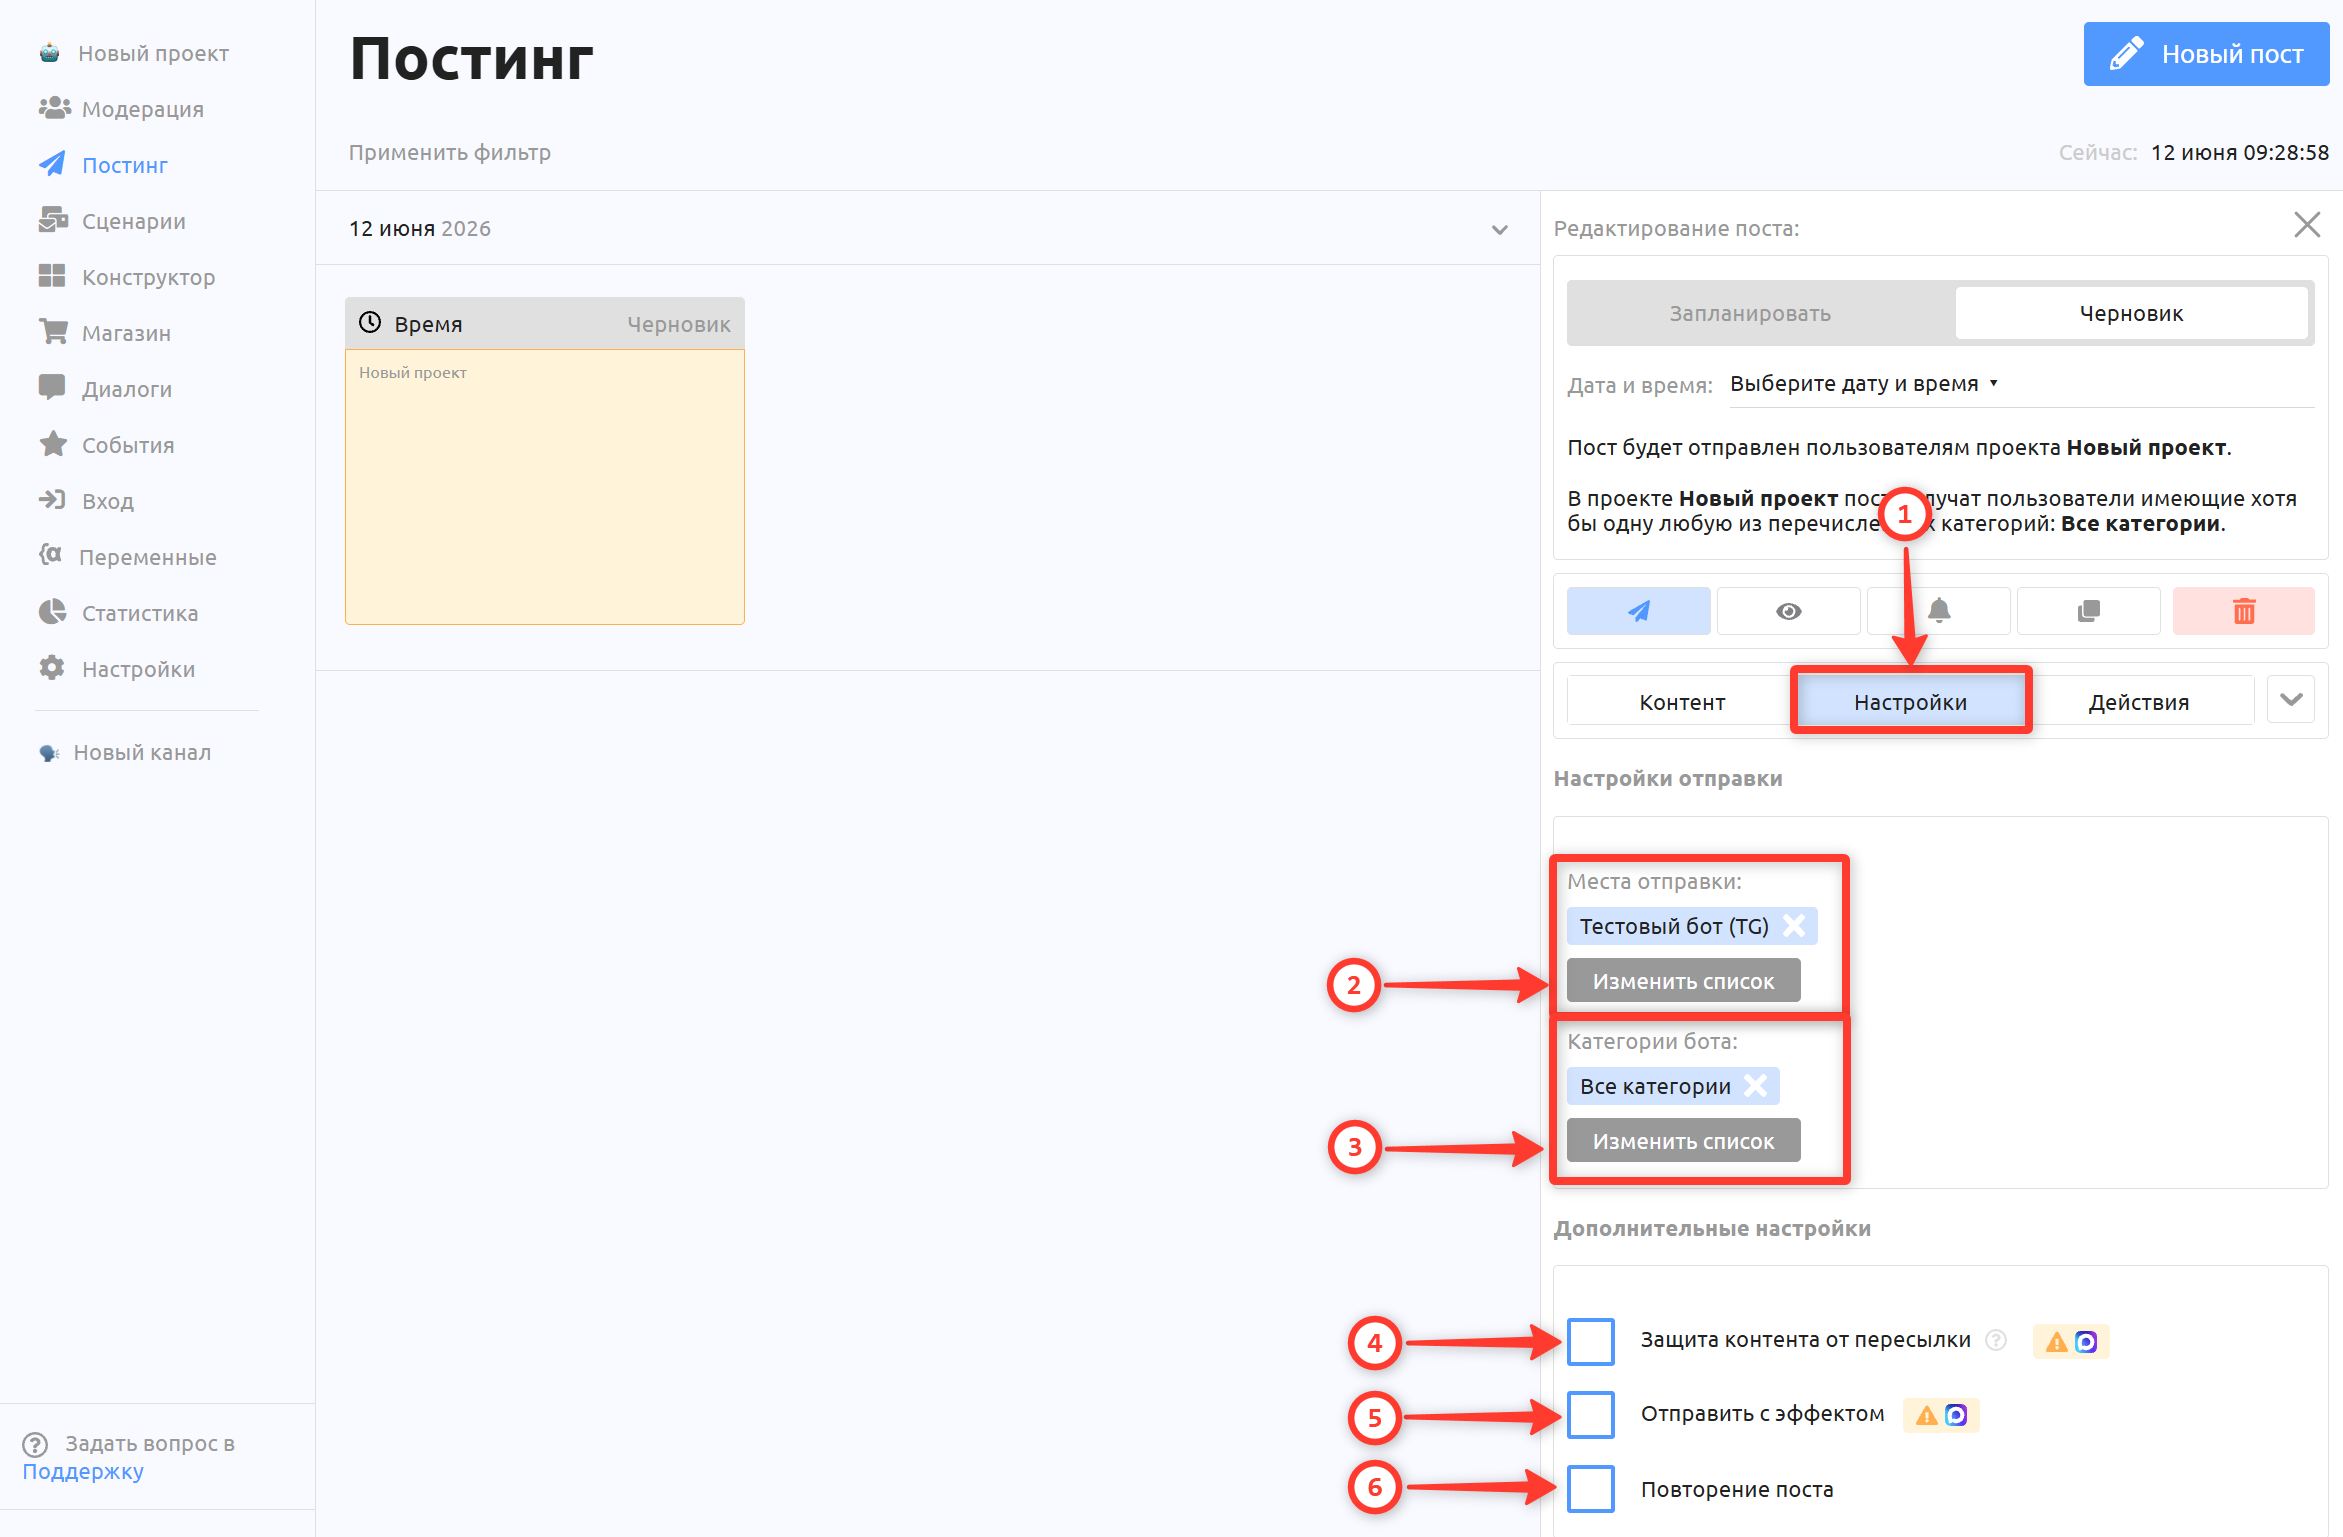
Switch to the Settings tab to choose the destination and, if you need to send the post to a user segment, the recipient category.
Destination — here you can choose the messenger to send to and, additionally, sending to connected channels and groups.
Bot categories — select the categories of post recipients. You can add several categories or excluding categories.
Learn more about sending a post to a user category: How to send a post to a user category or audience
Leave unchanged to send the post to all users.Select the "Protect content from forwarding" checkbox if you want to prevent other users from forwarding or downloading the post and its content in Telegram. This is useful when you send paid content or a paid course.
Important! This feature is not available for the Max messenger.Send with effect — lets you specify a reaction that is put on the post message after it is sent. For example: "❤️", "🔥", "👍🏼".
Post actions
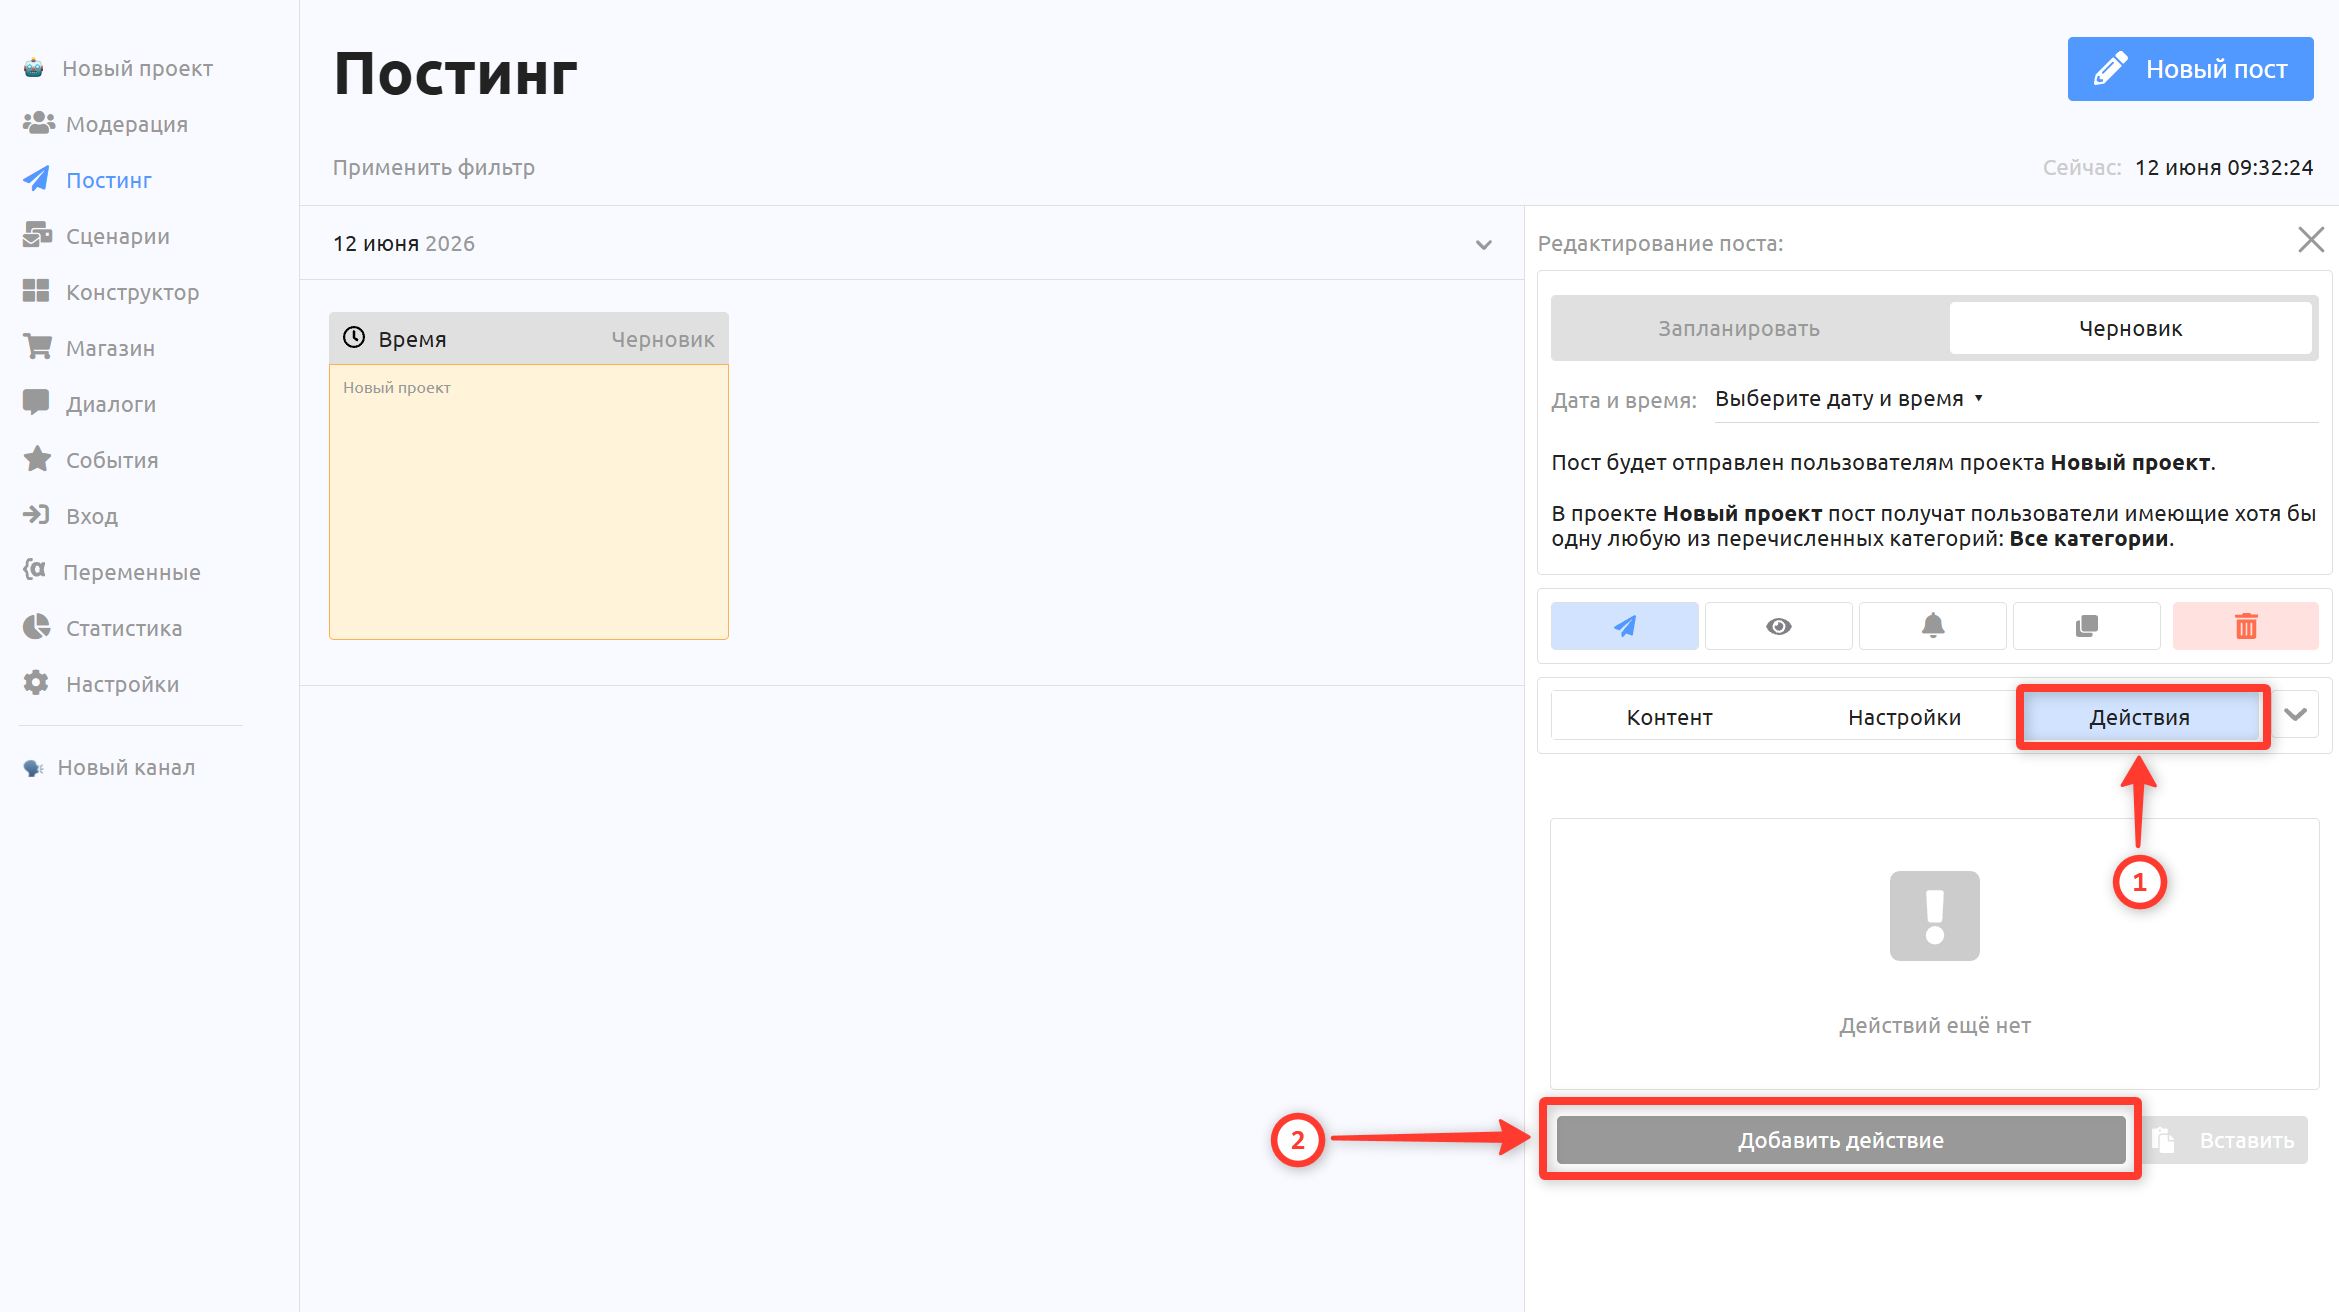
Select the Actions tab if, besides sending the post to the user, you need to perform additional actions in the bot.
Click "Add action" to choose the action you need, for example sending a command created in the Constructor section, changing categories and so on. You can add several actions; they run one after another once the post is sent.
Actions work only when the post is sent to a bot.
Sending and previewing a post
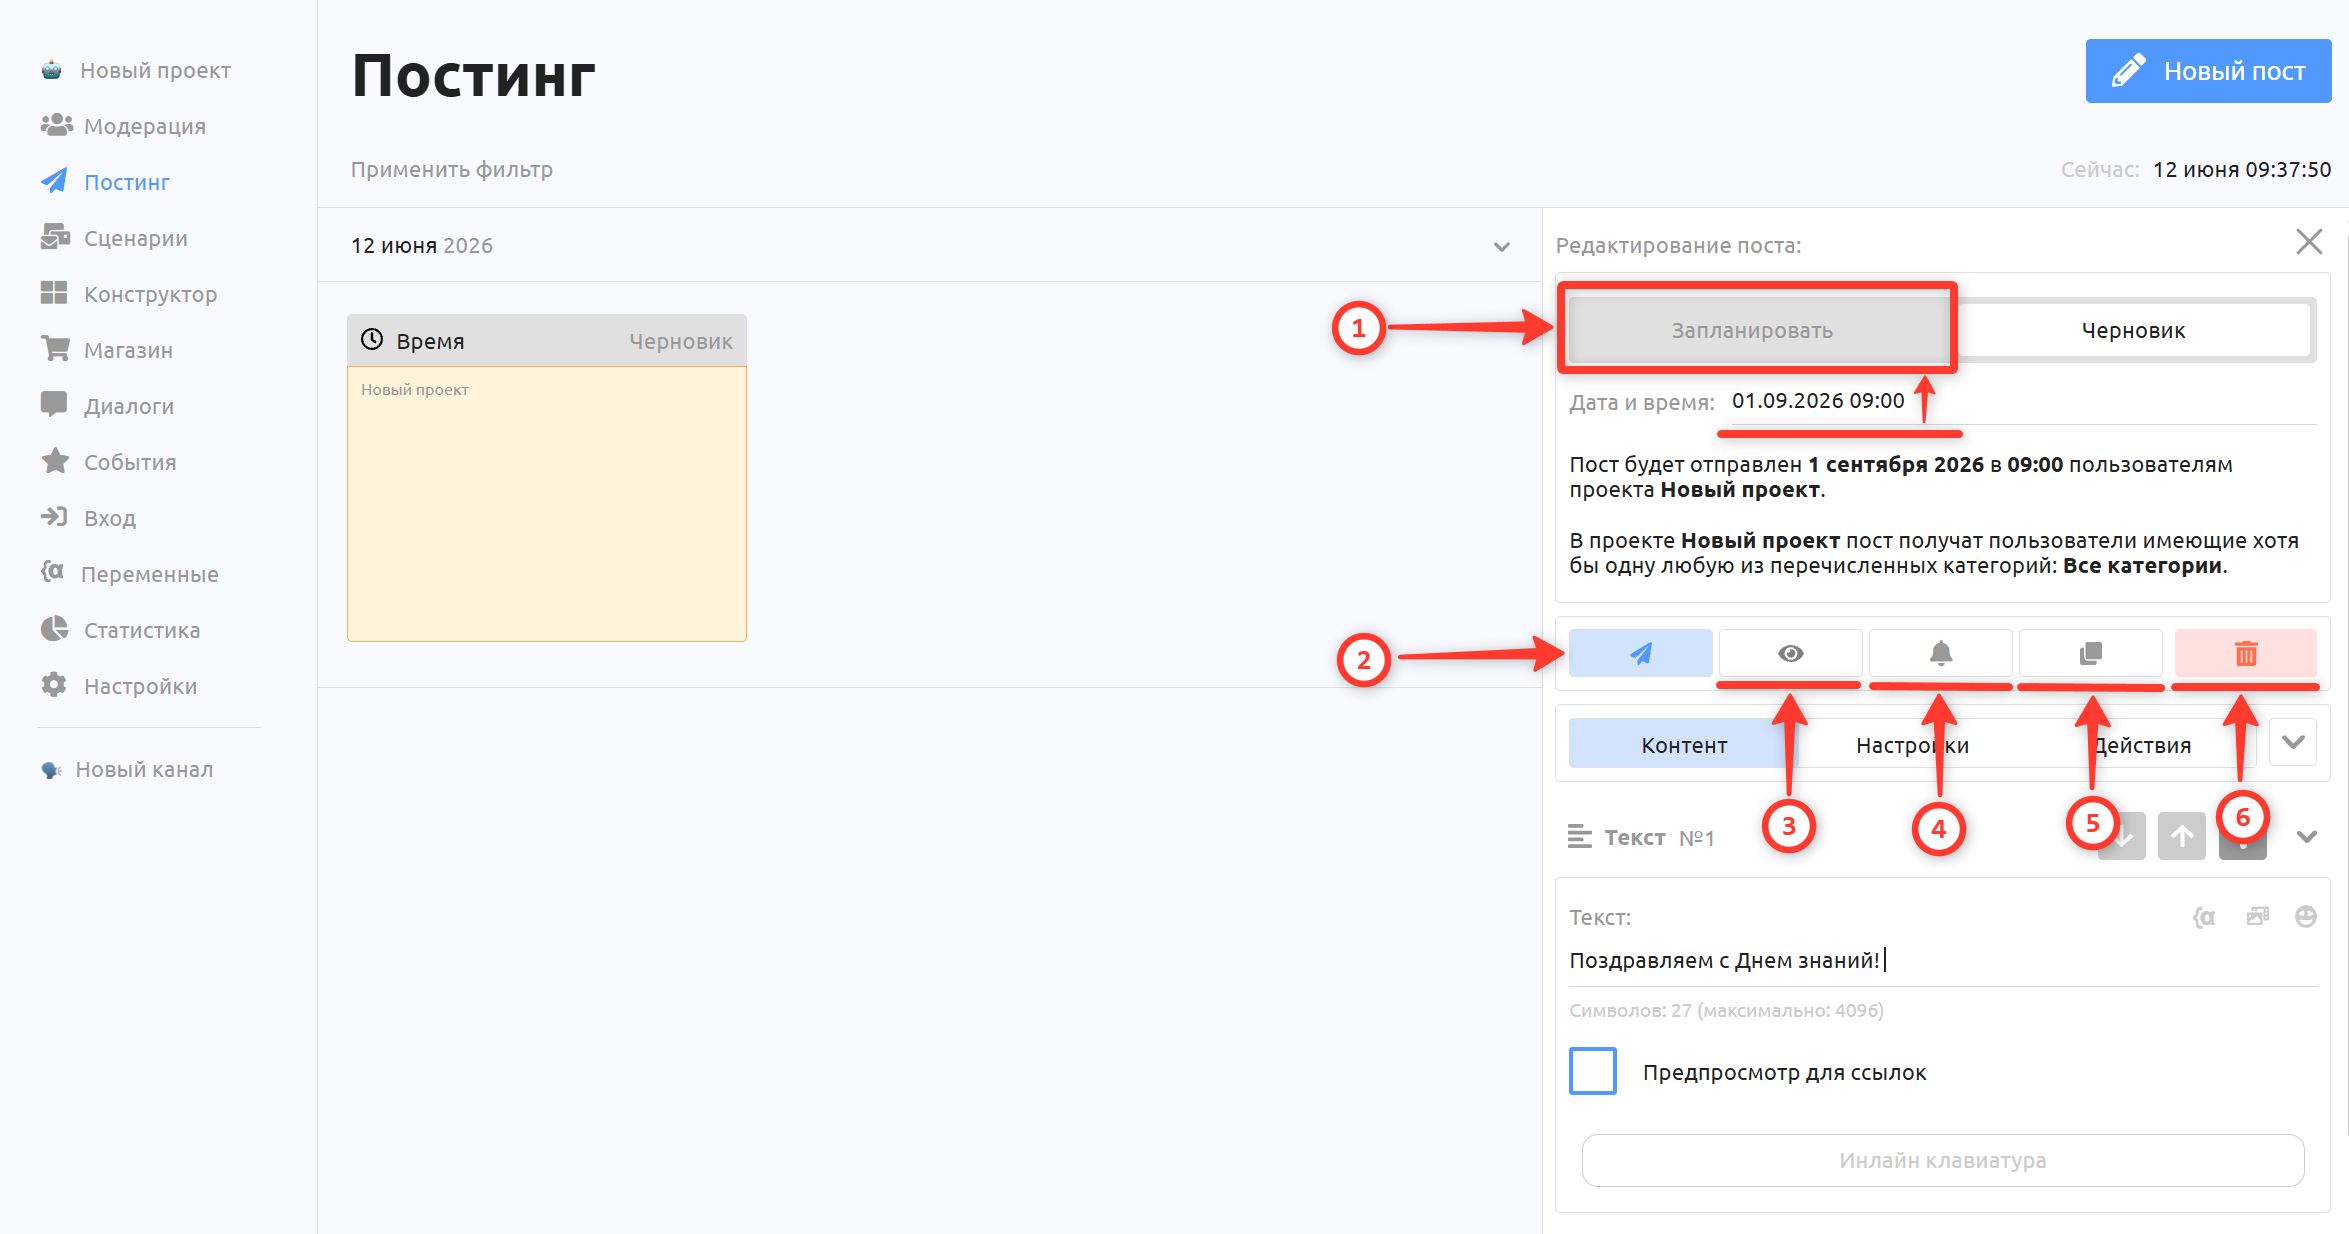
Change the status from "Draft" to "Scheduled" when the post is ready to be sent at the specified date and time. The post is then sent at the specified time.
To send the post right now, click the button with the paper plane icon. The broadcast starts immediately.
Preview — the button with the eye icon sends the post only to you or to an administrator in the bot.
Bell — this button turns the notification in the bot on or off for the created post.
The duplicate button creates a copy of the post, which is useful when you want to keep all settings and change only some of the data.
Delete post — the button with the trash can deletes the post. Warning: the post is also deleted for all users who received it, if less than 48 hours have passed since it was sent.
Note: The sending speed of a post depends directly on the number of users in the bot.
Editing a post and statuses
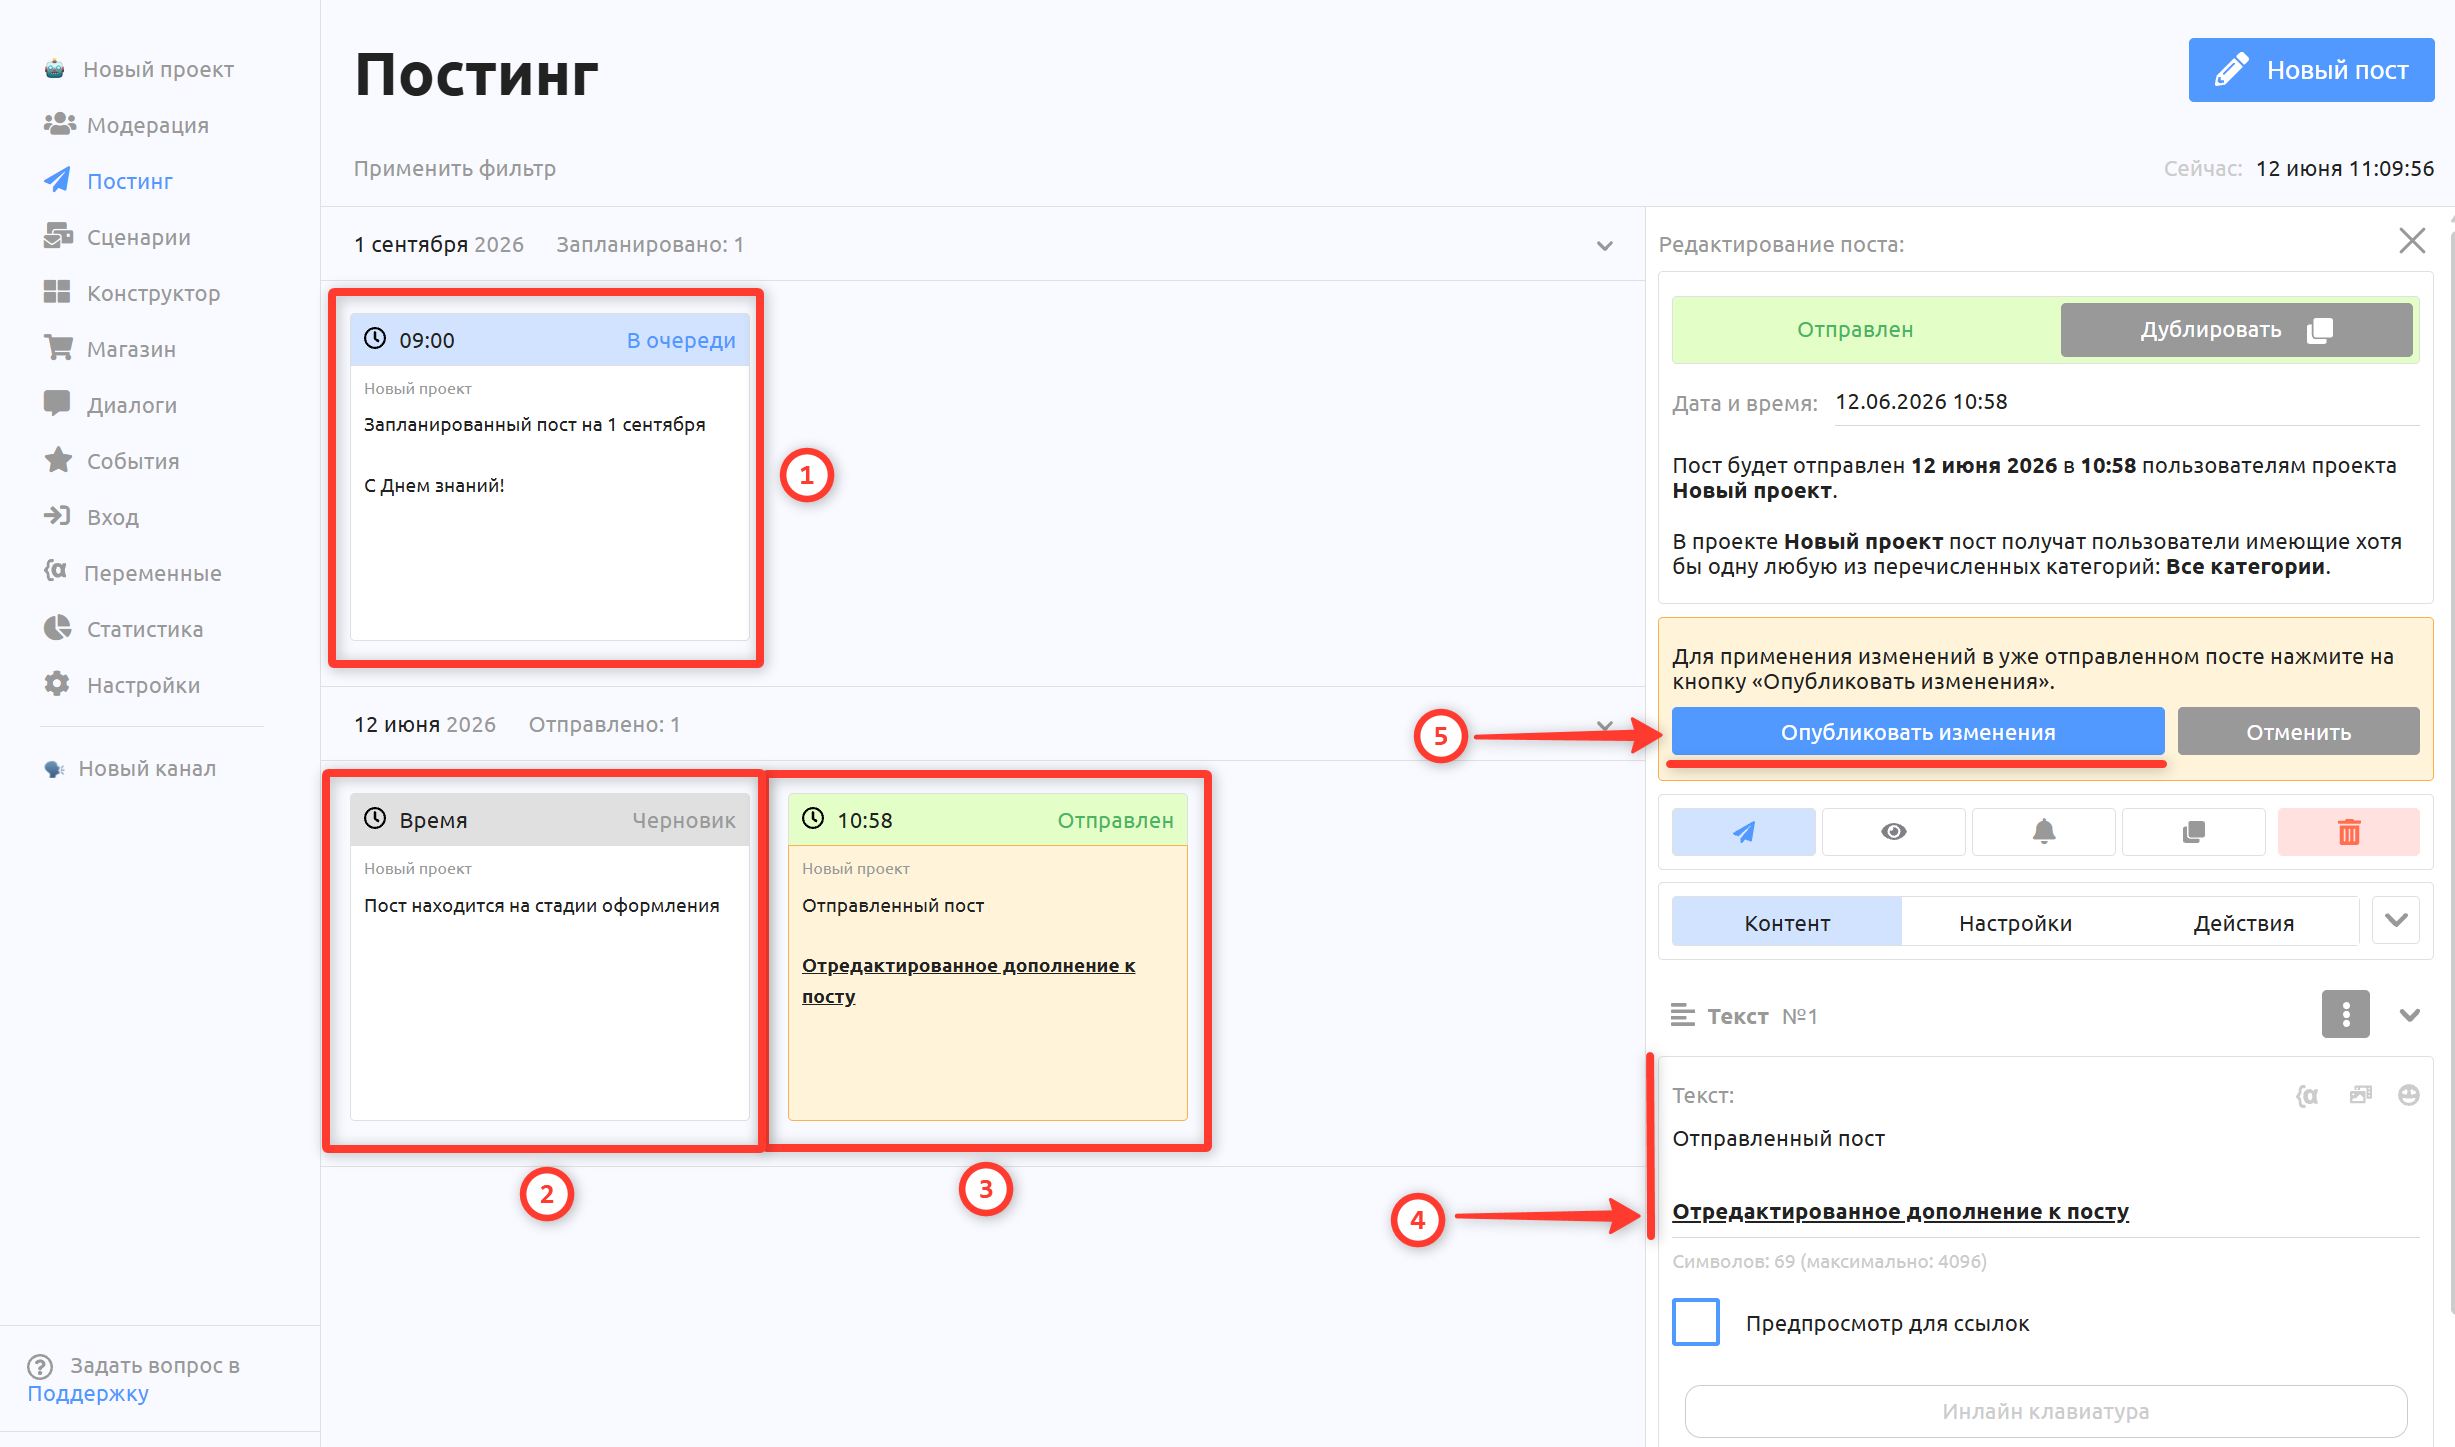
You can edit both scheduled posts and posts that have already been sent.
After you schedule a post for a specific date and time, it appears on the left with the "Queued" status.
Posts that you have not scheduled or sent yet have the "Draft" status. Such posts are not sent even if a date and time are already set, so be sure to switch the status to "Scheduled" when the post is ready.
Posts that users have already received have the "Sent" status.
You can select and edit any post:
- For "Queued" or "Scheduled" posts, you can also add new blocks while the post has not been sent yet.
- For posts with the "Sent" status, you can only change the content of the sent post; adding more blocks is no longer possible. Such a post can also be edited only if no more than 48 hours have passed since it was sent.After making changes to a post, click "Publish changes". The changes are then applied for the bot's recipients.
Filtering posts
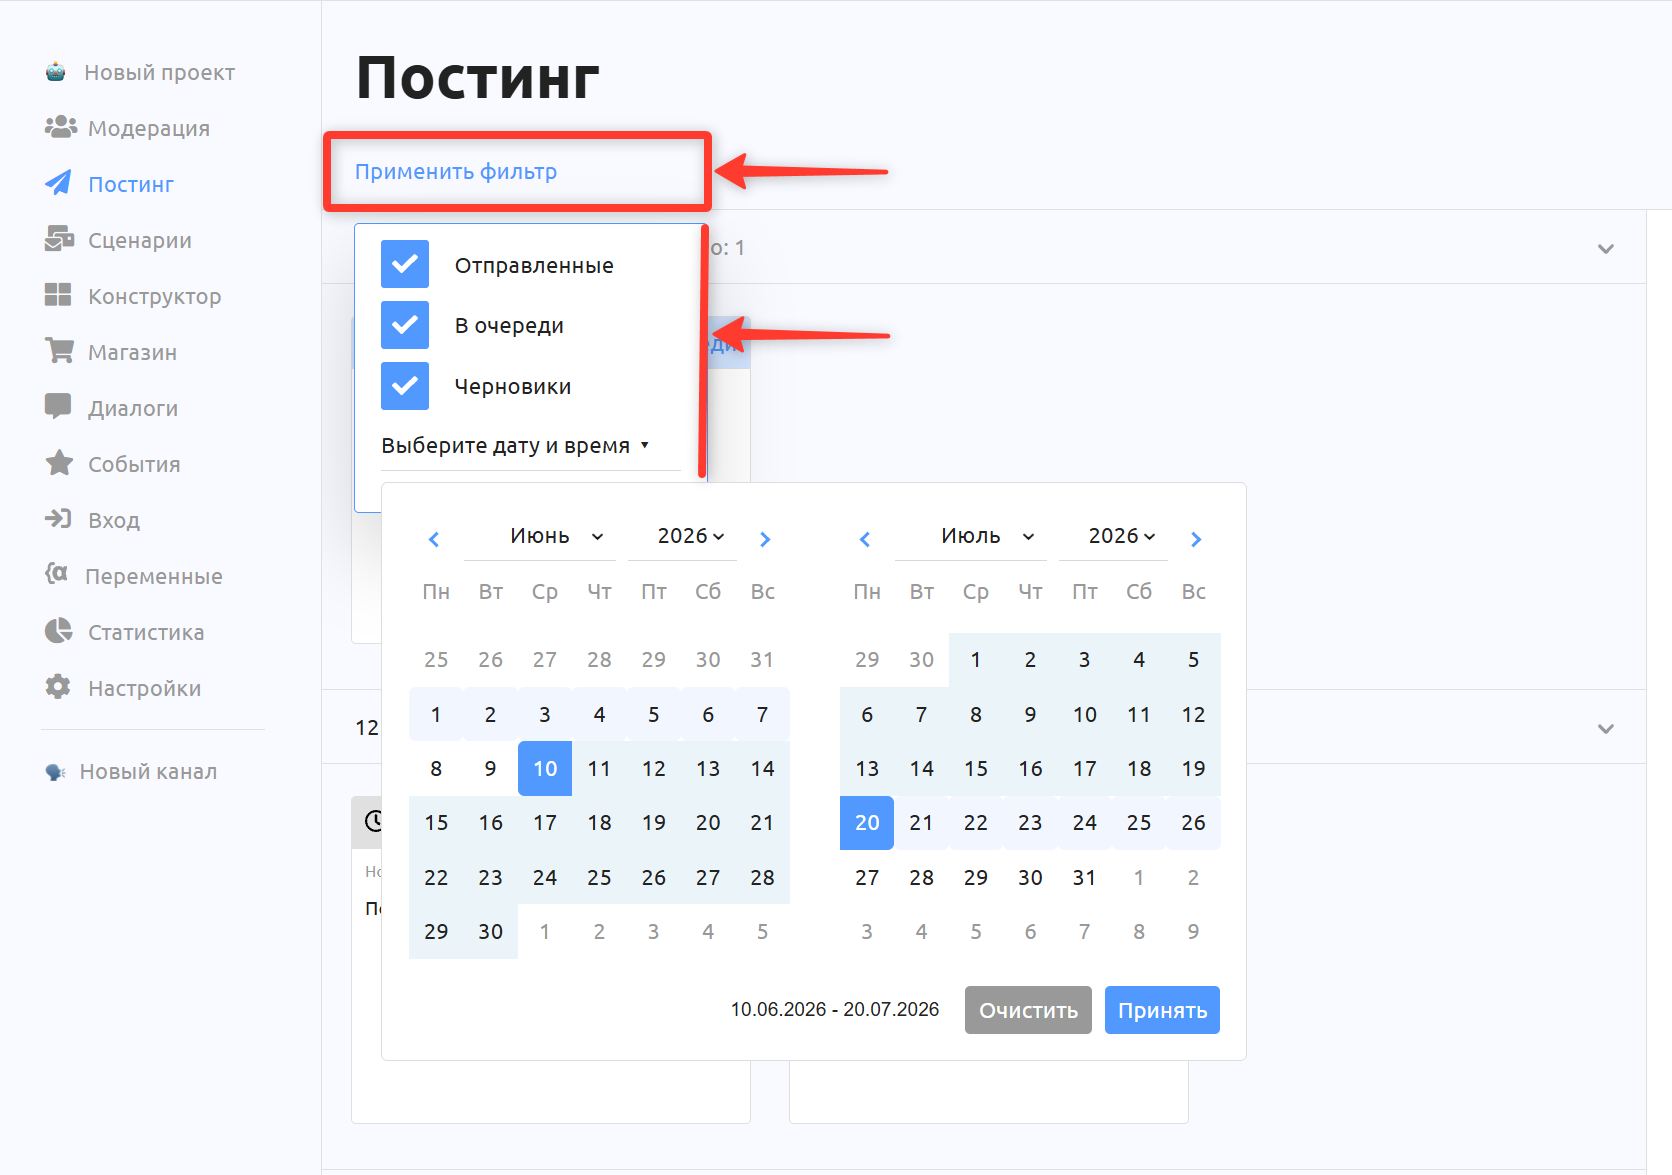
When you have many posts, you can apply a display filter to work with them more conveniently.
Click Apply filter
Select the post statuses to display.
Select a date range if you need to see posts for a specific period.